Creating an Employee
Creating an Employee
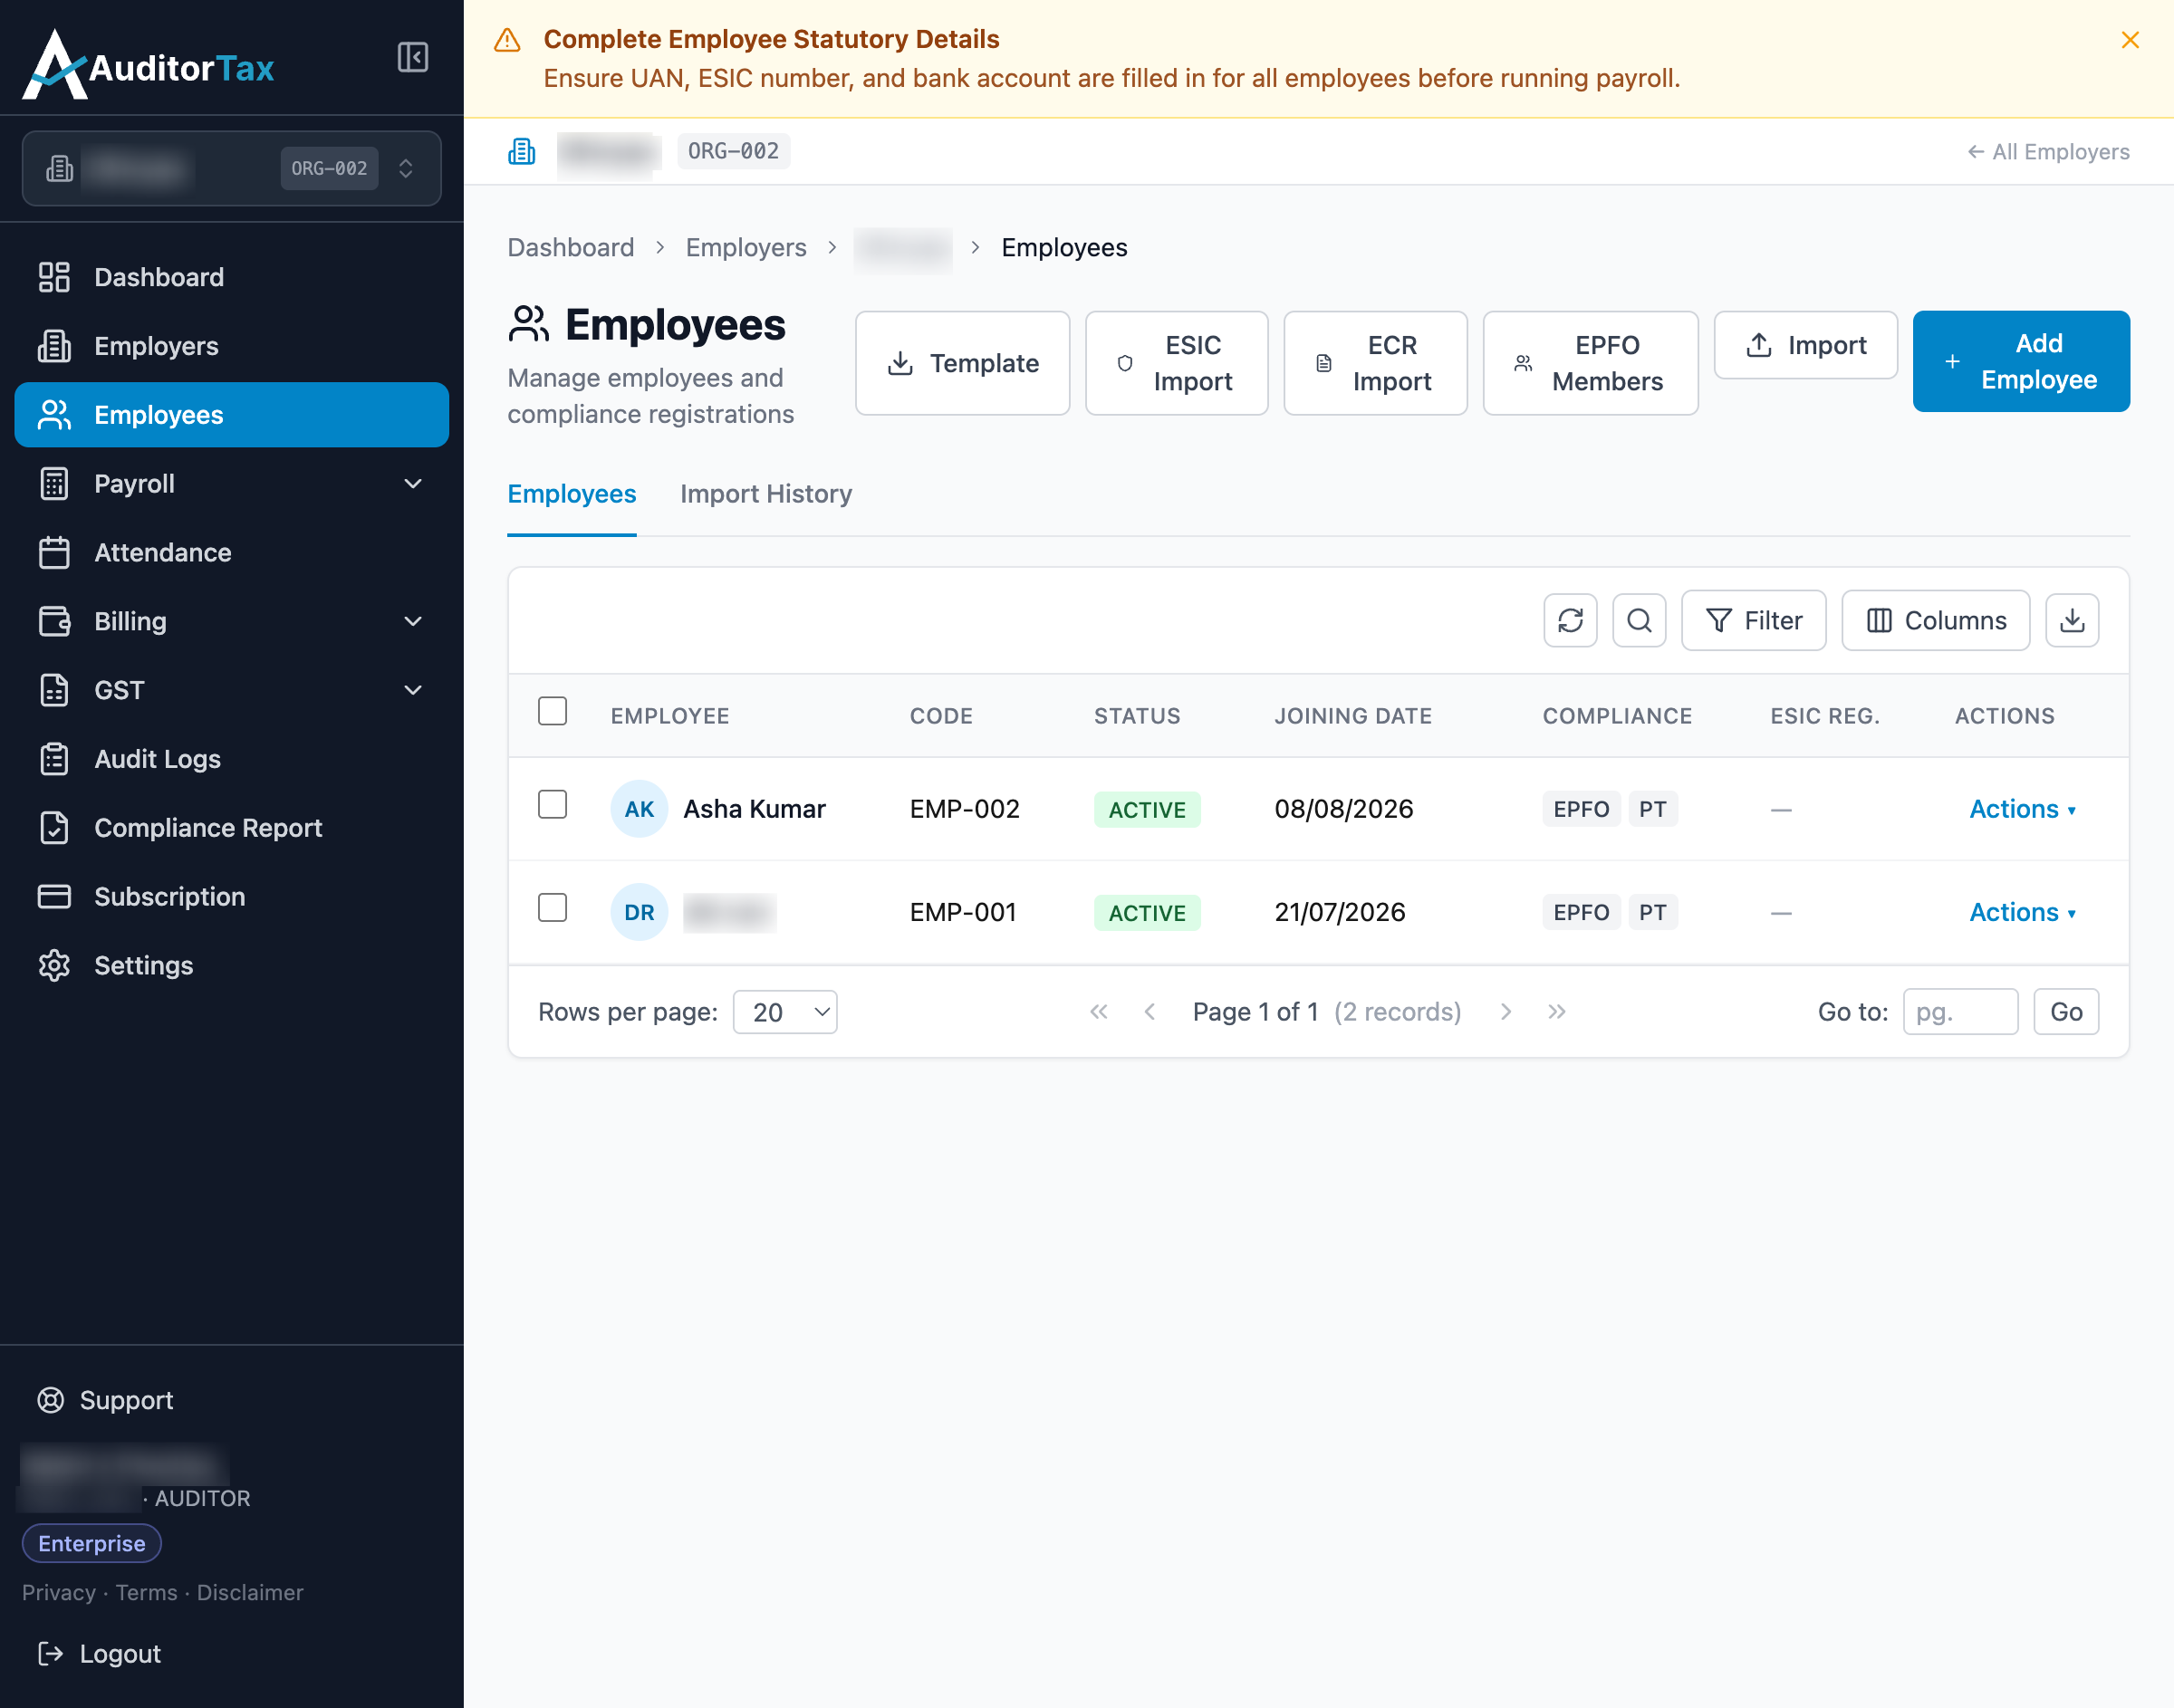
Section titled “Creating an Employee”1. Click “Employees” in the left sidebar
Section titled “1. Click “Employees” in the left sidebar”This opens the Employees list for the employer currently selected at the top of the sidebar, showing everyone already added.
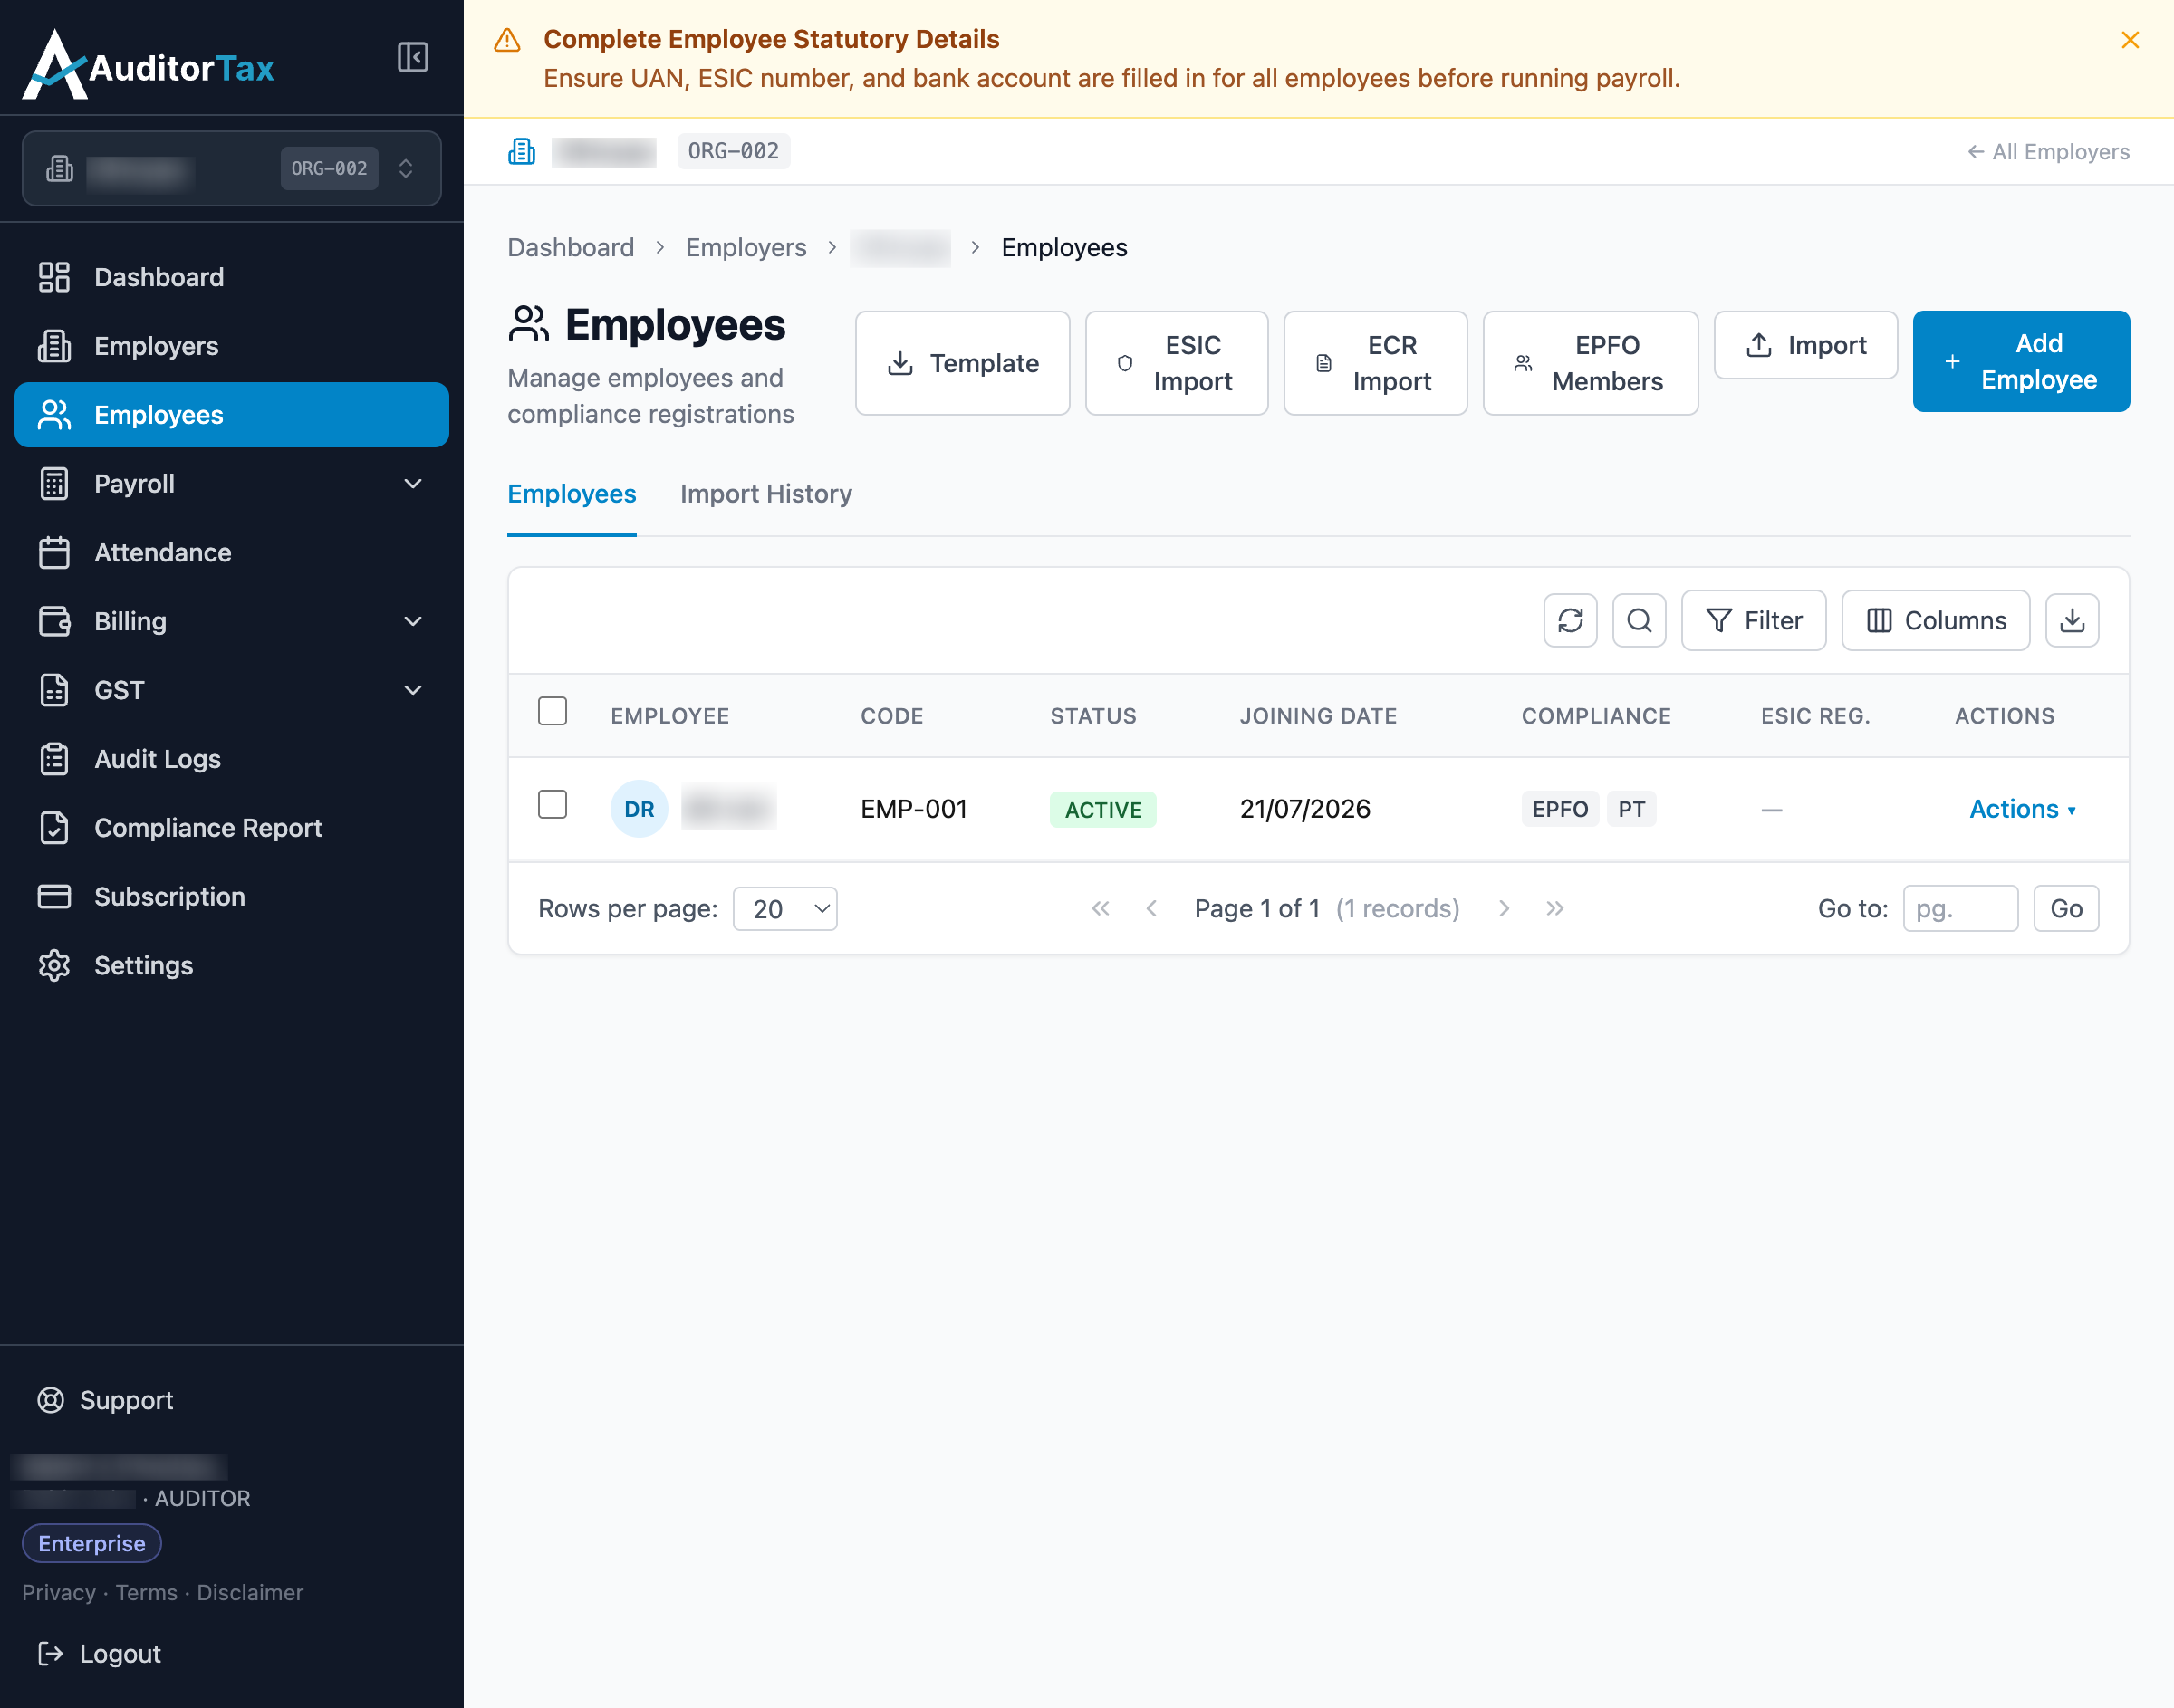
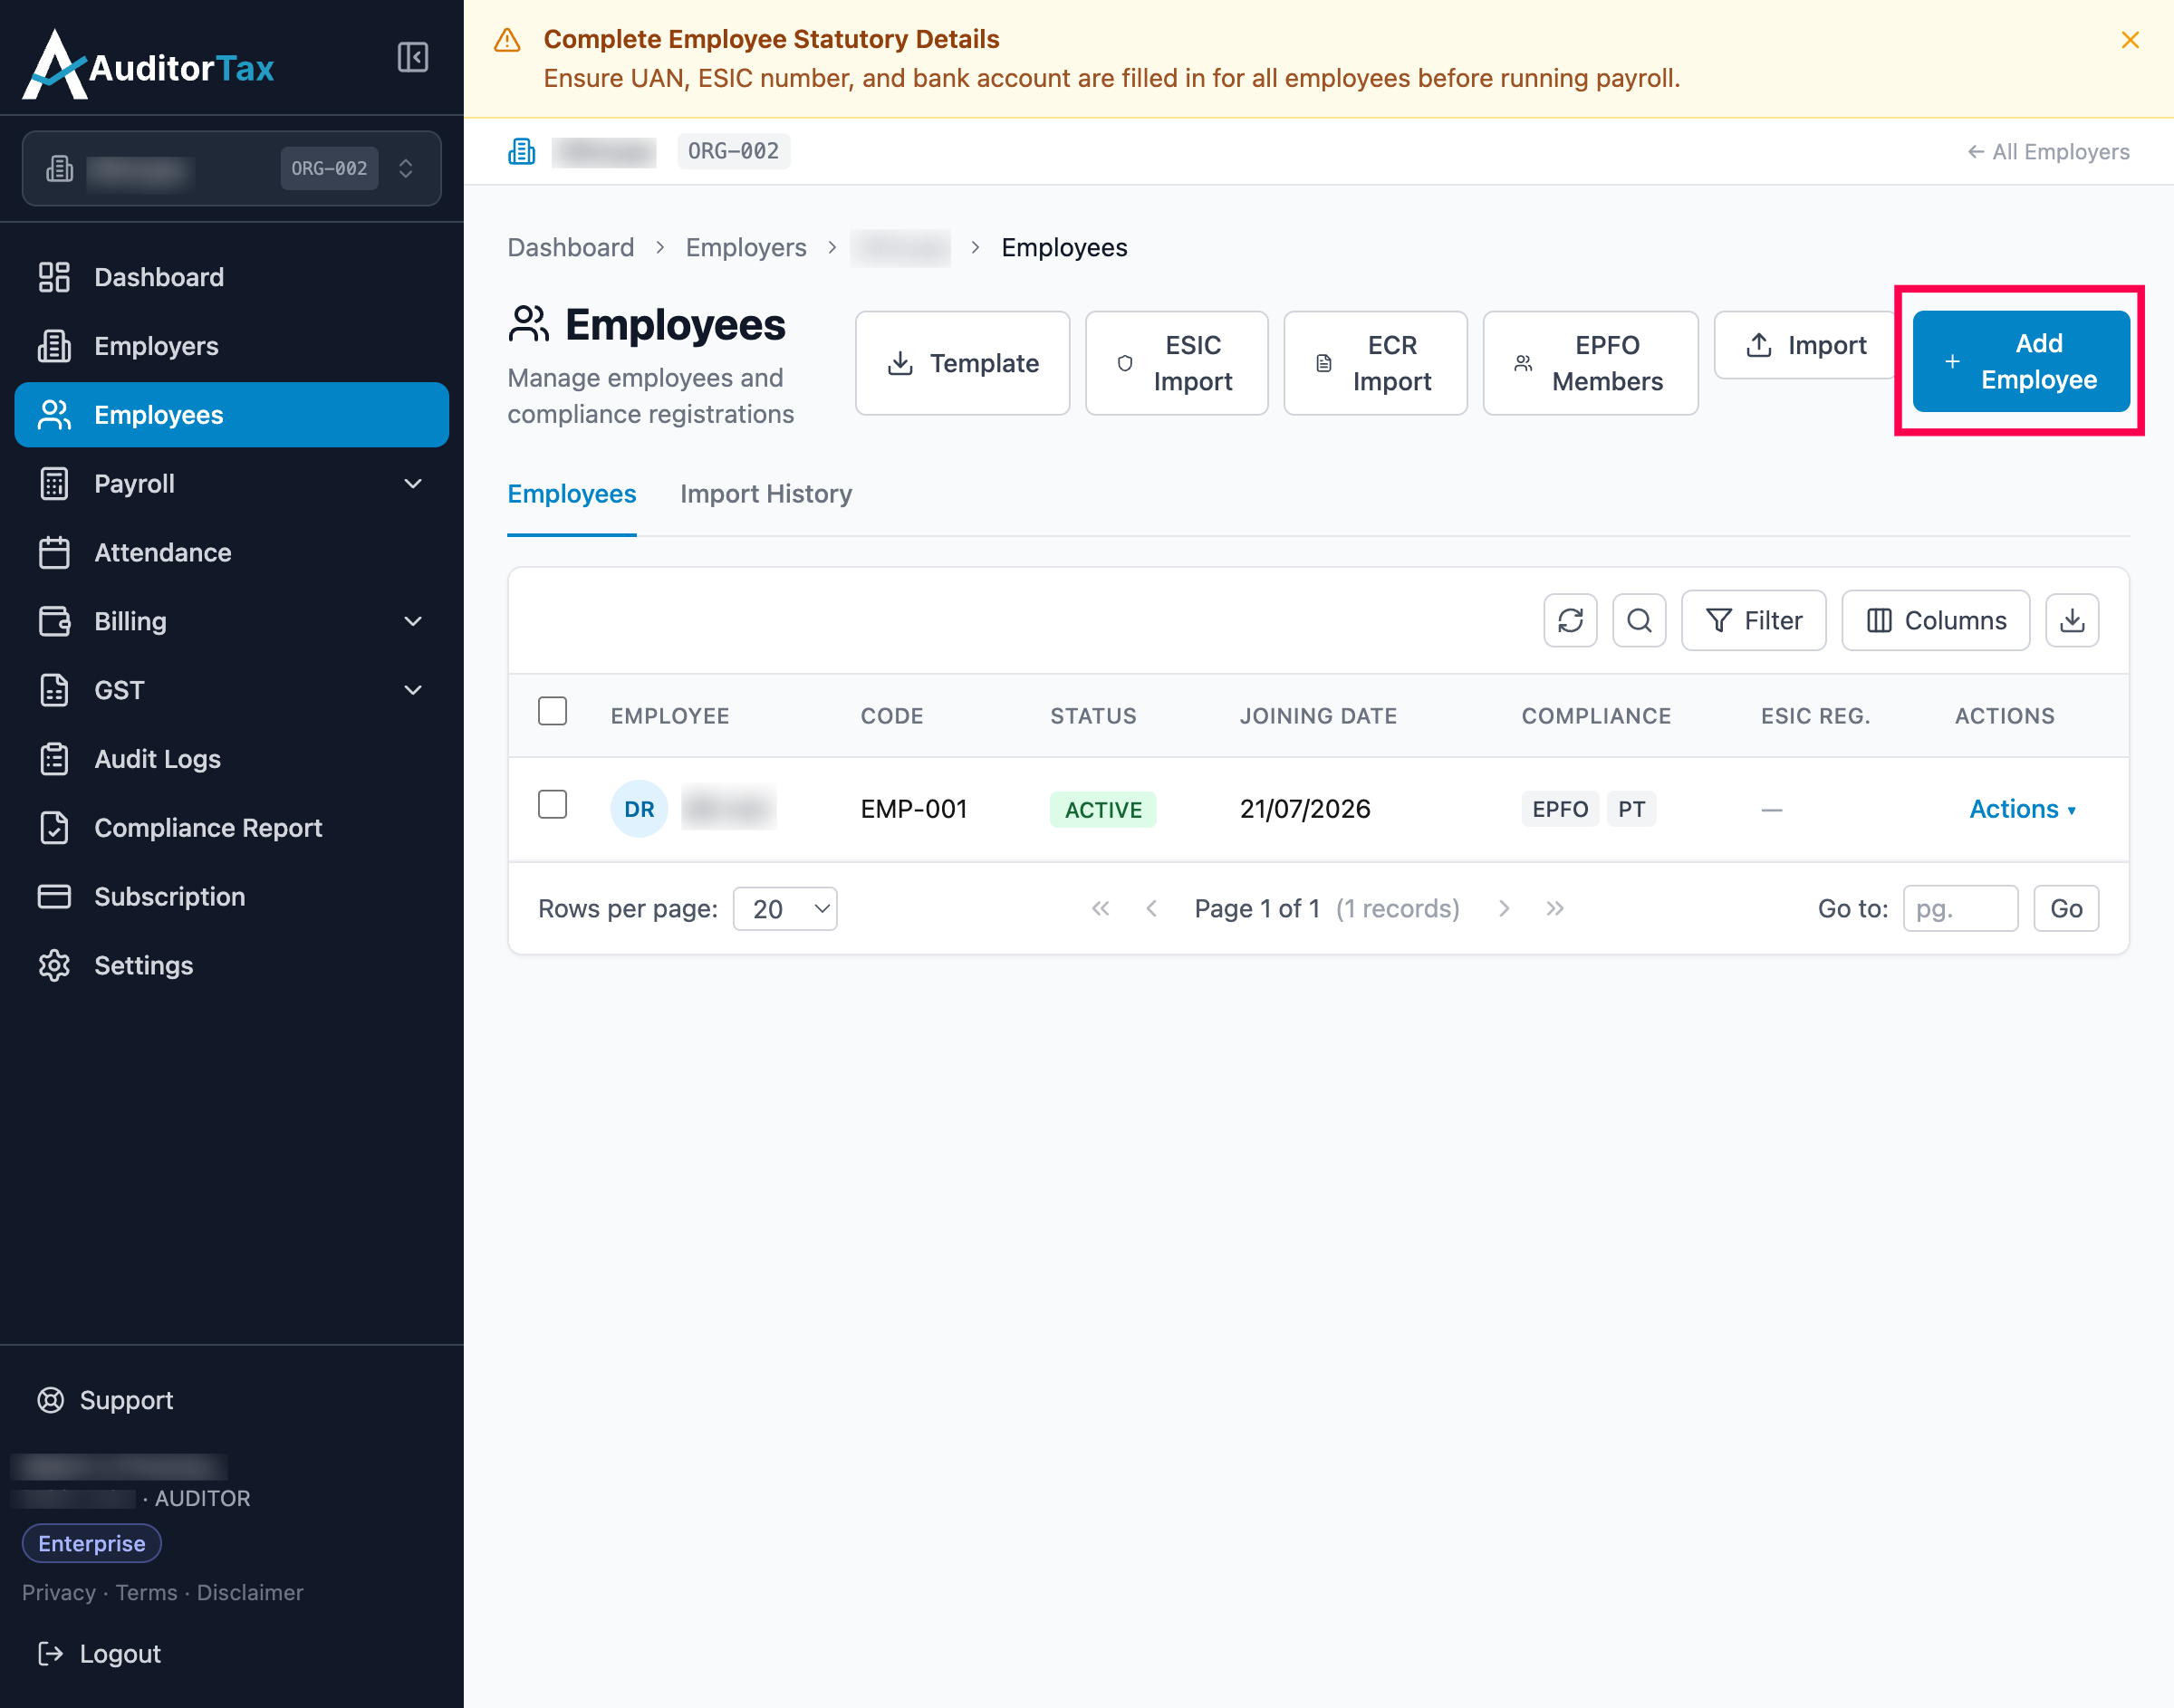
2. Click the “Add Employee” button
Section titled “2. Click the “Add Employee” button”It’s in the top right of the Employees list. This opens a 6-step form for registering a new employee.
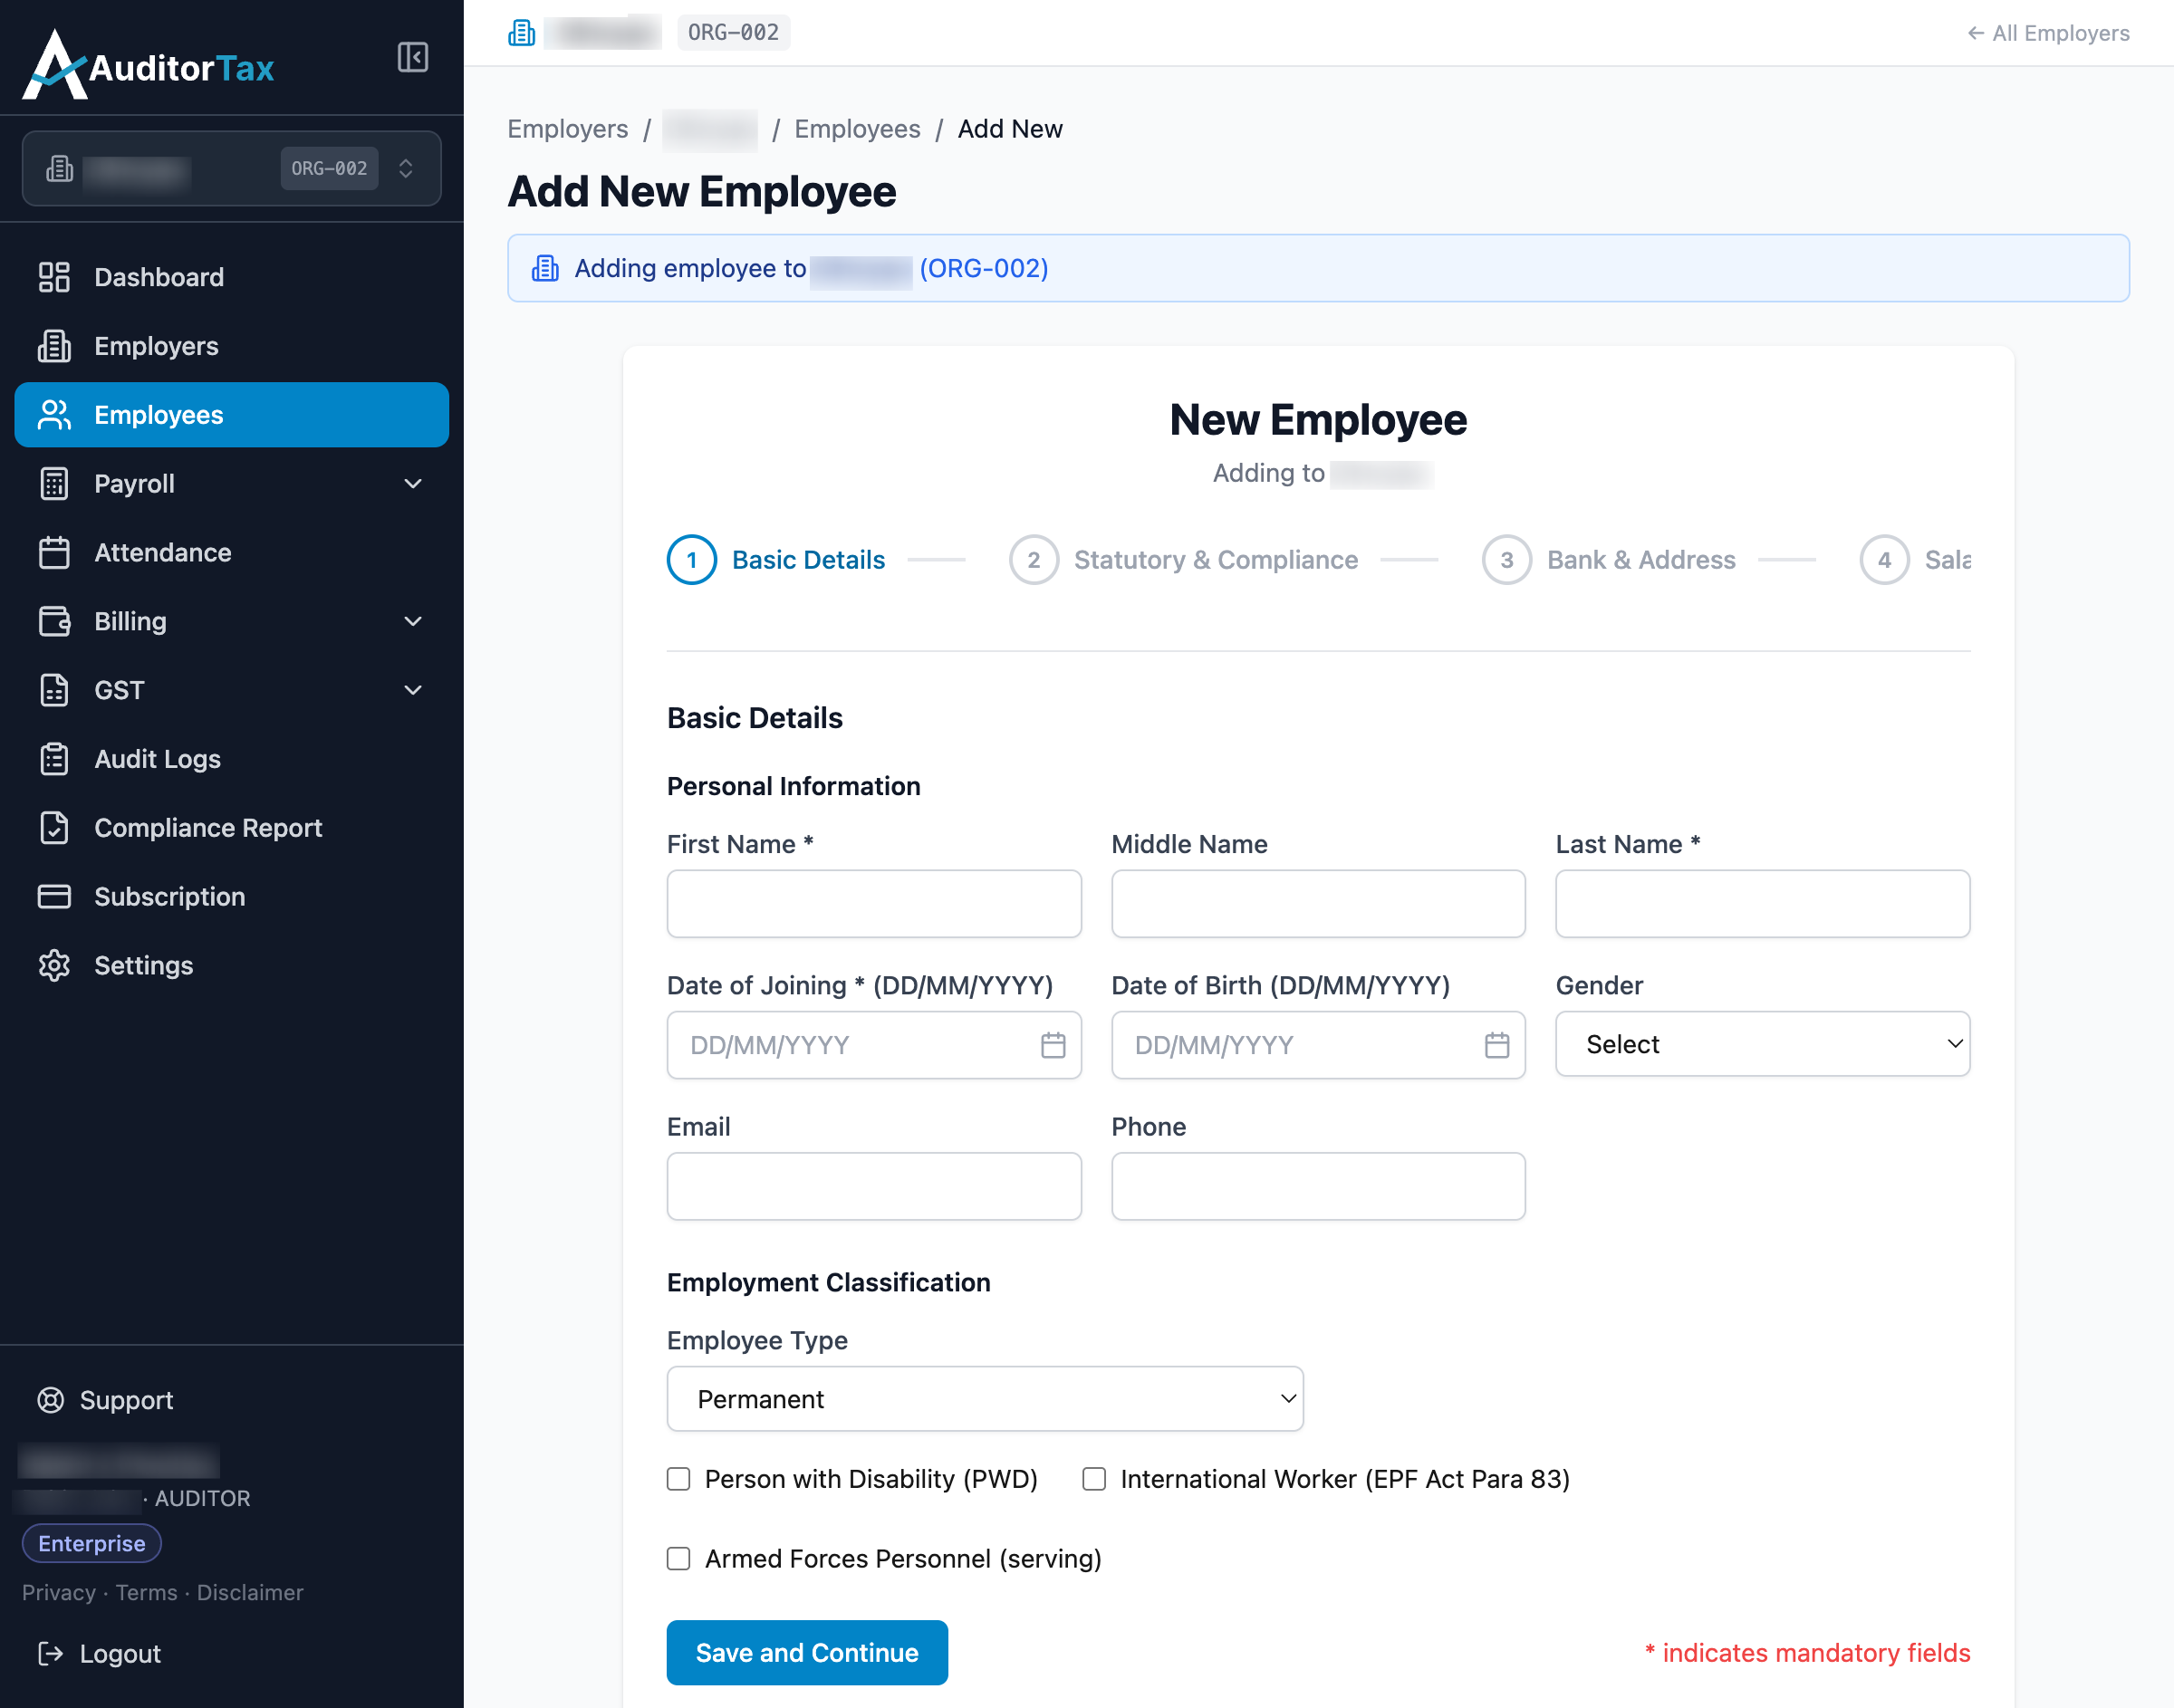
3. Enter the employee’s first name and last name
Section titled “3. Enter the employee’s first name and last name”Both are required.
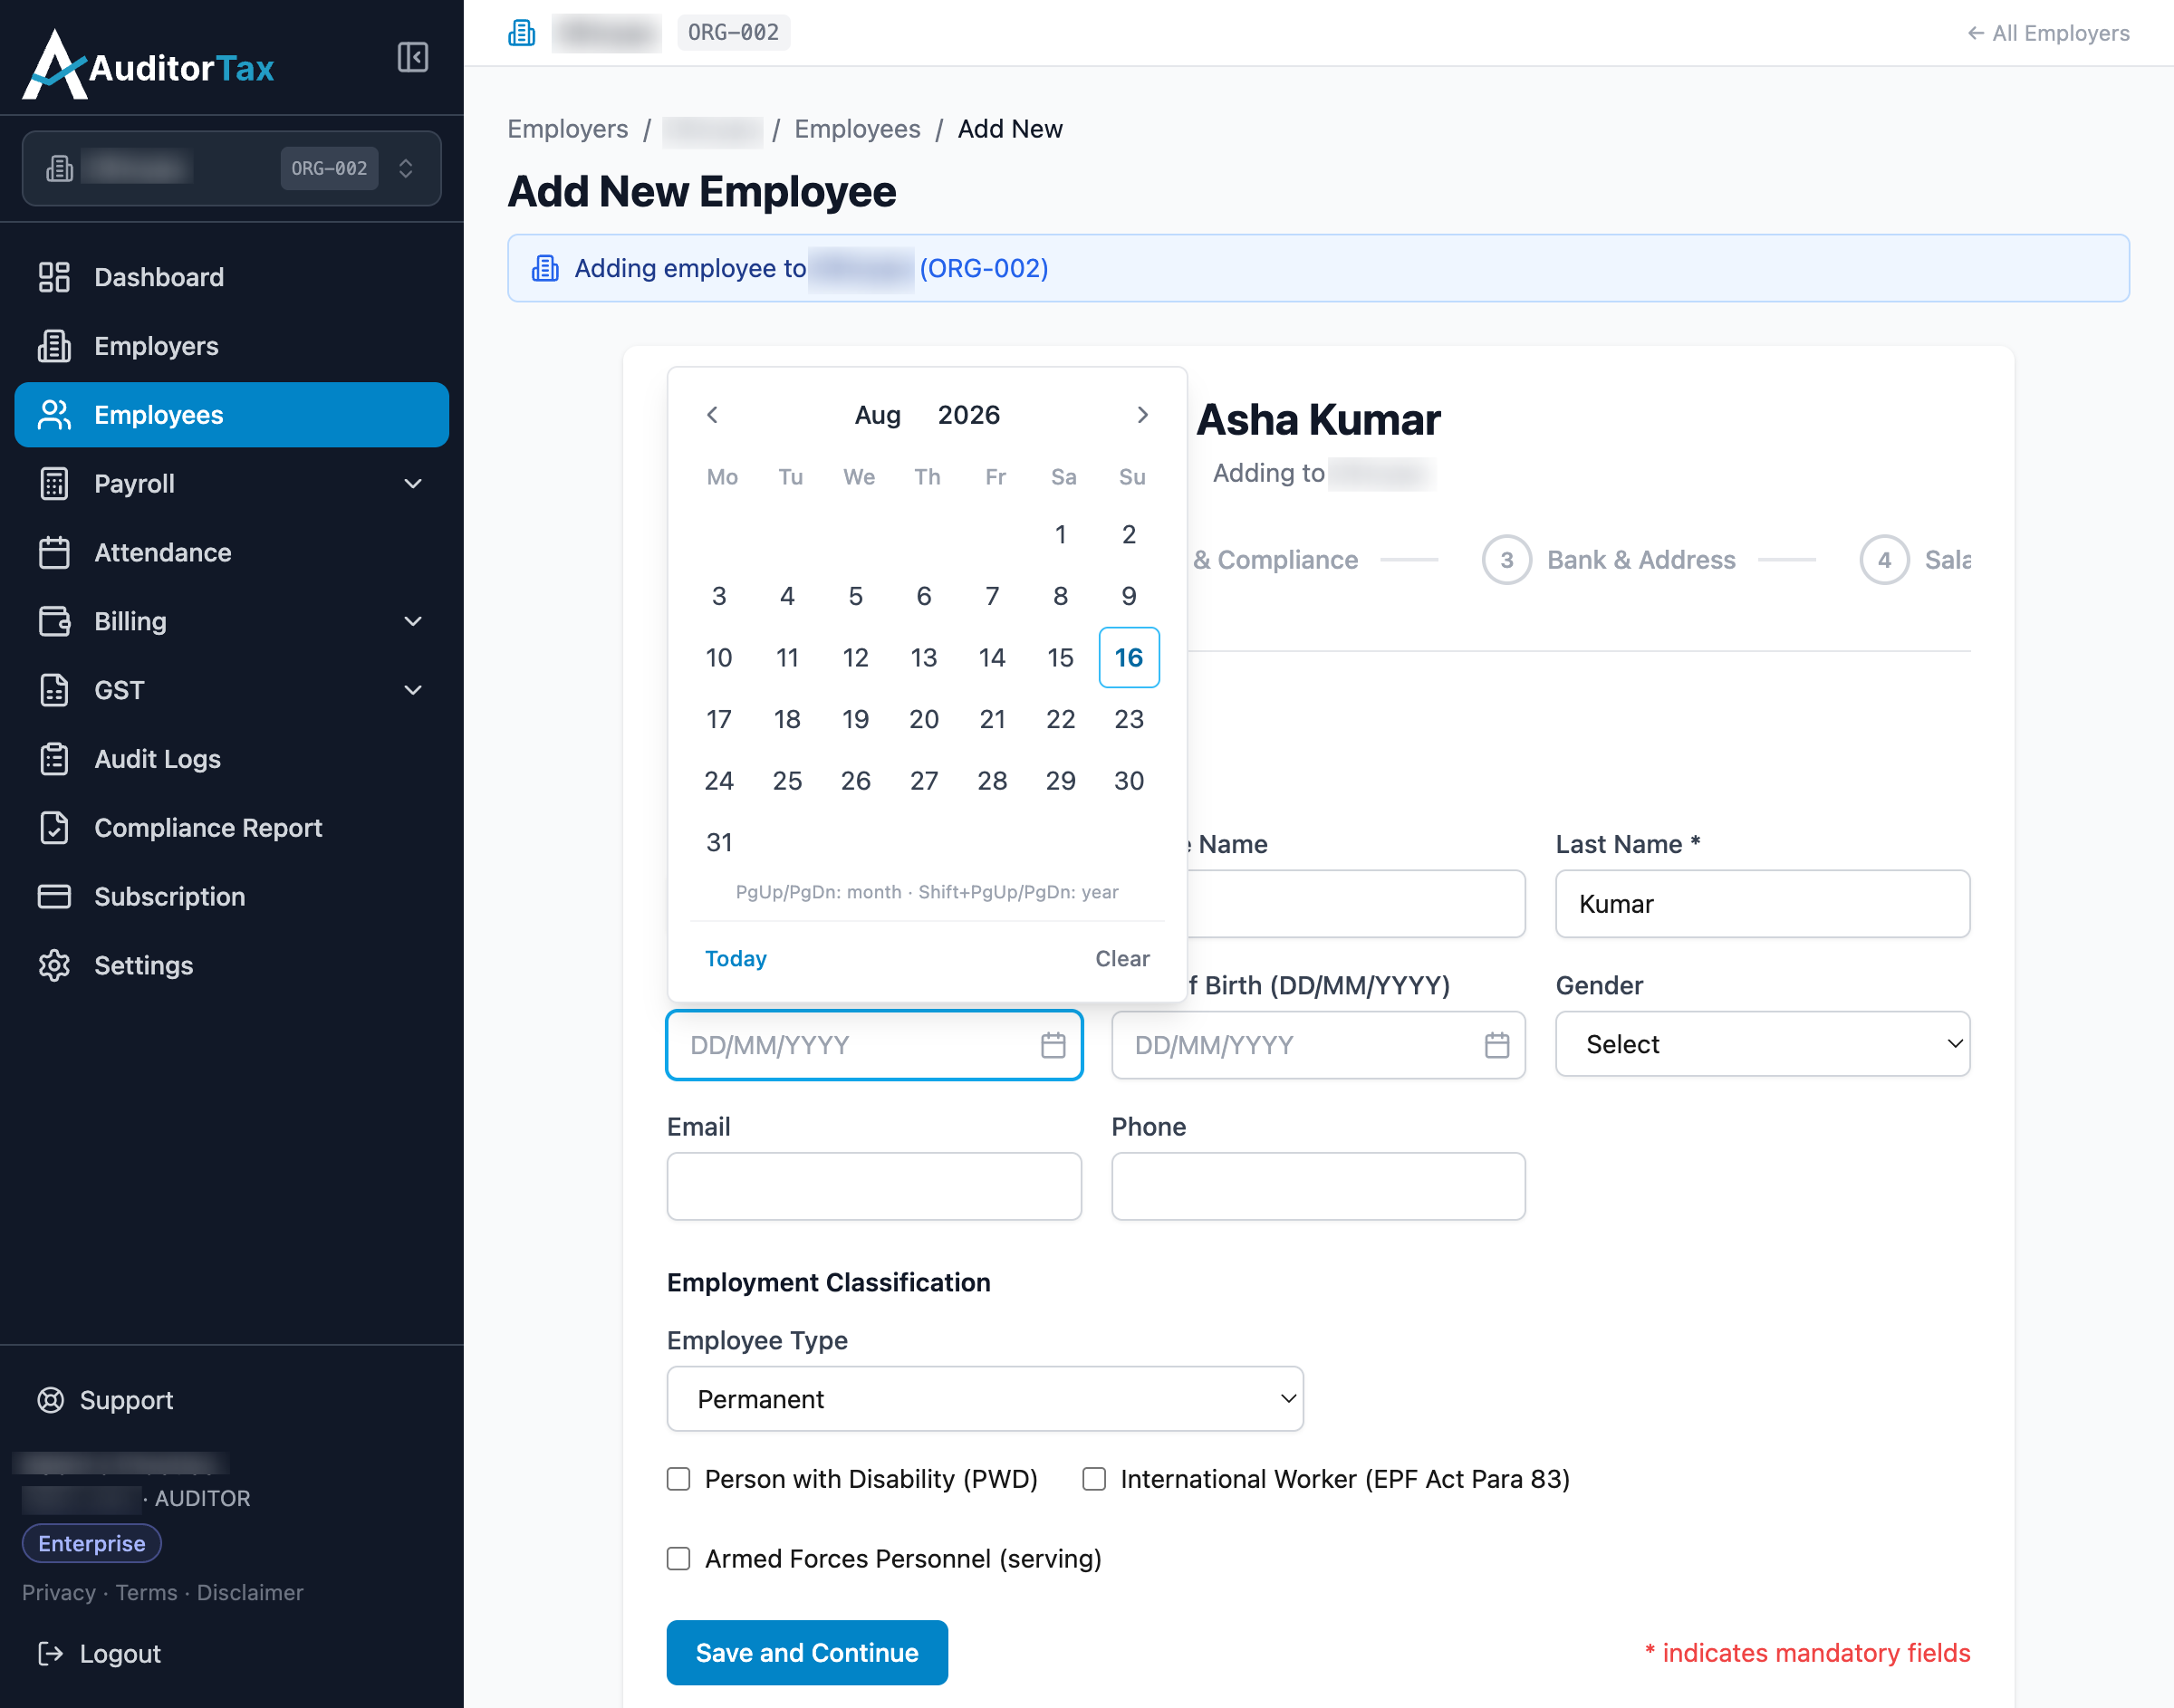
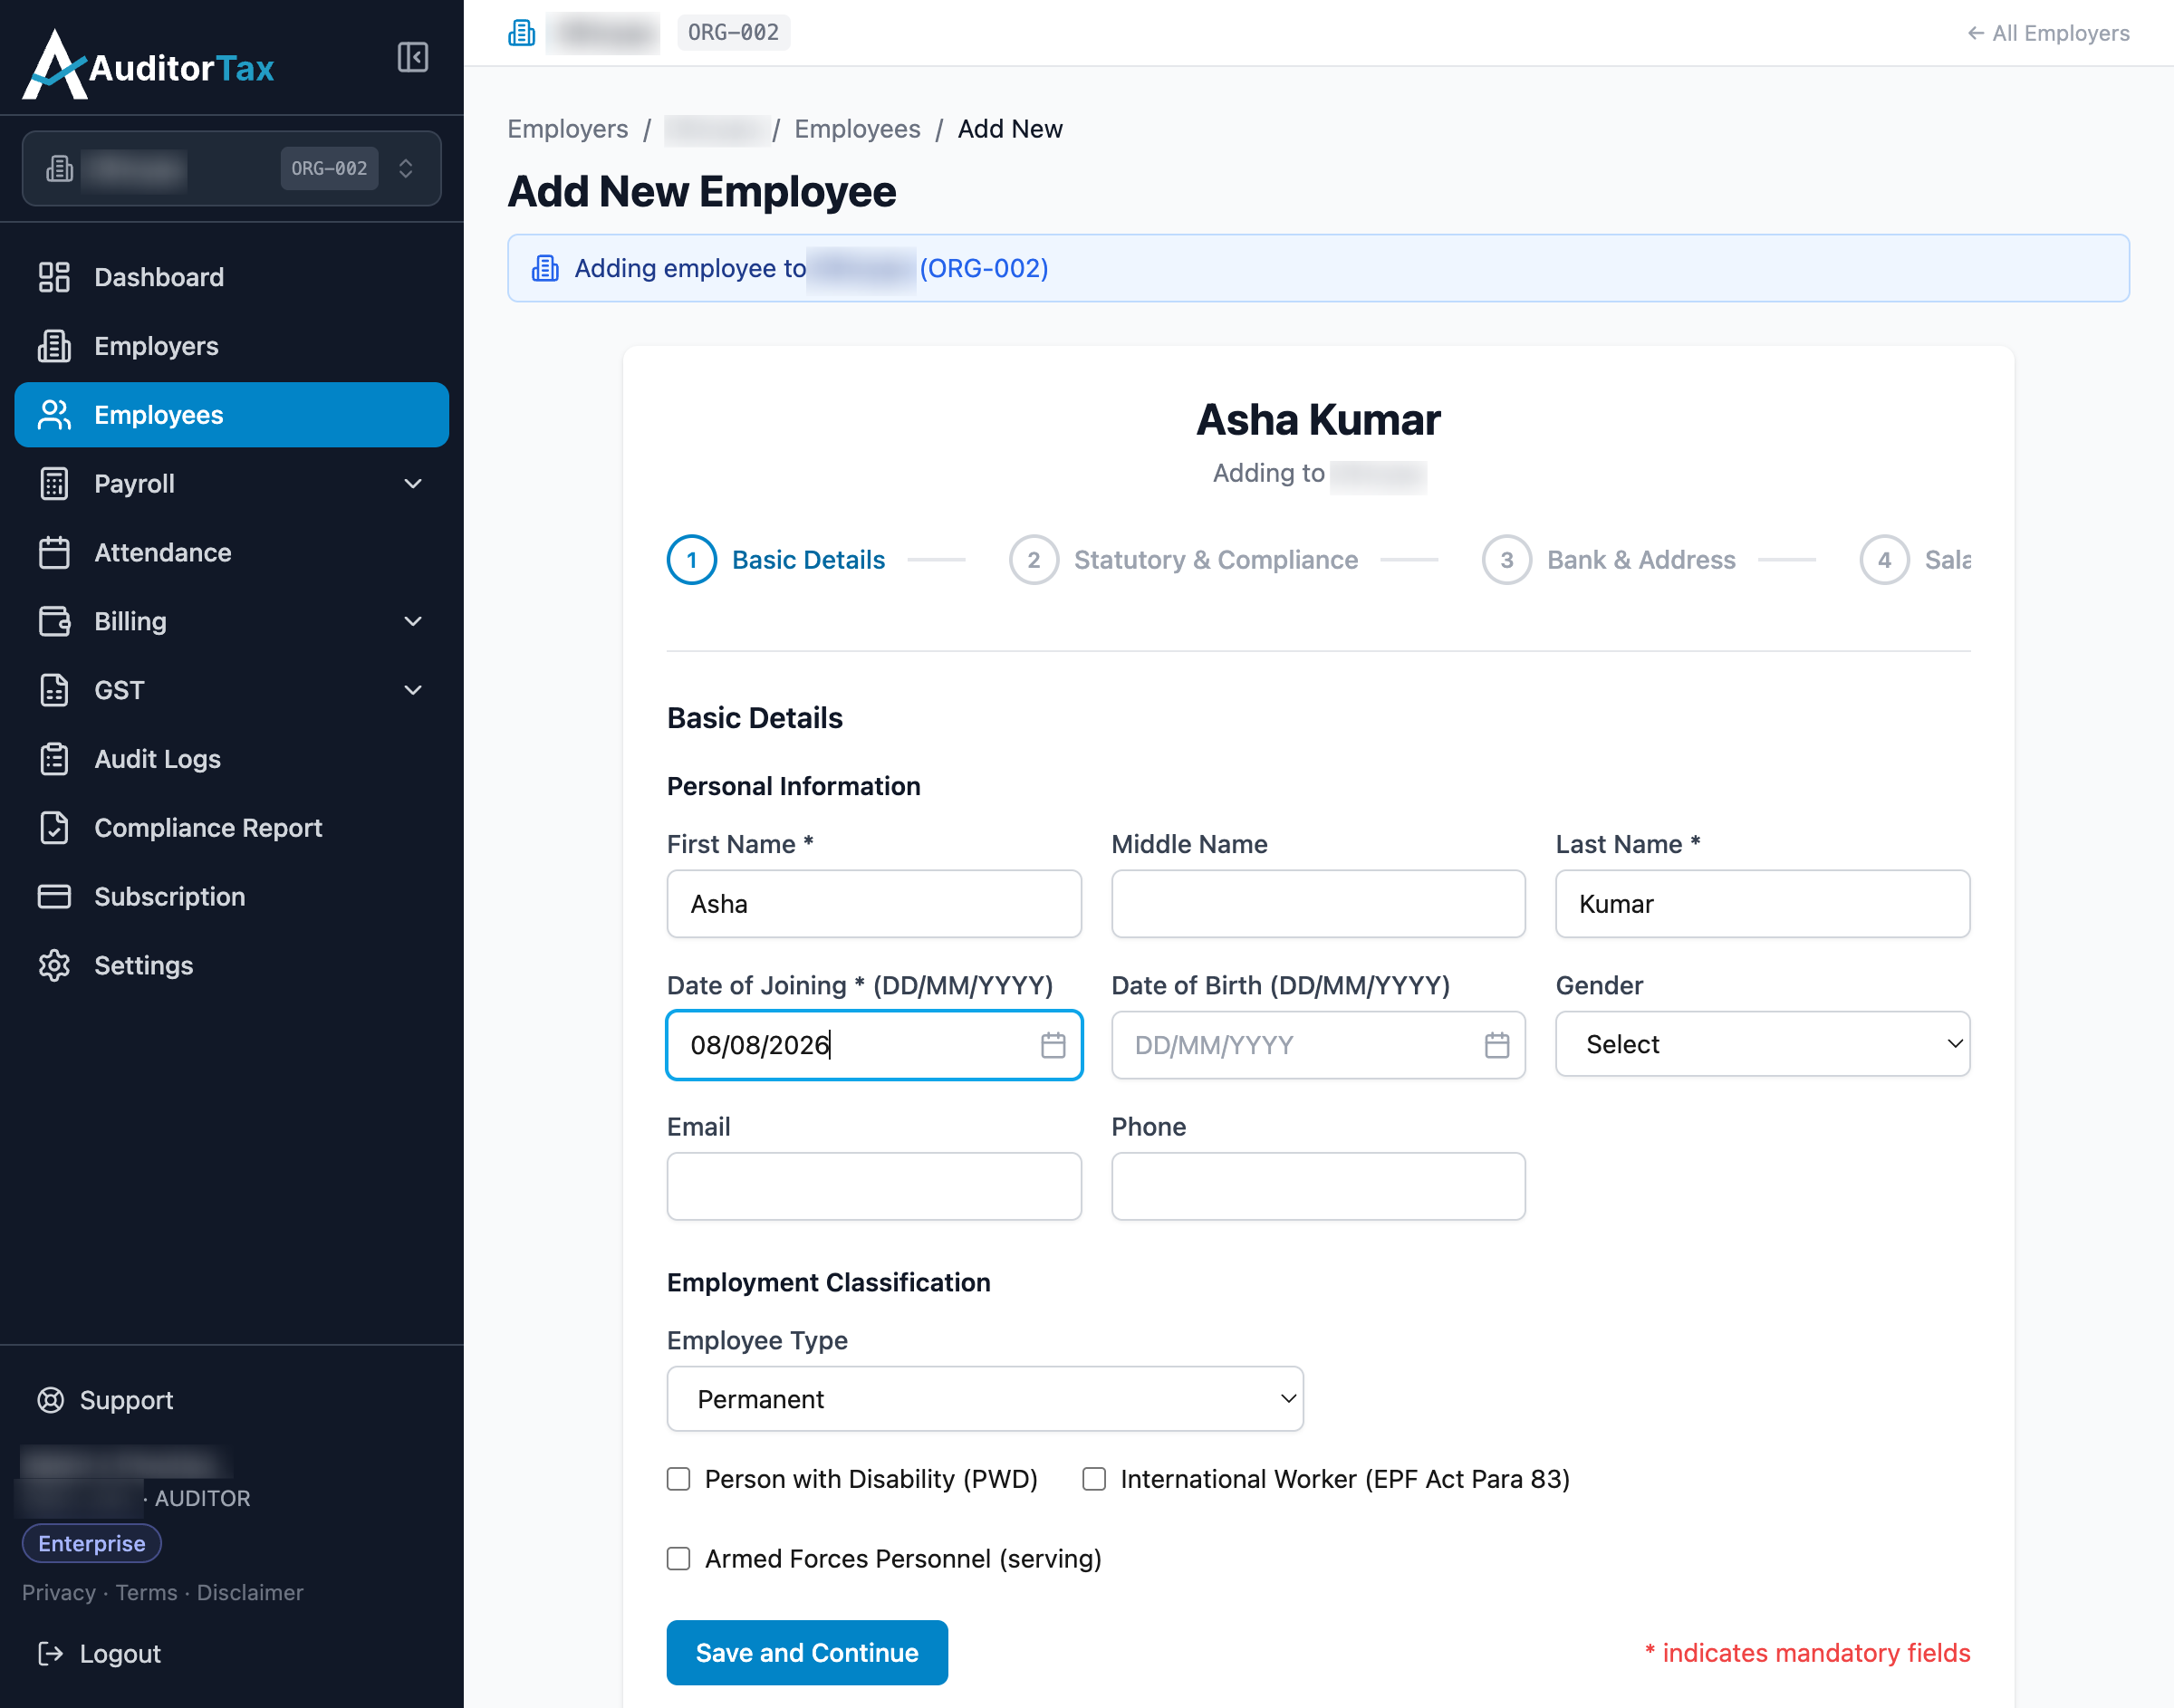
4. Click the “Date of Joining” field and pick a date
Section titled “4. Click the “Date of Joining” field and pick a date”This is also required. Clicking it opens a calendar picker; clicking a date fills the field and closes the calendar.
5. Choose the employee’s Employee Type
Section titled “5. Choose the employee’s Employee Type”Still on the same Basic Details step, below the date fields, is an “Employment Classification” section. Nothing here is required — it defaults to Permanent with no boxes ticked — but it’s worth understanding what each option does before moving on, because one of them changes how statutory deductions are calculated for this employee.
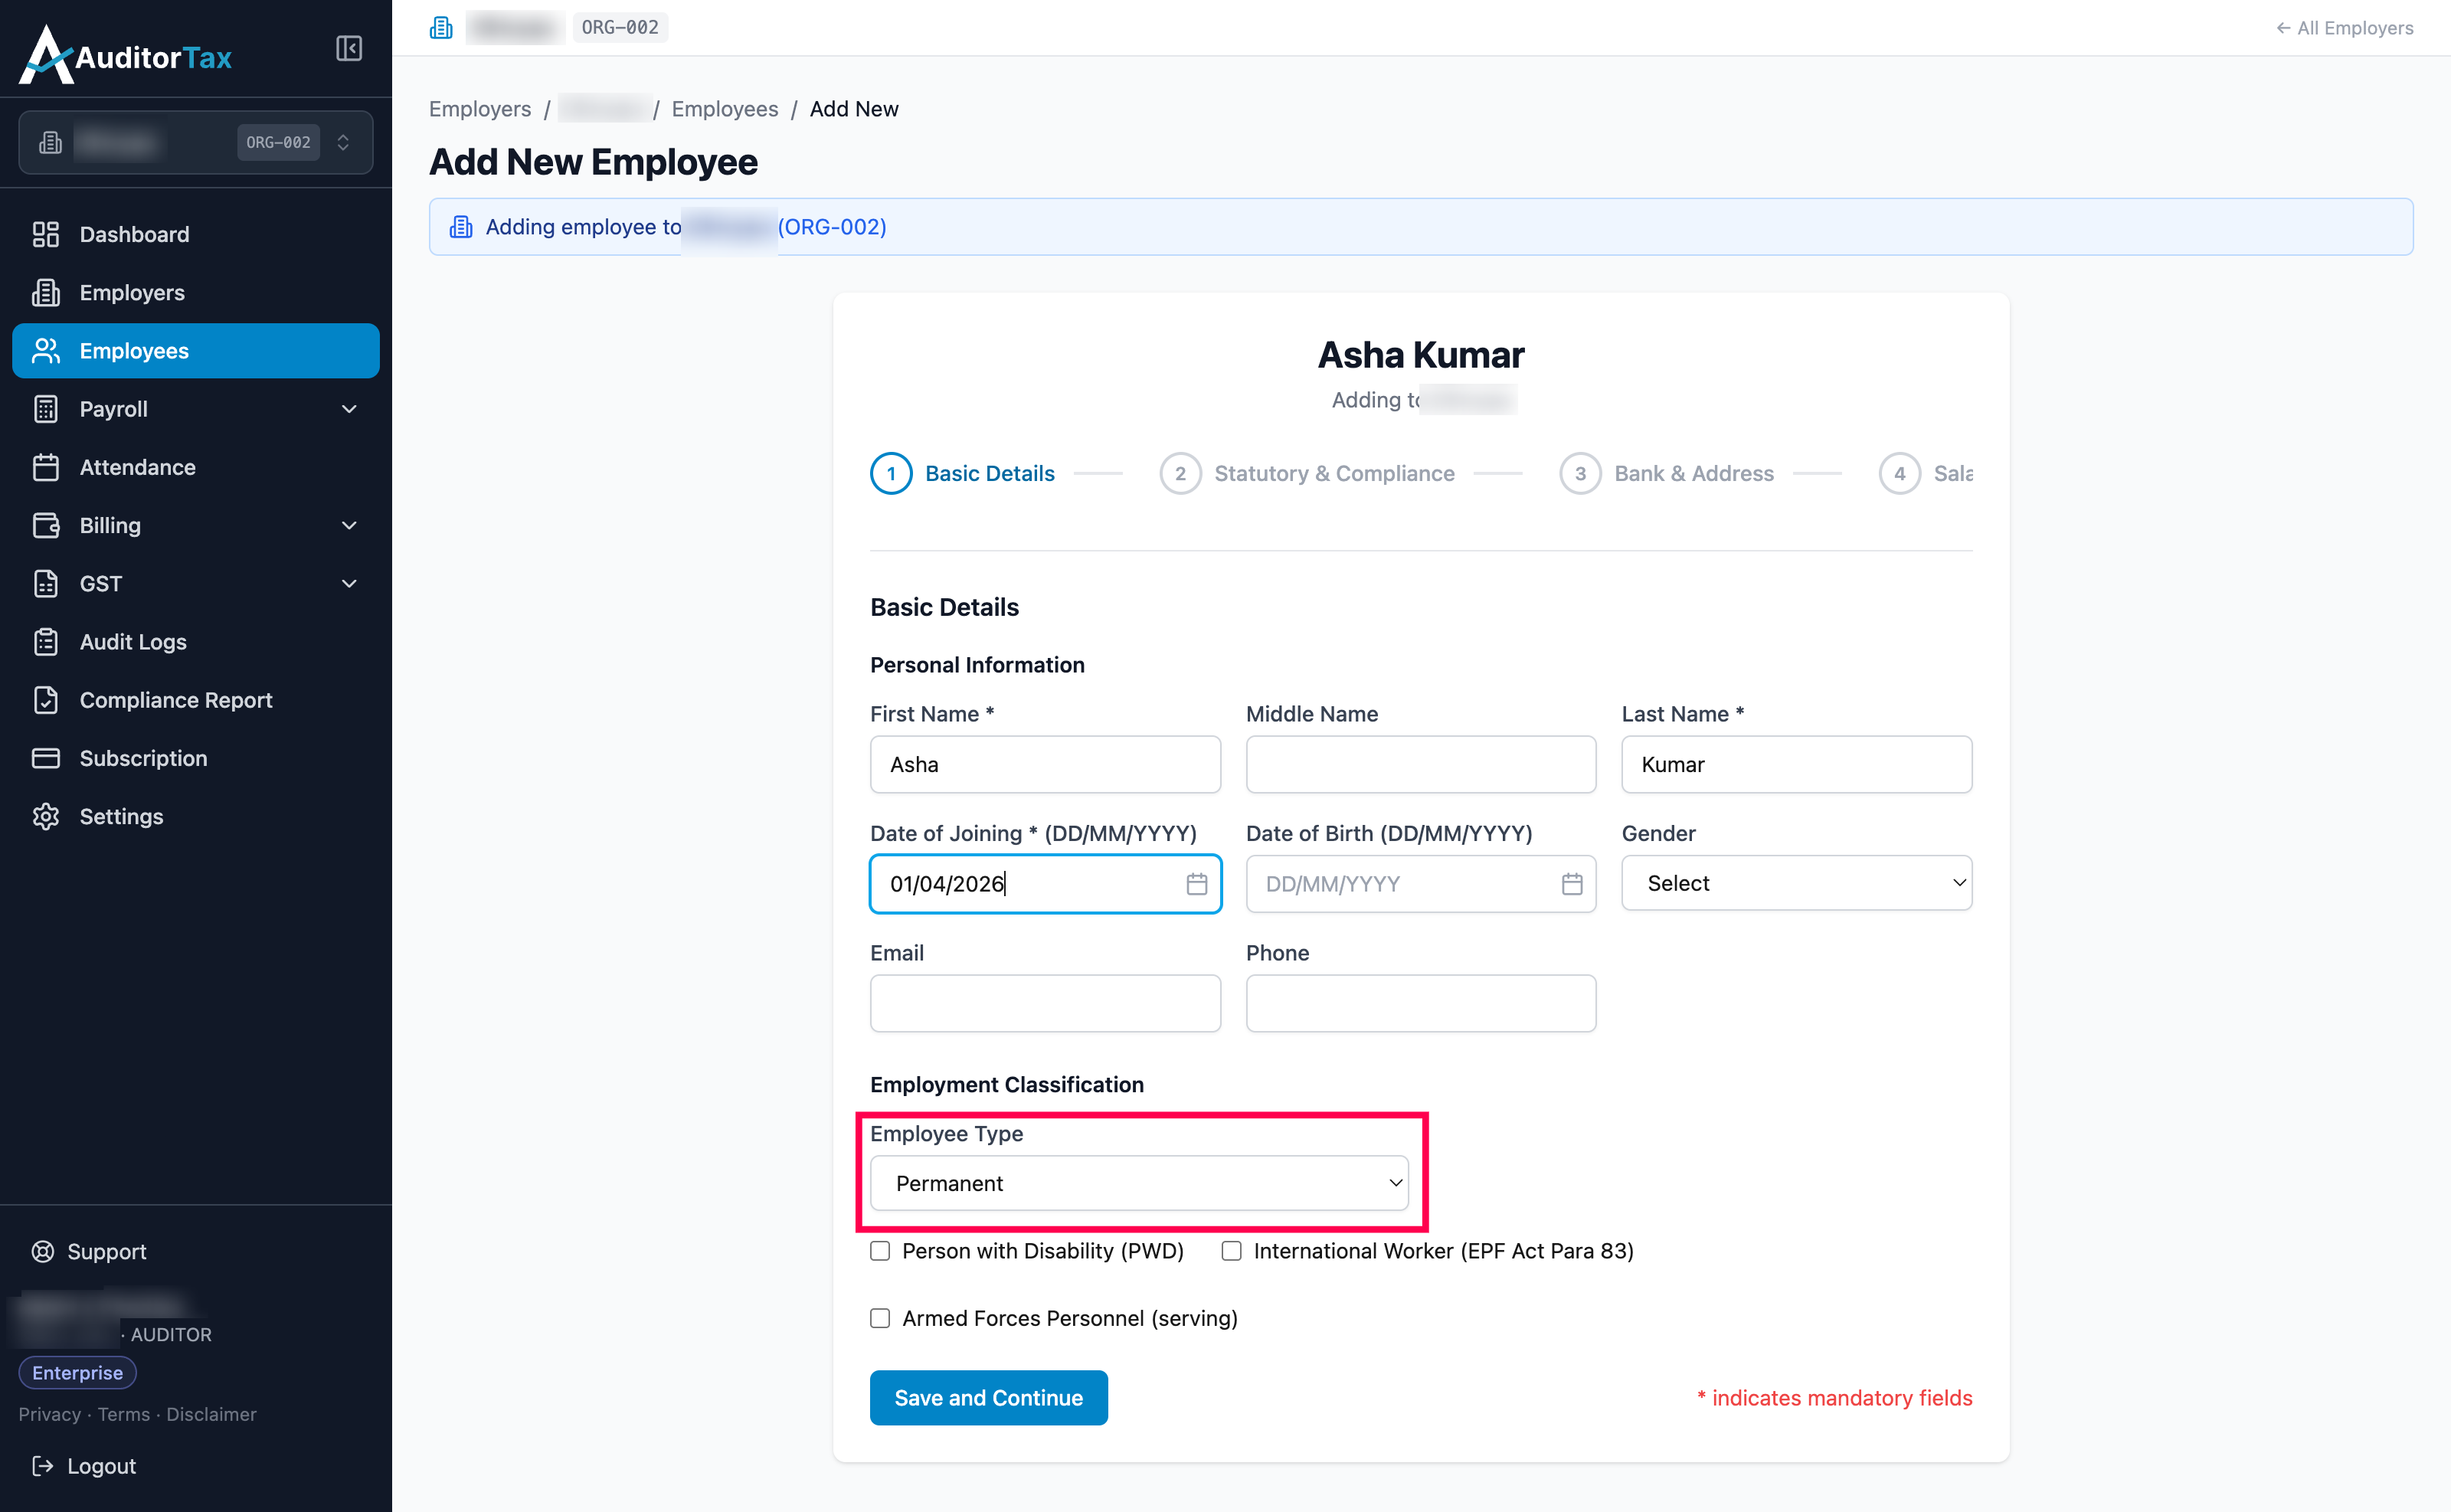
The Employee Type dropdown has five options:
- Permanent (the default) — a regular, indefinite employee. EPFO, ESIC, and Professional Tax (PT) are calculated the normal way for everyone else; this classification carries no exemption of its own.
- Contractual — engaged on a fixed-term or contract basis rather than as a permanent hire.
- Probationer — an employee still in their initial probation period, before being confirmed permanent.
- Intern — a trainee, typically on a stipend rather than a full salary.
- Apprentice — someone registered under a formal apprenticeship (e.g. under the Apprentices Act, 1961).
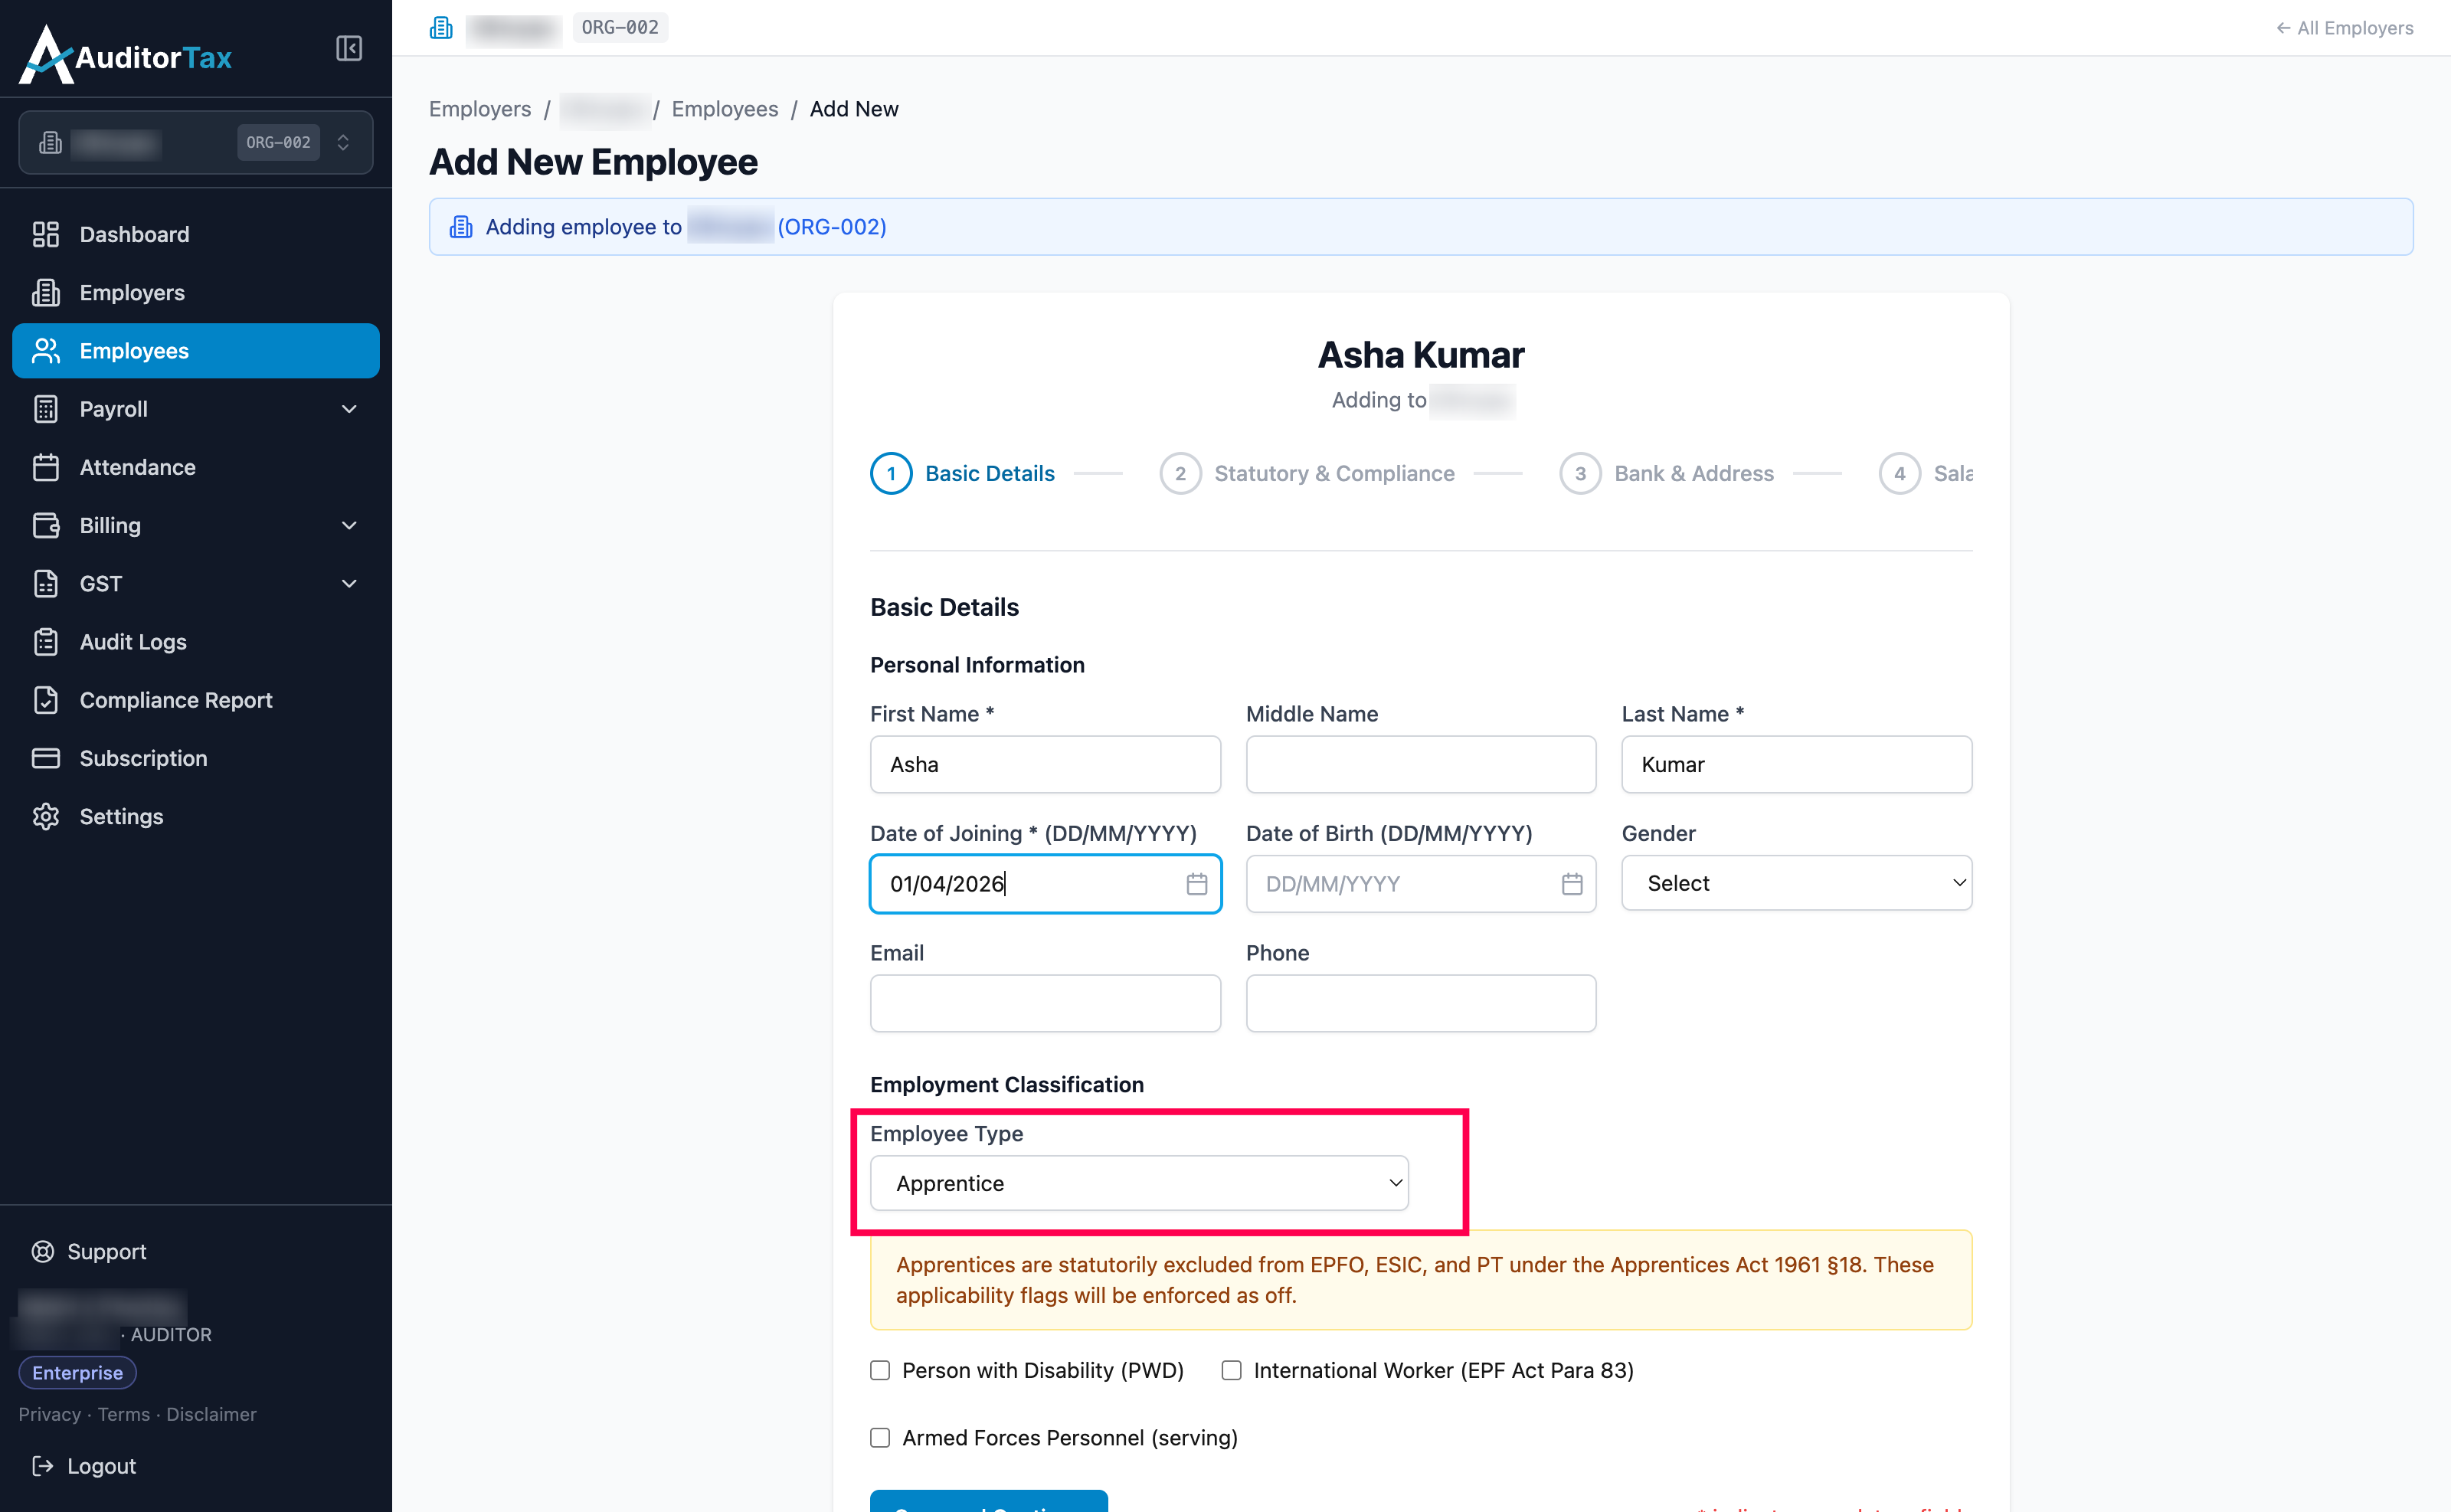
Selecting Apprentice is the one choice that visibly changes the form: AuditorTax immediately shows a banner underneath the dropdown, and automatically switches off EPFO, ESIC, and PT for this employee, because the Apprentices Act, 1961 §18 statutorily excludes apprentices from those three schemes. You can’t turn those deductions back on for an Apprentice.
Contractual, Probationer, and Intern are classification labels only. Selecting each of these in turn on the live form shows no banner, no extra fields, and nothing else on screen changes — and stepping through to the Statutory & Compliance step afterwards confirms EPFO, ESIC, and PT still behave exactly as they would for a Permanent employee, calculated the normal way from wages and the usual thresholds. In other words: these three types record how the person is engaged, for your own record-keeping, but by themselves they don’t add or remove any statutory benefit, deduction, or exemption. Whichever type you pick can be changed later from the employee’s Edit page.
6. Tick any Employment Classification checkboxes that apply
Section titled “6. Tick any Employment Classification checkboxes that apply”Below the Employee Type dropdown are three checkboxes, all unticked by default. Unlike the four non-Apprentice employee types, each of these does change a statutory calculation, and AuditorTax shows a short explanation on screen the moment you tick one.
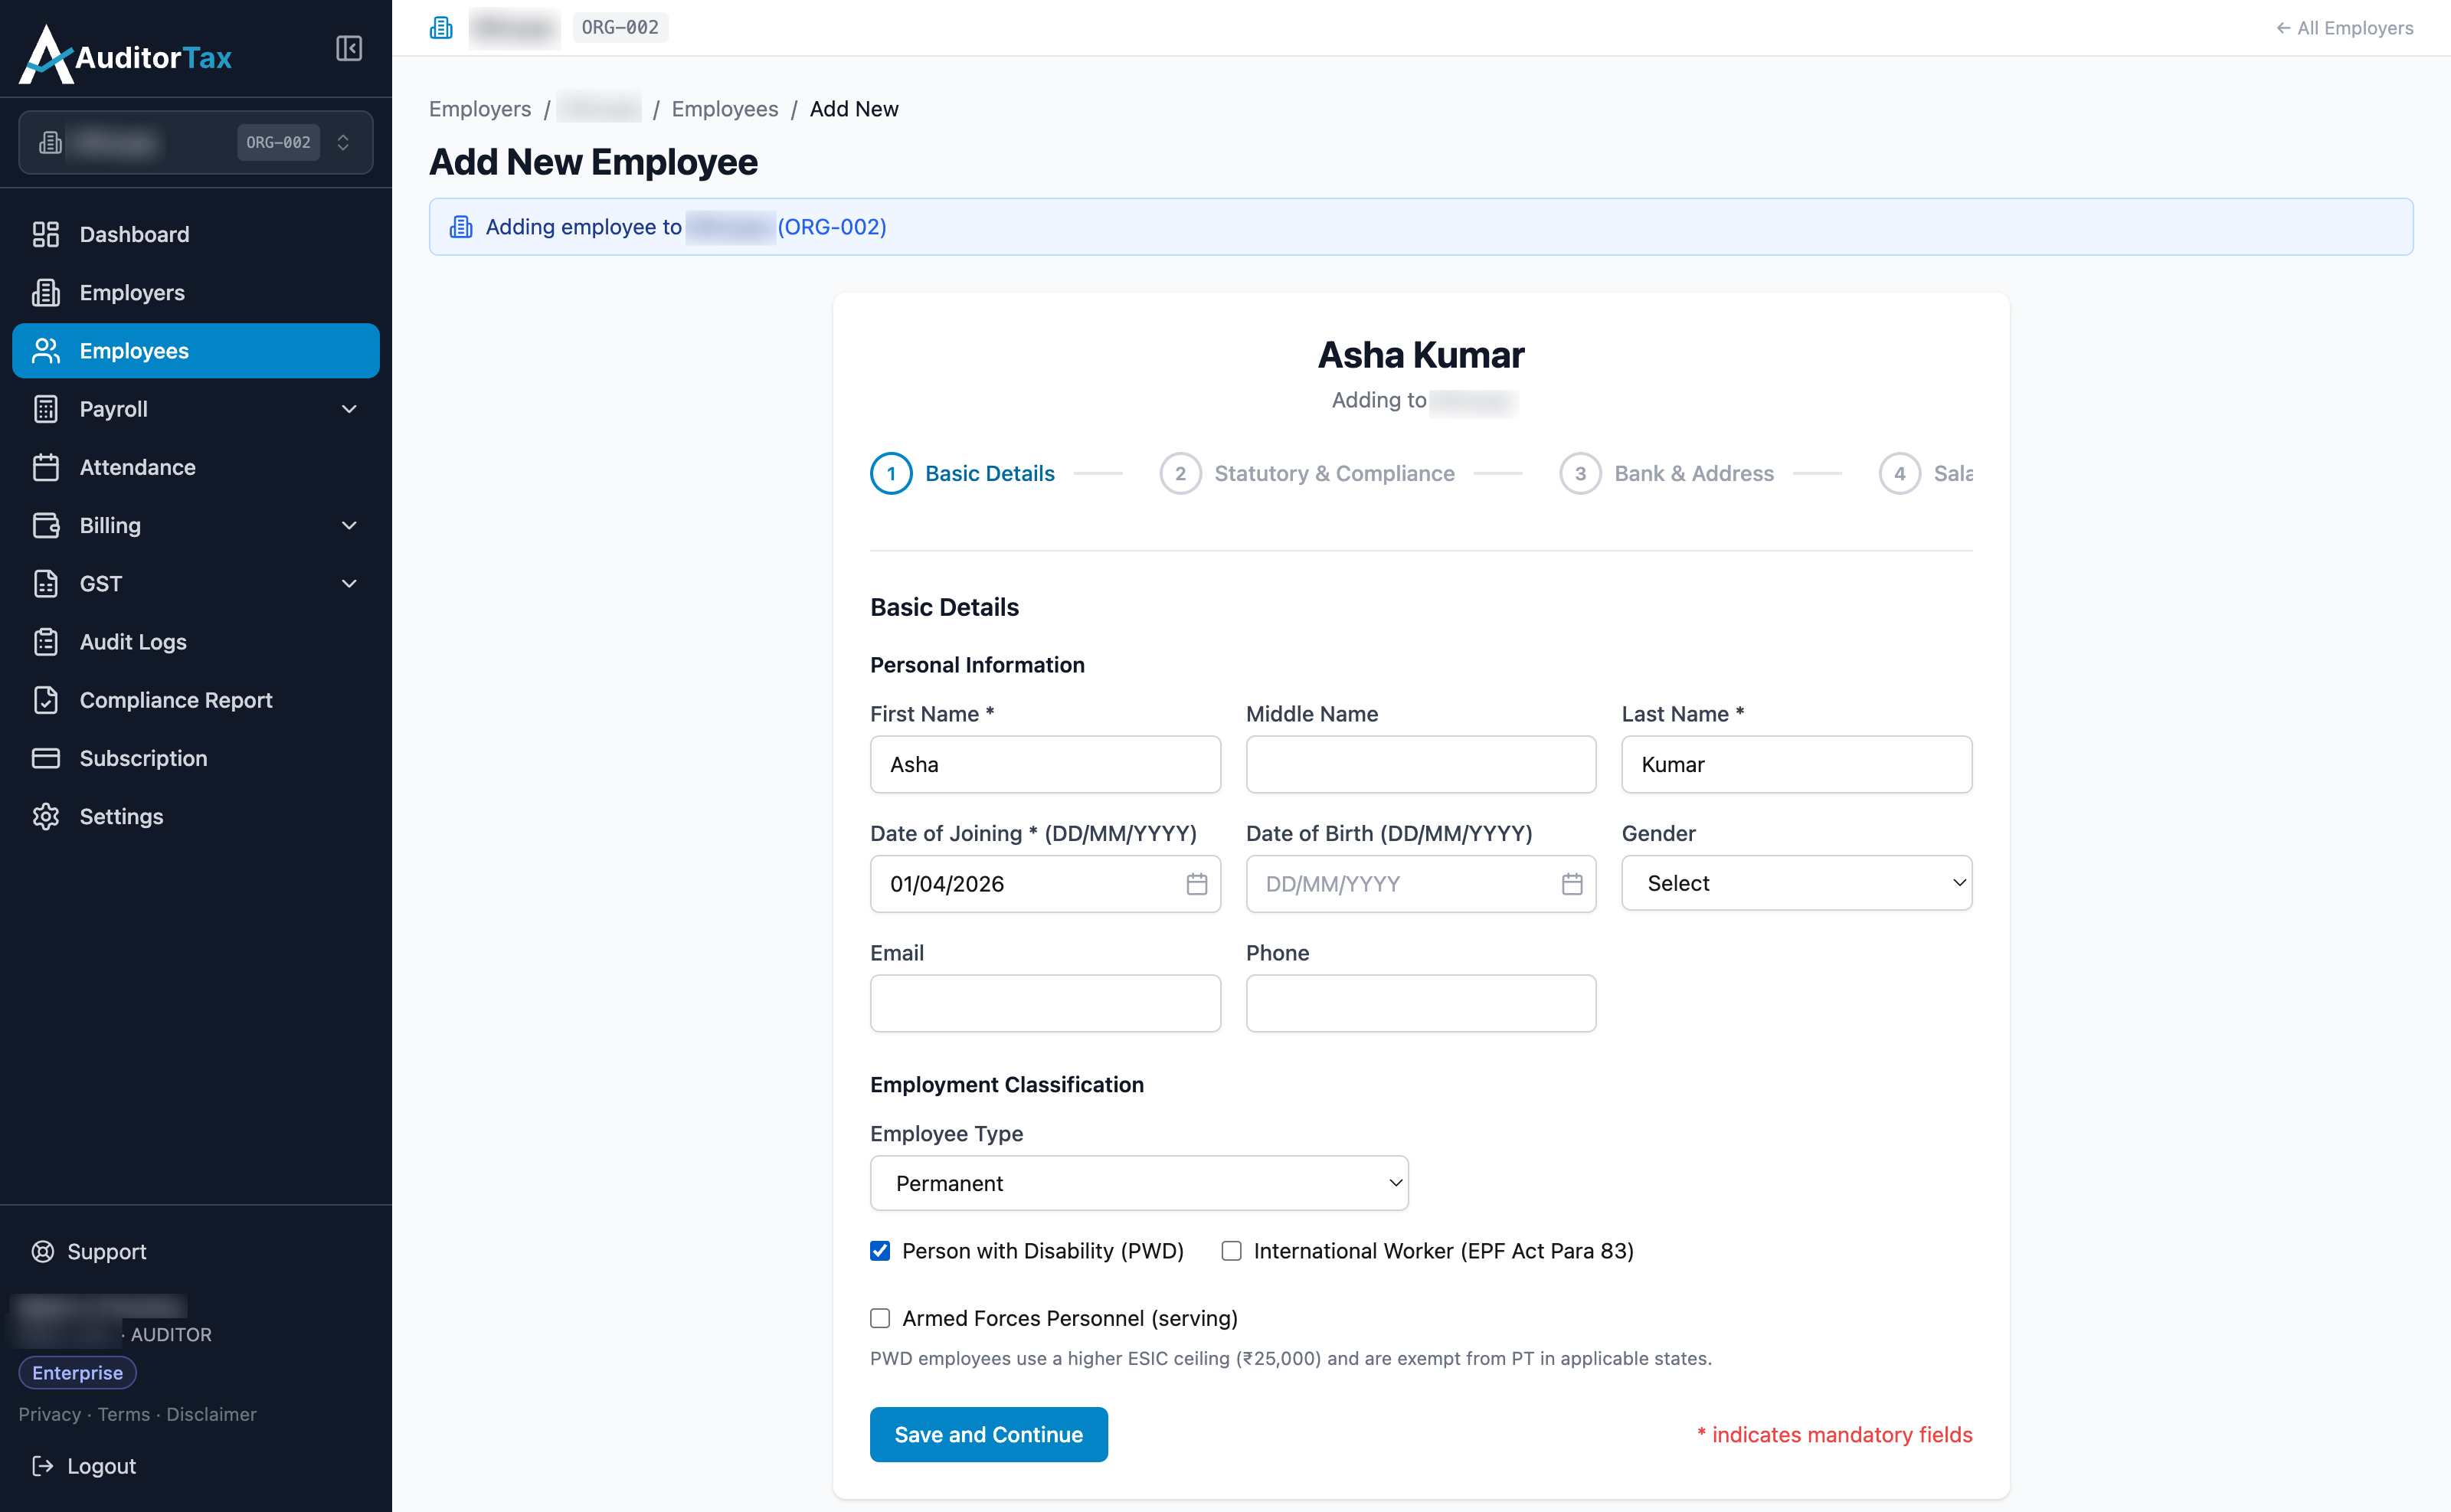
Person with Disability (PWD) — tick this if the employee has a recognized disability. It affects two statutes: ESIC uses a higher wage ceiling of ₹25,000/month for this employee instead of the standard ceiling (under the ESI (Amendment) Act, 2010), so someone earning above the usual ESIC cutoff but at or below ₹25,000 can still be covered; and PT is exempted in states whose PT Act grants a disability exemption — fully exempt in some states, or exempt only up to a salary threshold in others, depending on the employee’s PT work state.
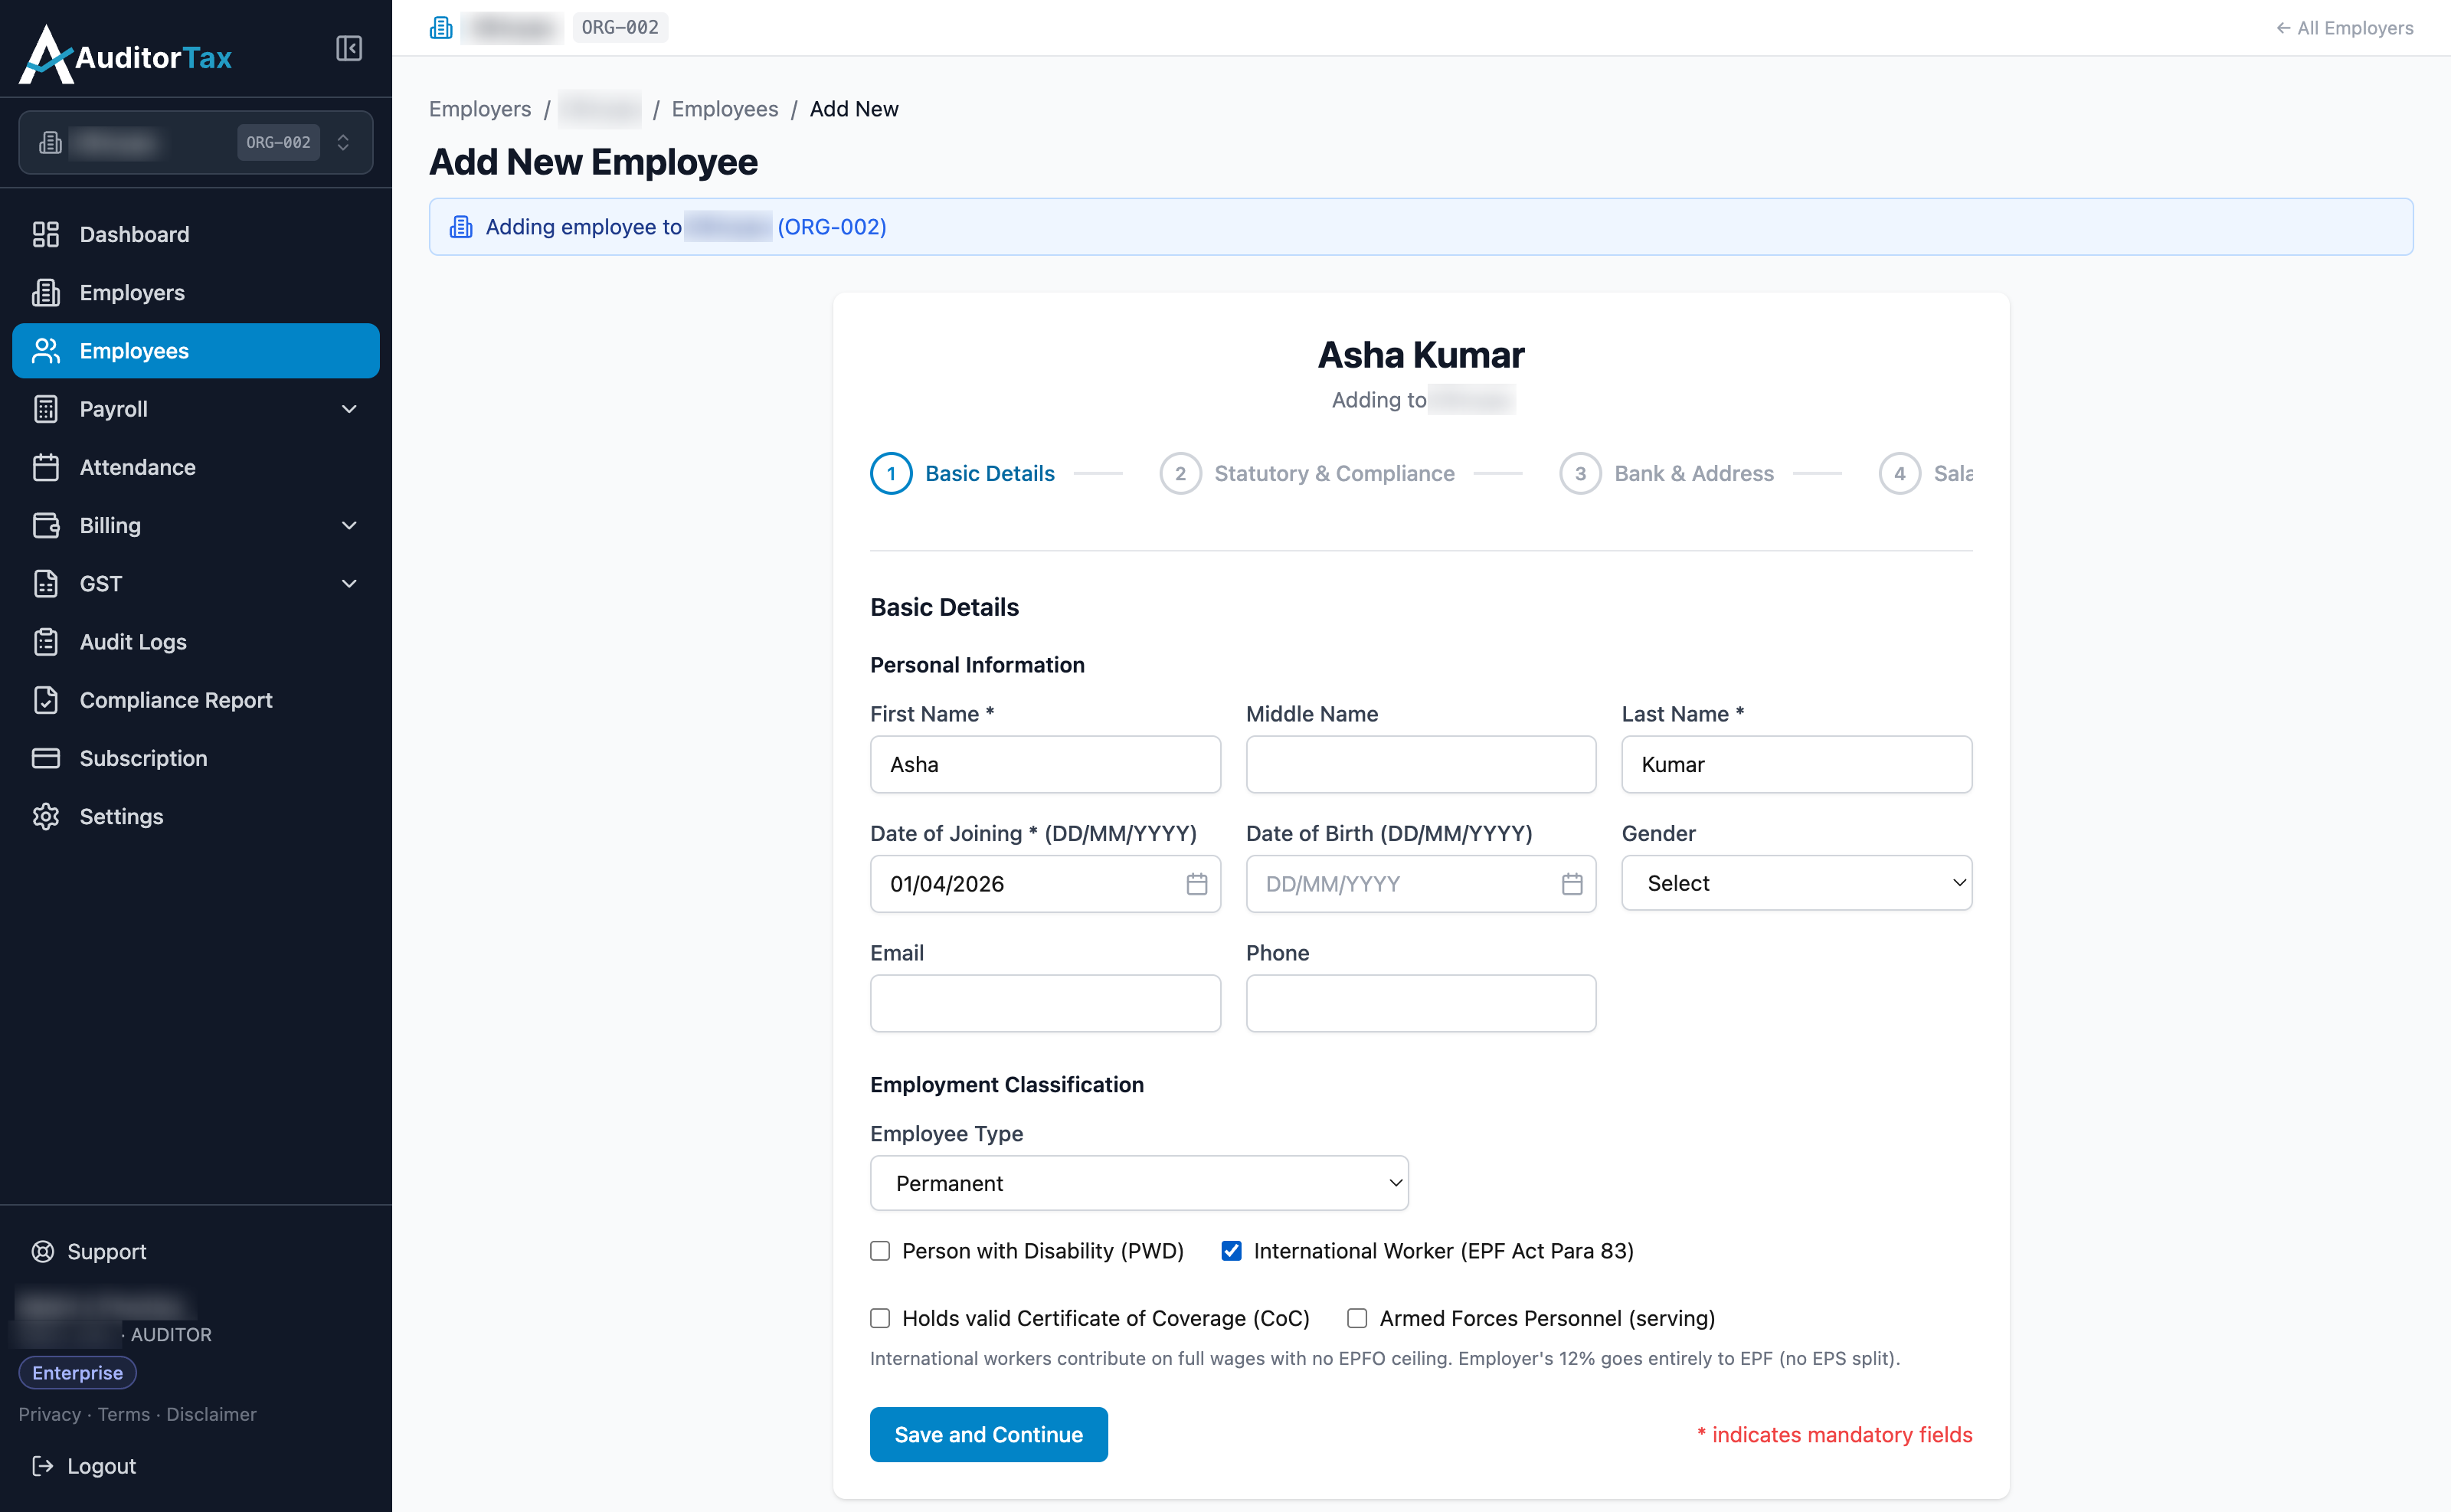
International Worker (EPF Act Para 83) — tick this for a foreign national (or an Indian worker covered by a reciprocal arrangement) under EPF & MP Act 1952 Para 83. Ticking it reveals a second checkbox, “Holds valid Certificate of Coverage (CoC)”. Without a CoC, the employee still gets EPF, but with no wage ceiling — contributions are calculated on full wages, and the employer’s entire 12% share goes to EPF with none diverted to EPS.
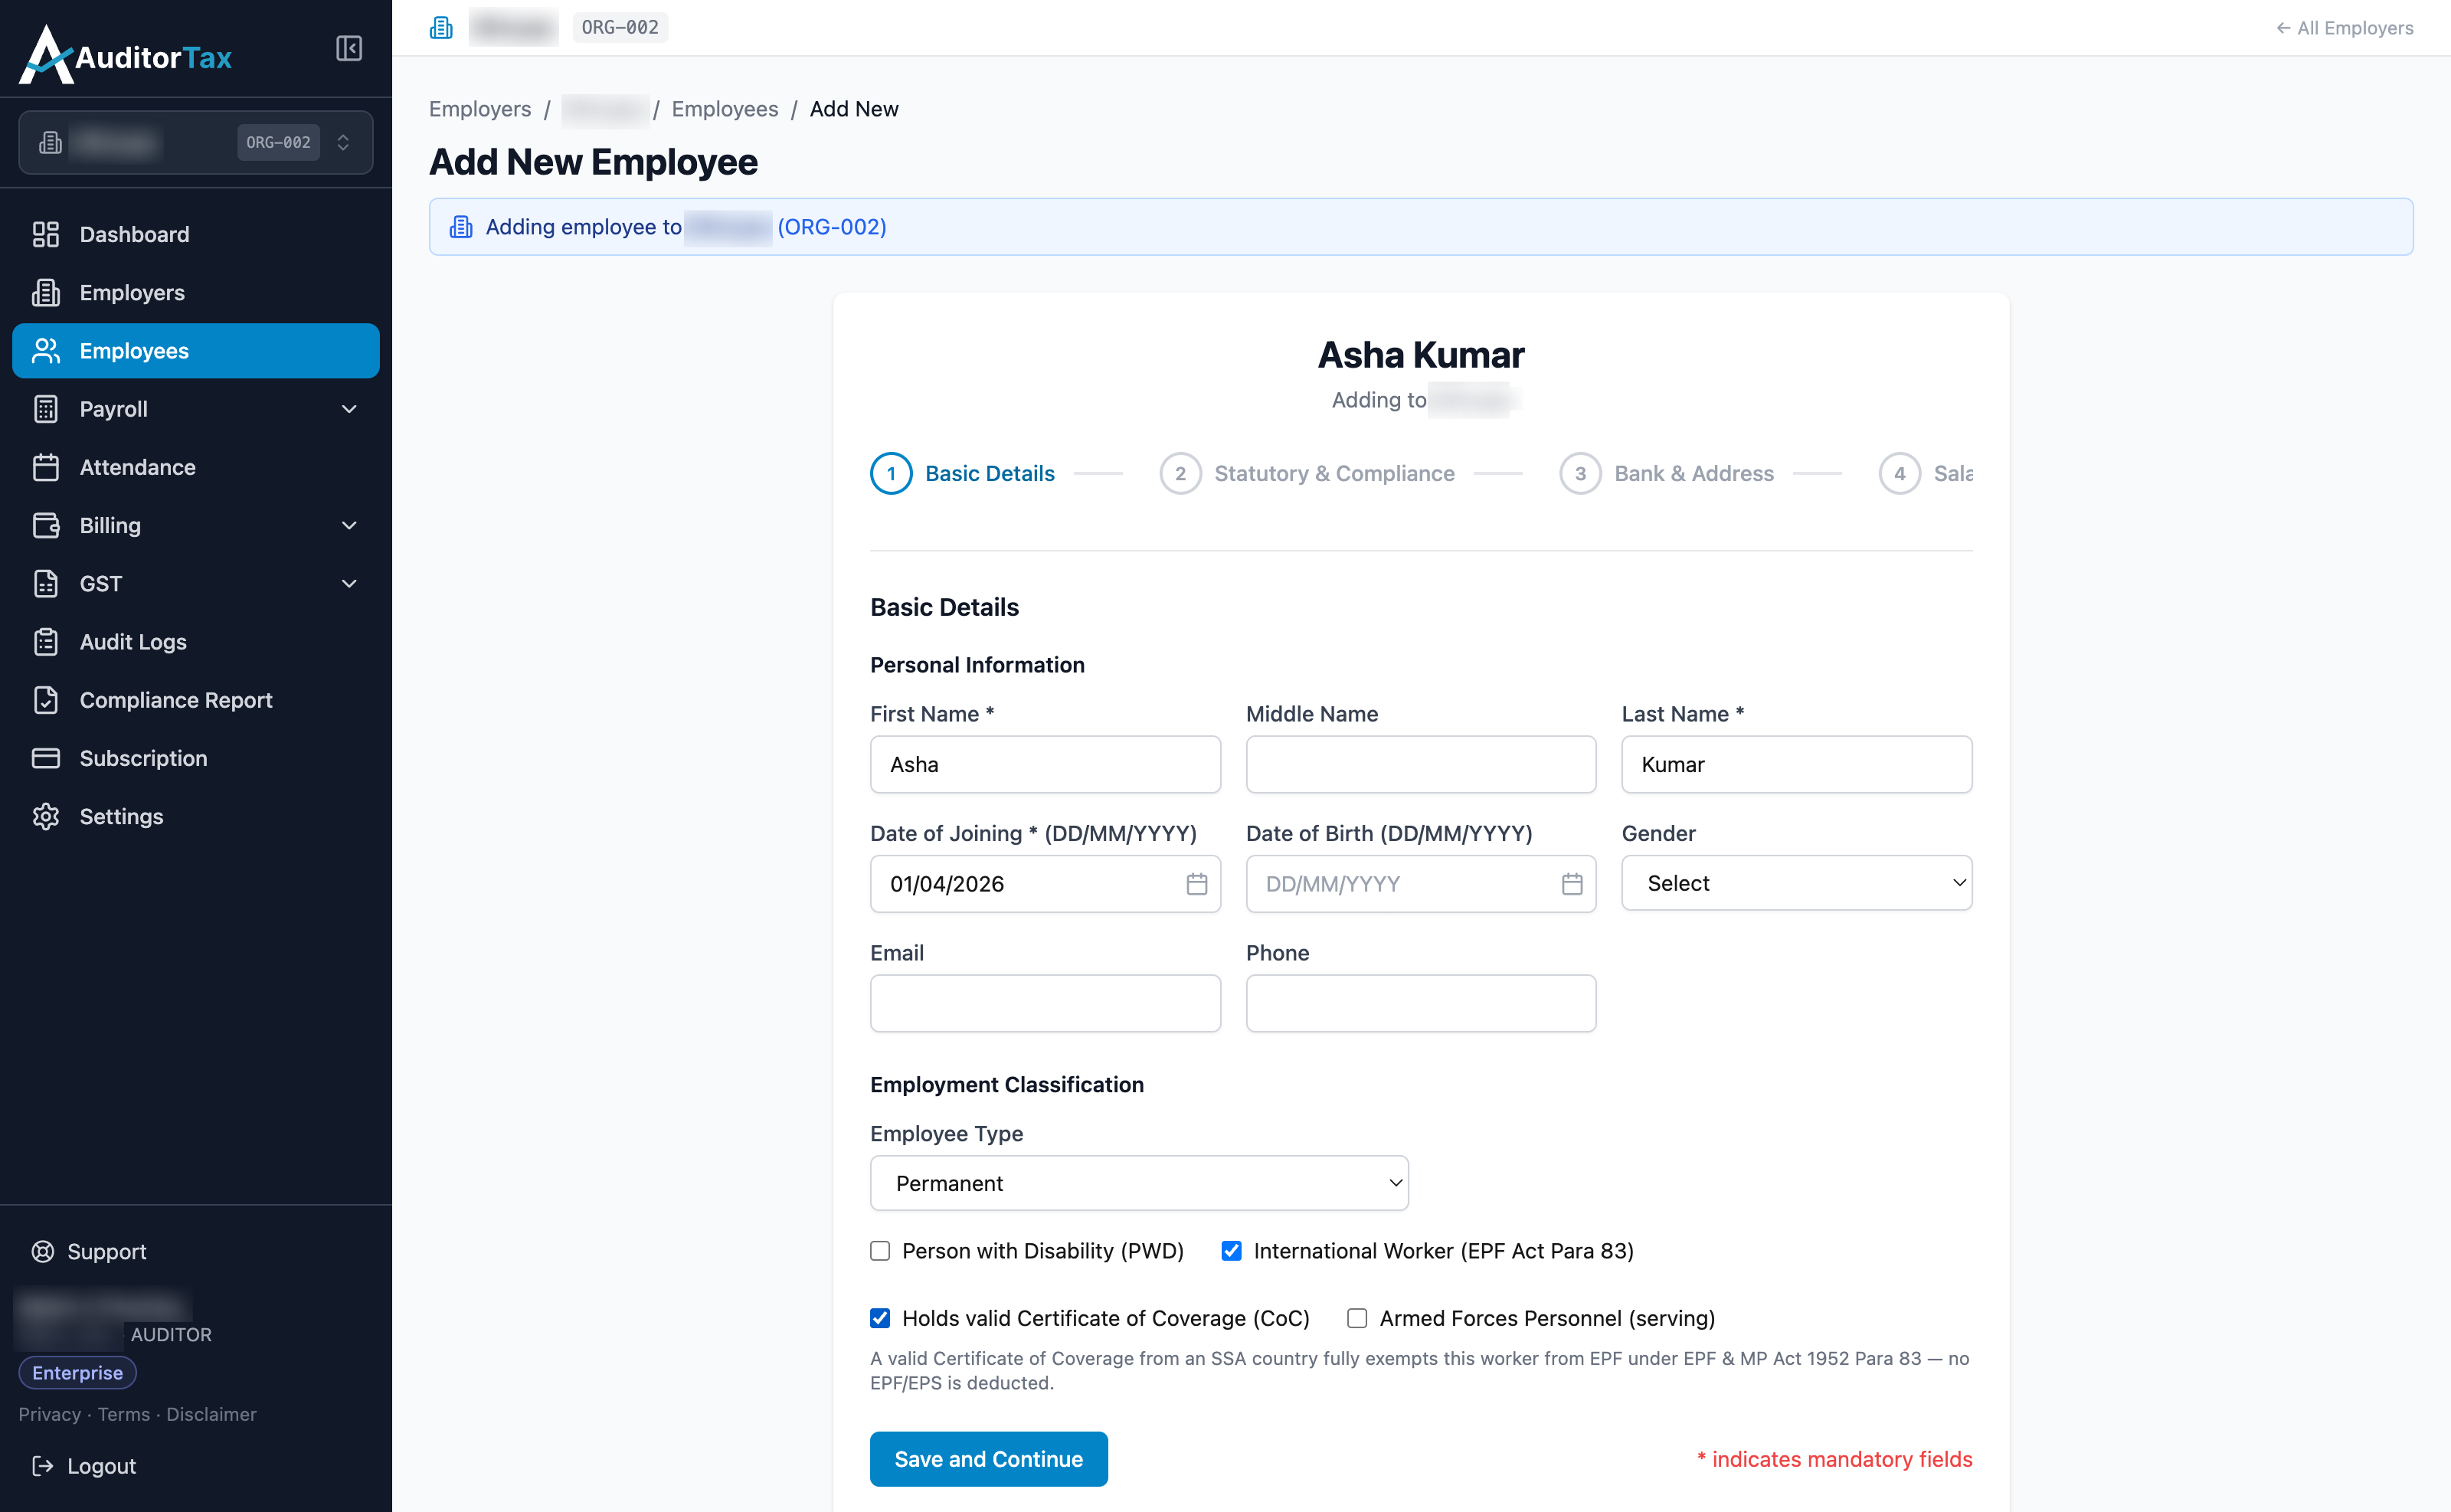
With a valid CoC from a Social Security Agreement (SSA) country, the employee is fully exempt from EPF instead — no EPF or EPS is deducted at all.
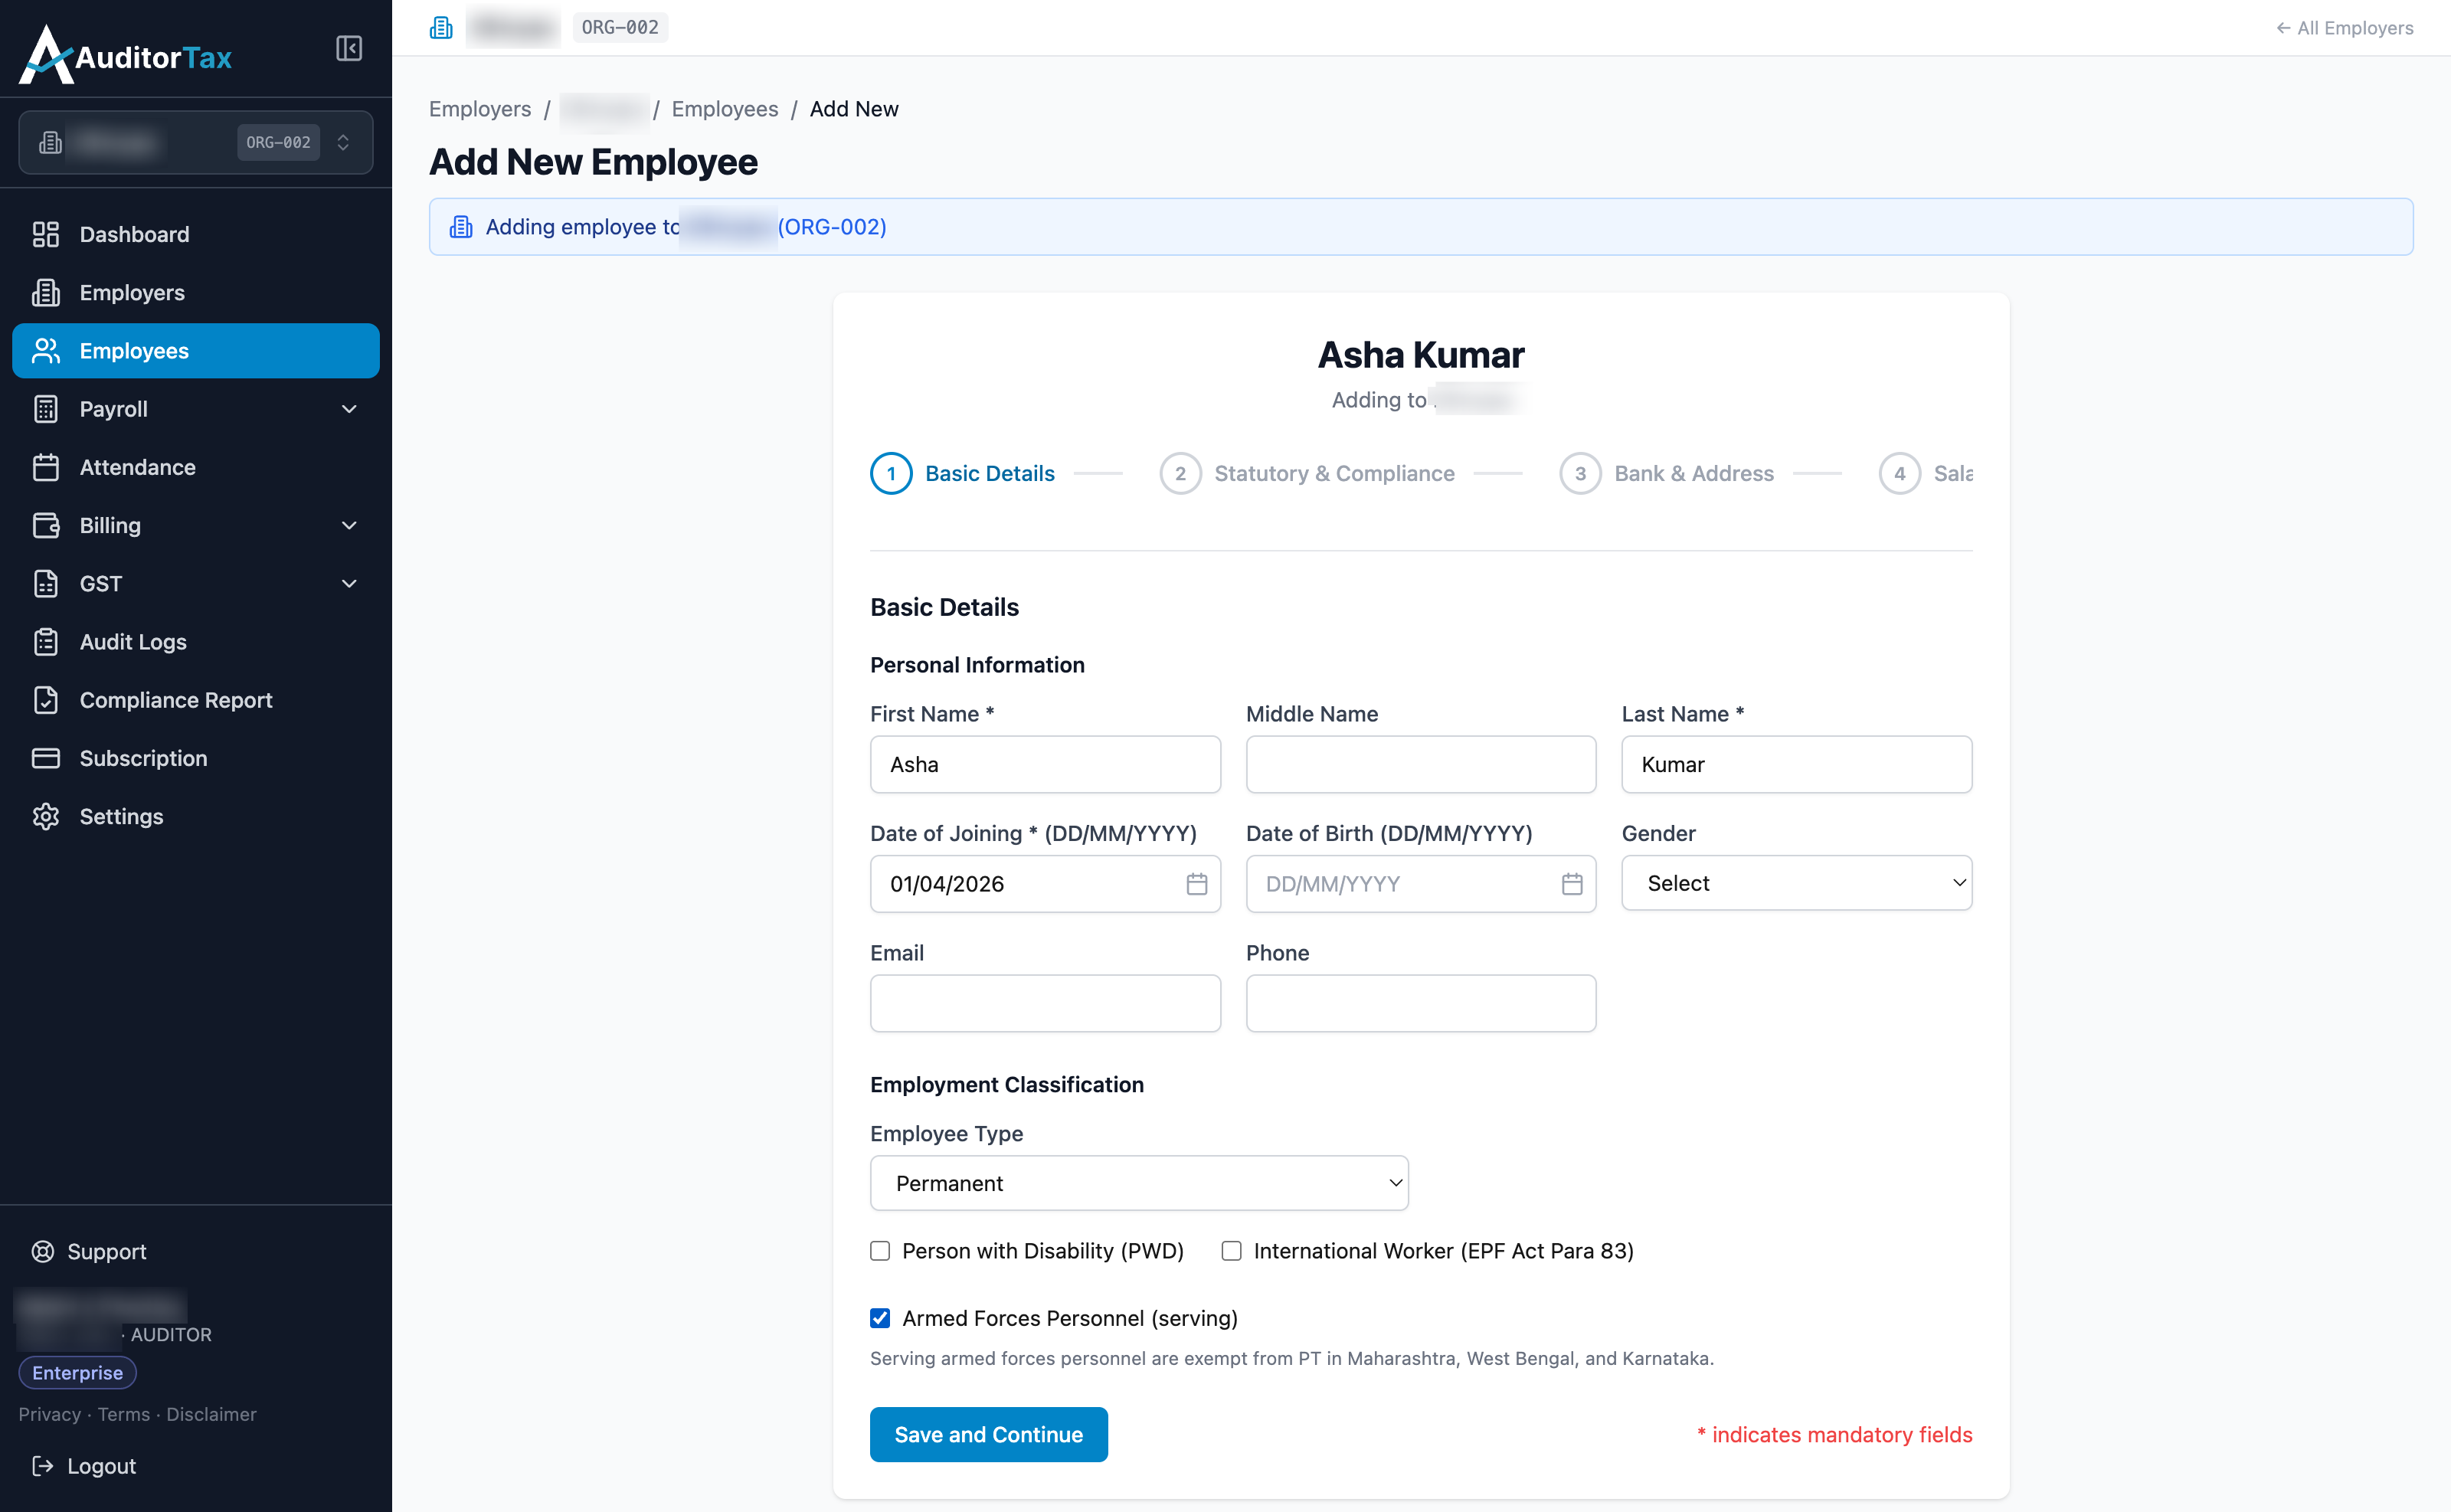
Armed Forces Personnel (serving) — tick this for someone currently serving in the armed forces. It exempts them from PT in the three states AuditorTax has this configured for: Maharashtra, West Bengal, and Karnataka.
Whatever you set here can be changed later from the employee’s Edit page.
7. Click “Save and Continue”
Section titled “7. Click “Save and Continue””This moves you to the Statutory & Compliance step.
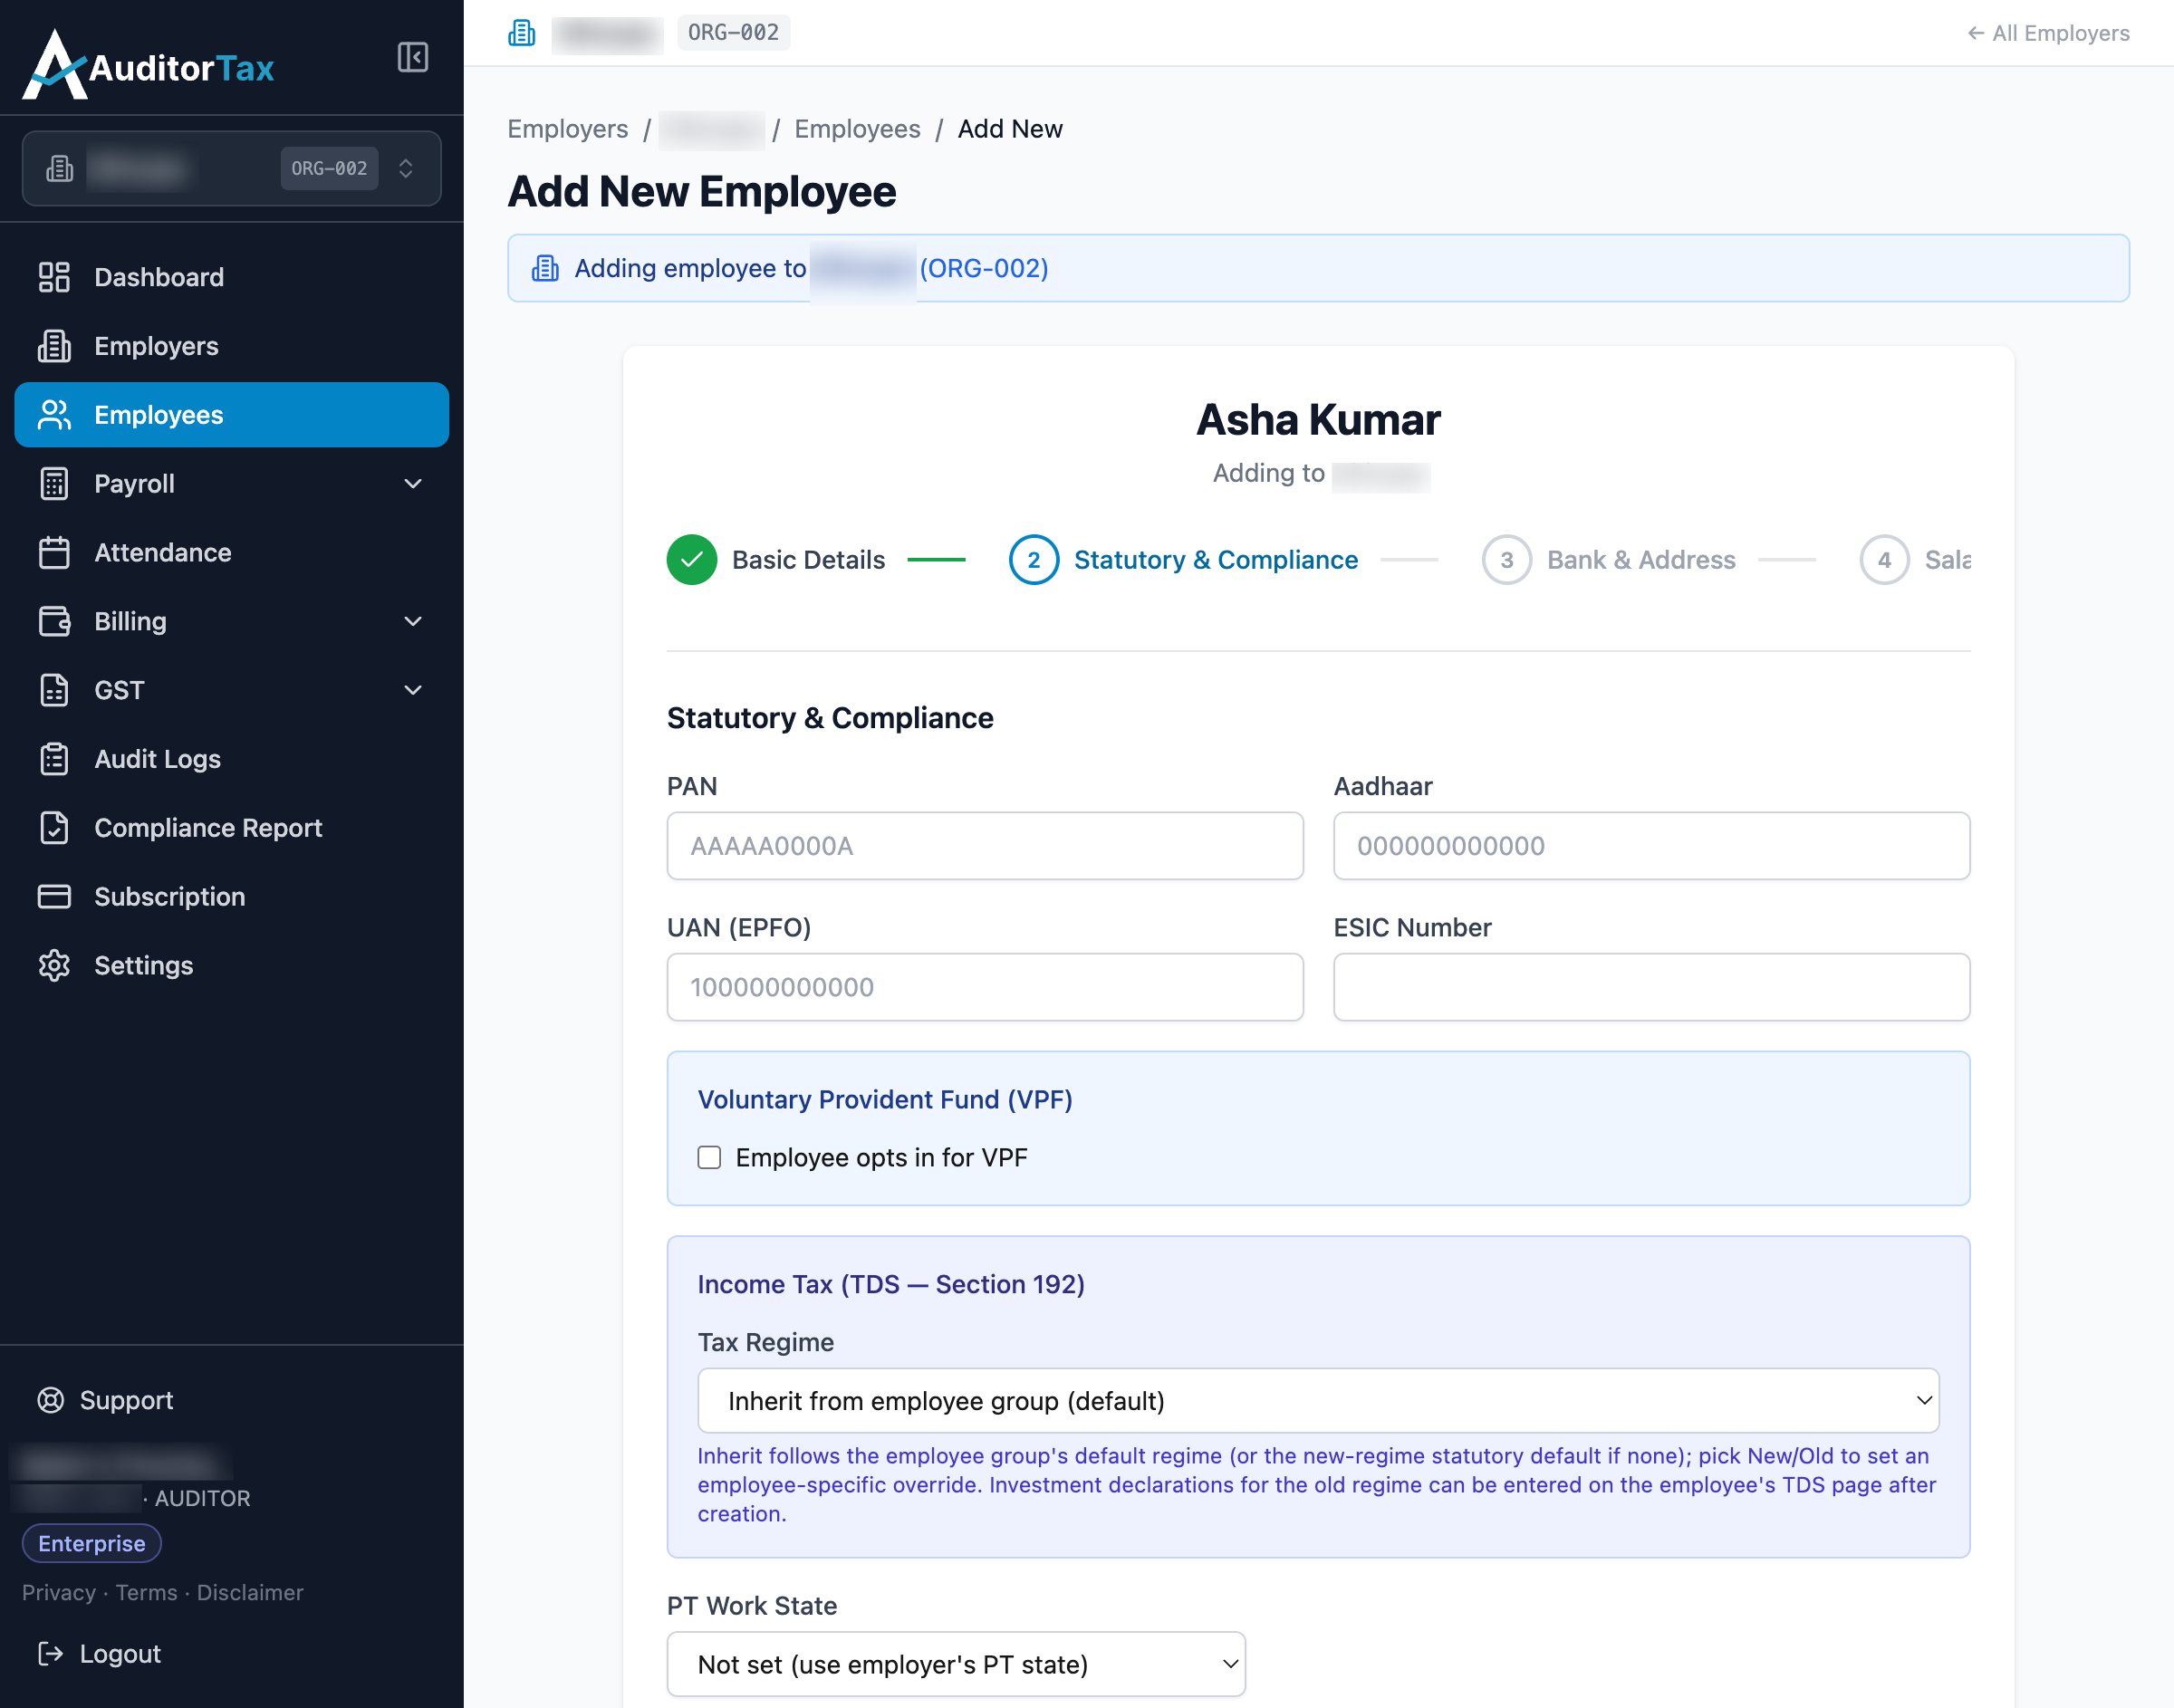
8. PAN, Aadhaar, UAN, and ESIC Number are optional for now
Section titled “8. PAN, Aadhaar, UAN, and ESIC Number are optional for now”If you have these details on hand, go ahead and enter them; if not, there’s no need to hold up creating the employee — all four can be added whenever they’re ready, from the employee’s Edit page. PAN and Aadhaar are the employee’s personal tax and identity numbers; UAN (EPFO) is their Universal Account Number for the EPF pension/provident fund scheme; ESIC Number is their number under the ESI Corporation’s health insurance scheme. Payroll runs fine without them, but if you do leave one out, statutory filings that need it — an ECR file for EPFO, for example — will show it as missing until it’s been added.
9. Decide whether to opt this employee into VPF
Section titled “9. Decide whether to opt this employee into VPF”VPF stands for Voluntary Provident Fund — an extra, employee-only contribution on top of the mandatory EPF. Mandatory EPF is 12% of Basic + DA, paid by both employee and employer and capped at the EPF wage ceiling; VPF is an additional percentage the employee alone chooses to contribute, with no matching employer share, calculated on the employee’s actual Basic + DA rather than the ceiling. Ticking “Employee opts in for VPF” reveals a VPF Percentage field (1–88%) and a running total showing what the mandatory and voluntary contributions add up to.
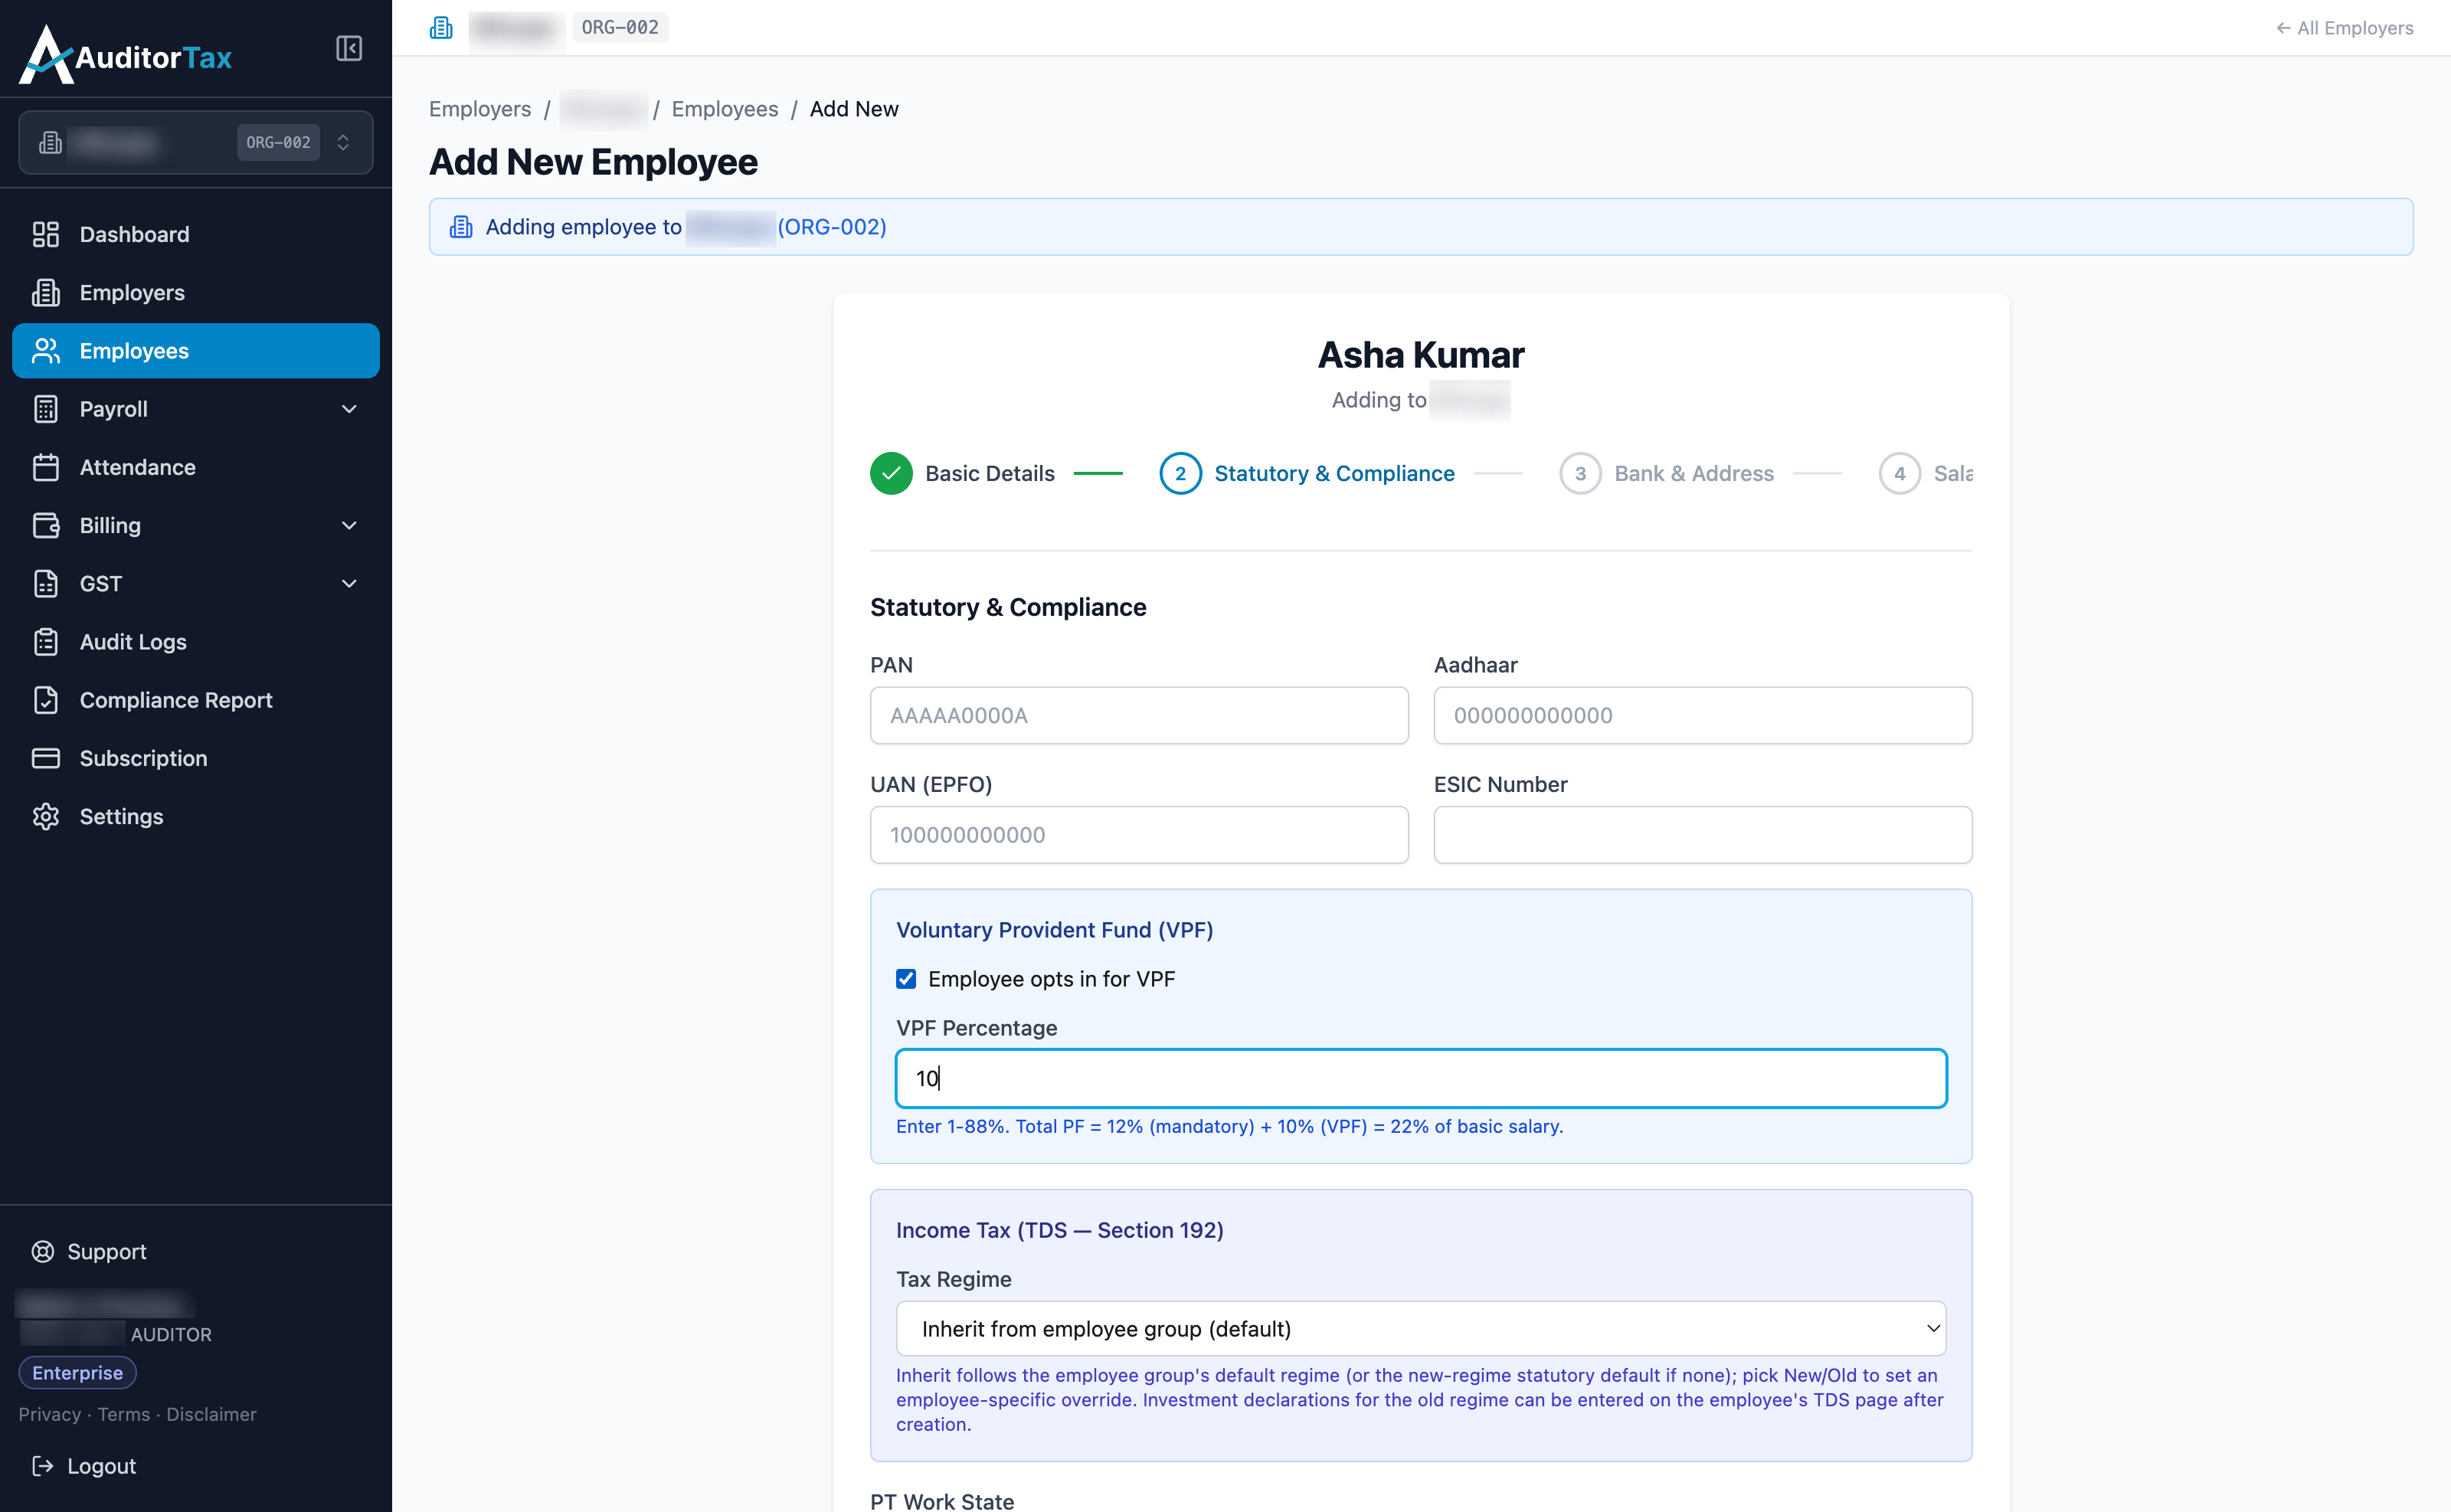
What this means for the employee: it’s a way to direct more of their own salary into the EPF account than the mandatory 12% requires.
What it means for you as the auditor: a VPF-opted-in employee will show a larger PF deduction on their payslip than their EPF rate alone would suggest, and because VPF has no employer match, it doesn’t change the employer’s per-employee statutory cost. Leave this unticked if the employee doesn’t want to contribute beyond the mandatory 12%.
10. Choose a Tax Regime
Section titled “10. Choose a Tax Regime”Every employee’s monthly income tax (TDS under Section 192) is calculated under one of two regimes set by the Income Tax Act, and this field decides which one applies to this employee. The dropdown has three options:
- Inherit from employee group (default) — follows whatever regime the employee’s Employee Group is set to (explained in step 16 below). If this employee isn’t in a group, or their group has no default set, AuditorTax falls back to the New Regime instead (the on-screen note under the dropdown calls this the “new-regime statutory default”). Pick this option when you don’t need this specific employee to be an exception.
- New Regime (— s.115BAC) — the regime introduced under Income Tax Act Section 115BAC. It’s the statutory default AuditorTax falls back to when nothing else is set.
- Old Regime (with deductions) — the regime that lets the employee claim deductions and exemptions — investments under 80C, HRA, home loan interest, and similar — to reduce their taxable salary. Picking it here only sets which regime applies to this employee; it doesn’t ask for the deduction amounts on this screen. Those are entered later, on the employee’s own TDS page, covered in Employee Income Tax (TDS) Details.
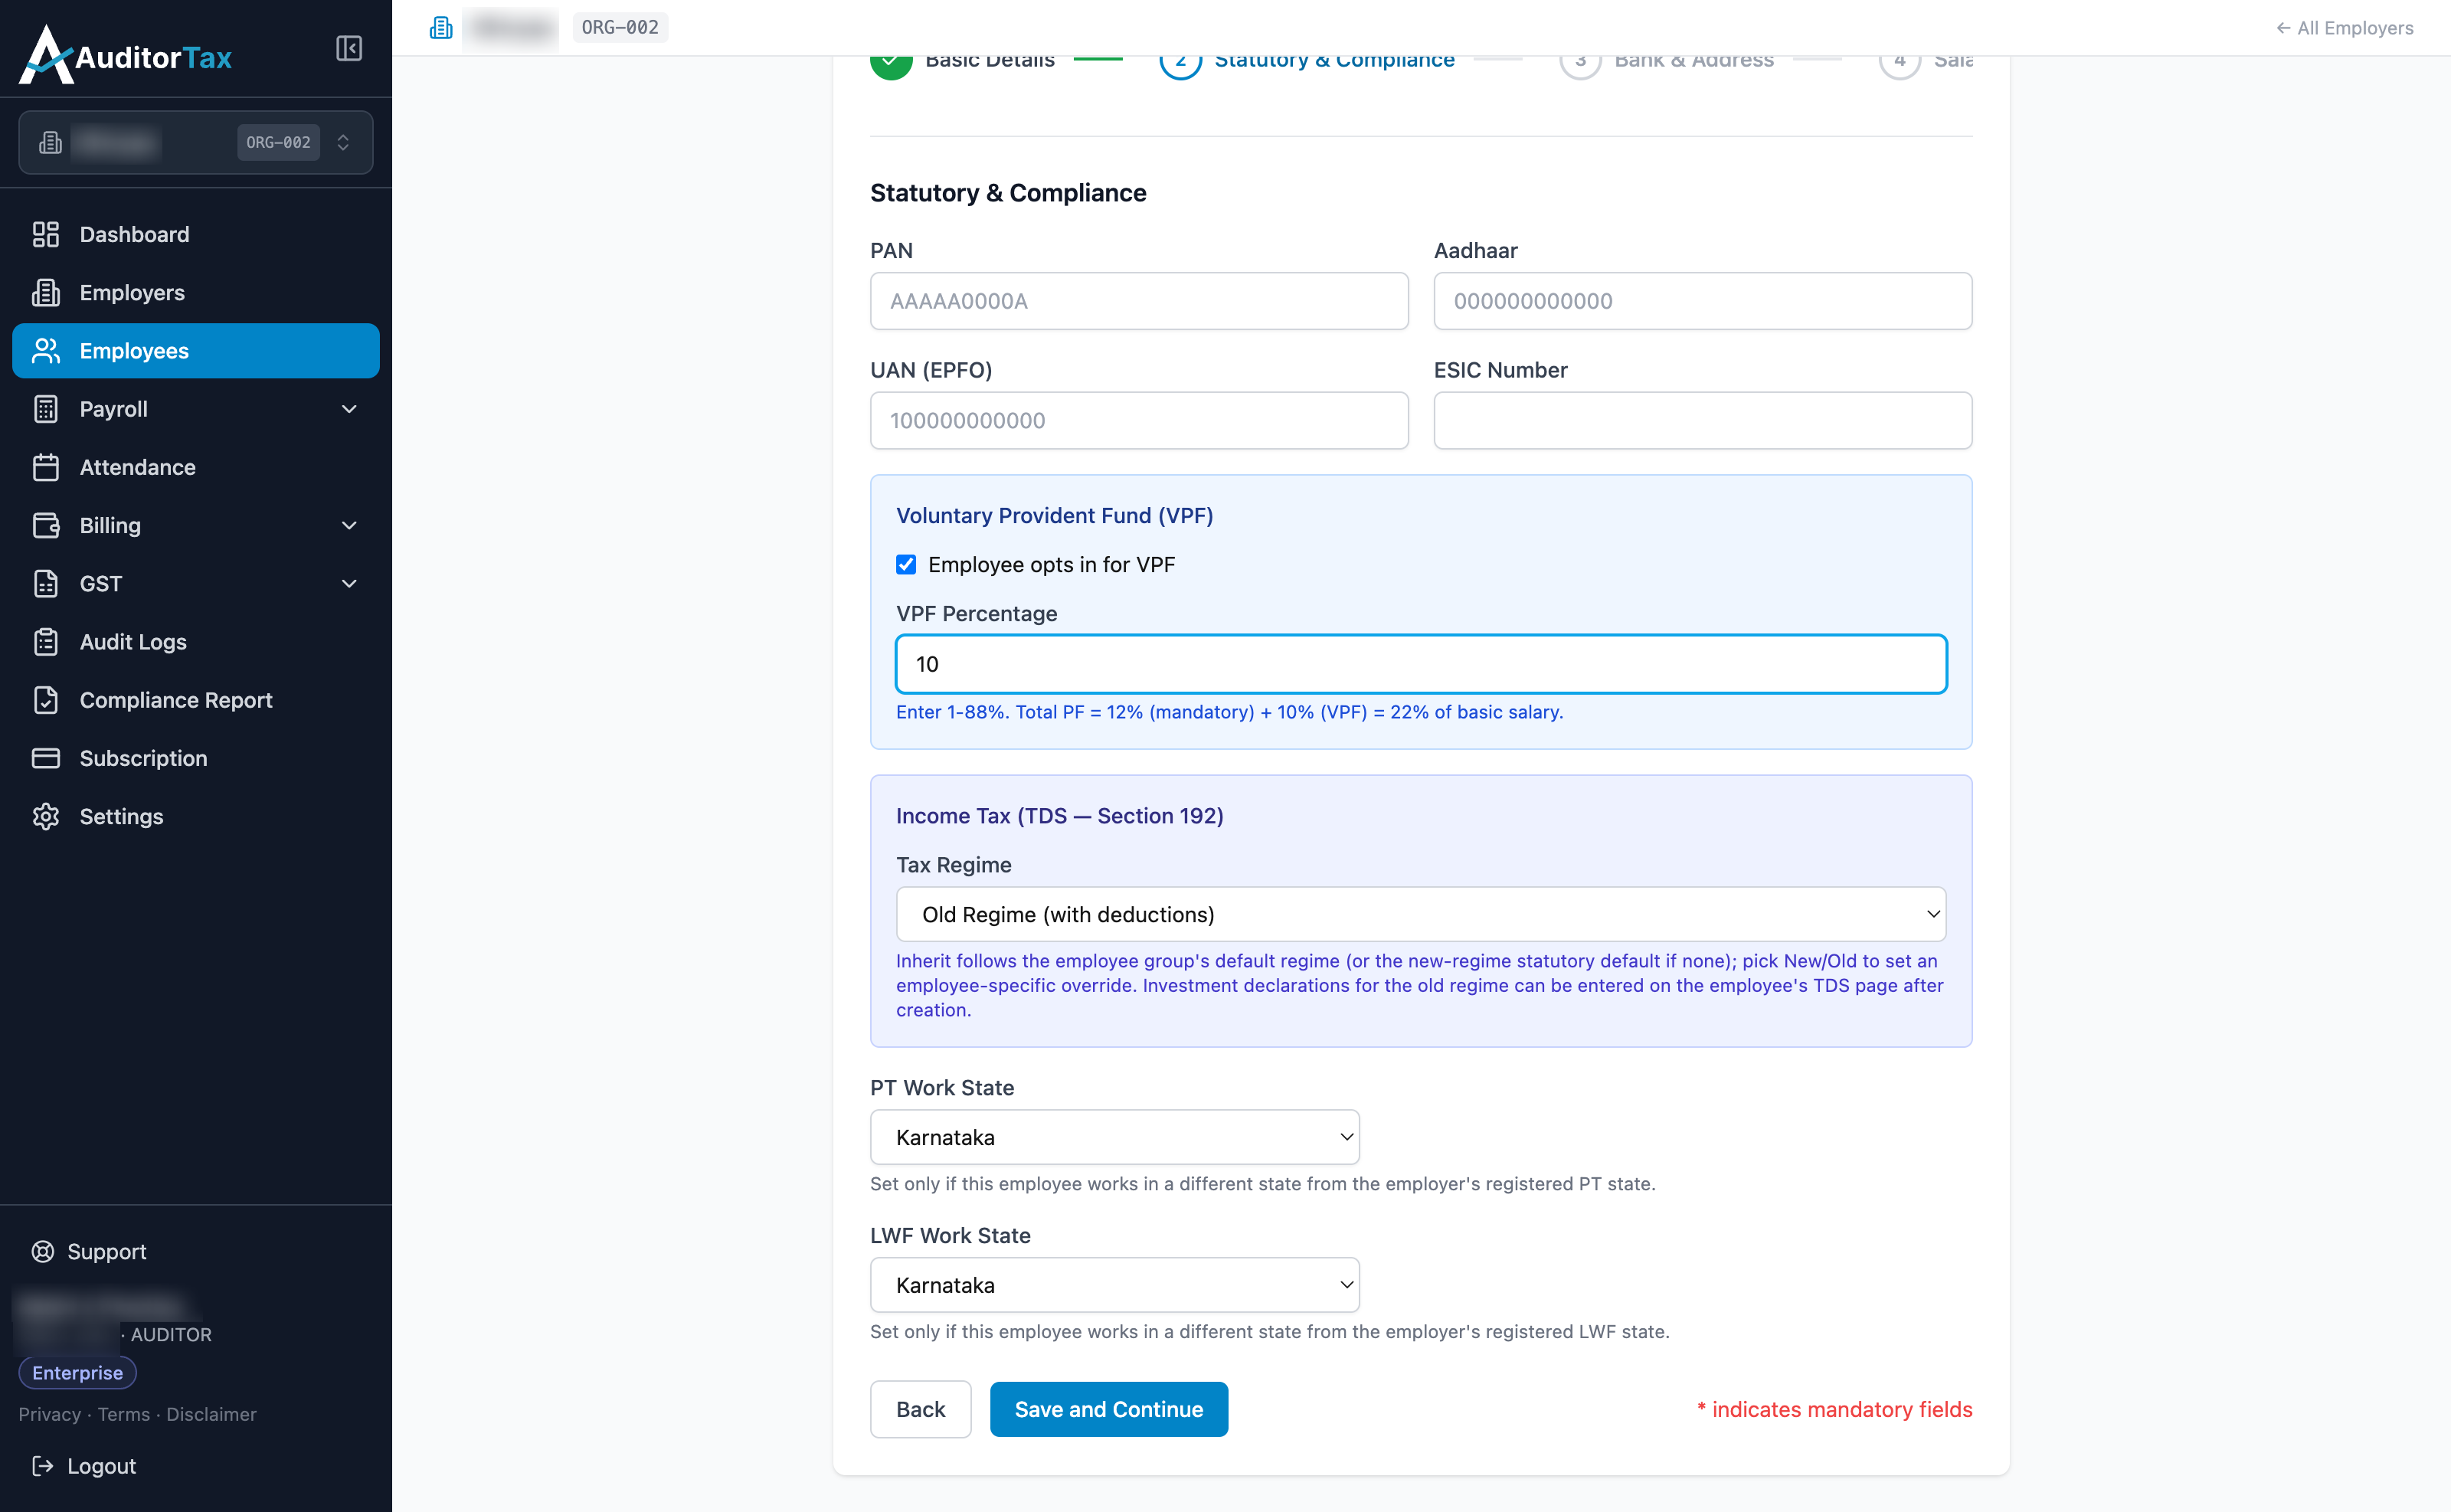
Which regime benefits a given employee depends on their own numbers: someone with substantial eligible deductions (a home loan, sizeable 80C investments, and so on) often ends up paying less tax under the Old Regime despite its different slab structure, while someone with few deductions is usually better off under the simpler New Regime. AuditorTax doesn’t recommend one over the other on this screen — the actual Old-vs-New comparison for a specific employee, once real numbers are involved, is what the TDS page shows.
11. Set PT Work State and LWF Work State only if they differ from the employer’s
Section titled “11. Set PT Work State and LWF Work State only if they differ from the employer’s”PT (Professional Tax) and LWF (Labour Welfare Fund) are both state government levies deducted from an employee’s salary, and both are determined by where the employee actually works, not where the employer’s registered office is. AuditorTax already knows the employer’s own registered PT state and LWF state, set up when the employer was added. These two fields exist only for the exception: an employee who works in a different state from that registration.
- PT Work State — leave as “Not set” to use the employer’s registered PT state. Set it only if this employee’s actual place of work is a different state, so AuditorTax applies that state’s PT rules to them instead.
- LWF Work State — the same idea, for Labour Welfare Fund. Leave as “Not set” to use the employer’s registered LWF state; set it only if the employee works in a different one. Its dropdown lists fewer states than PT Work State’s does — not every state levies LWF, and the shorter list reflects that.
Getting this wrong has a real effect: PT and LWF rates, and whether they’re levied at all, vary by state. If an employee genuinely works in a different state from the employer’s registration and this is left unset, AuditorTax will calculate their PT and LWF using the wrong state’s rules instead of the state they actually work in.
12. Click “Save and Continue”
Section titled “12. Click “Save and Continue””This moves you to the Bank & Address step.
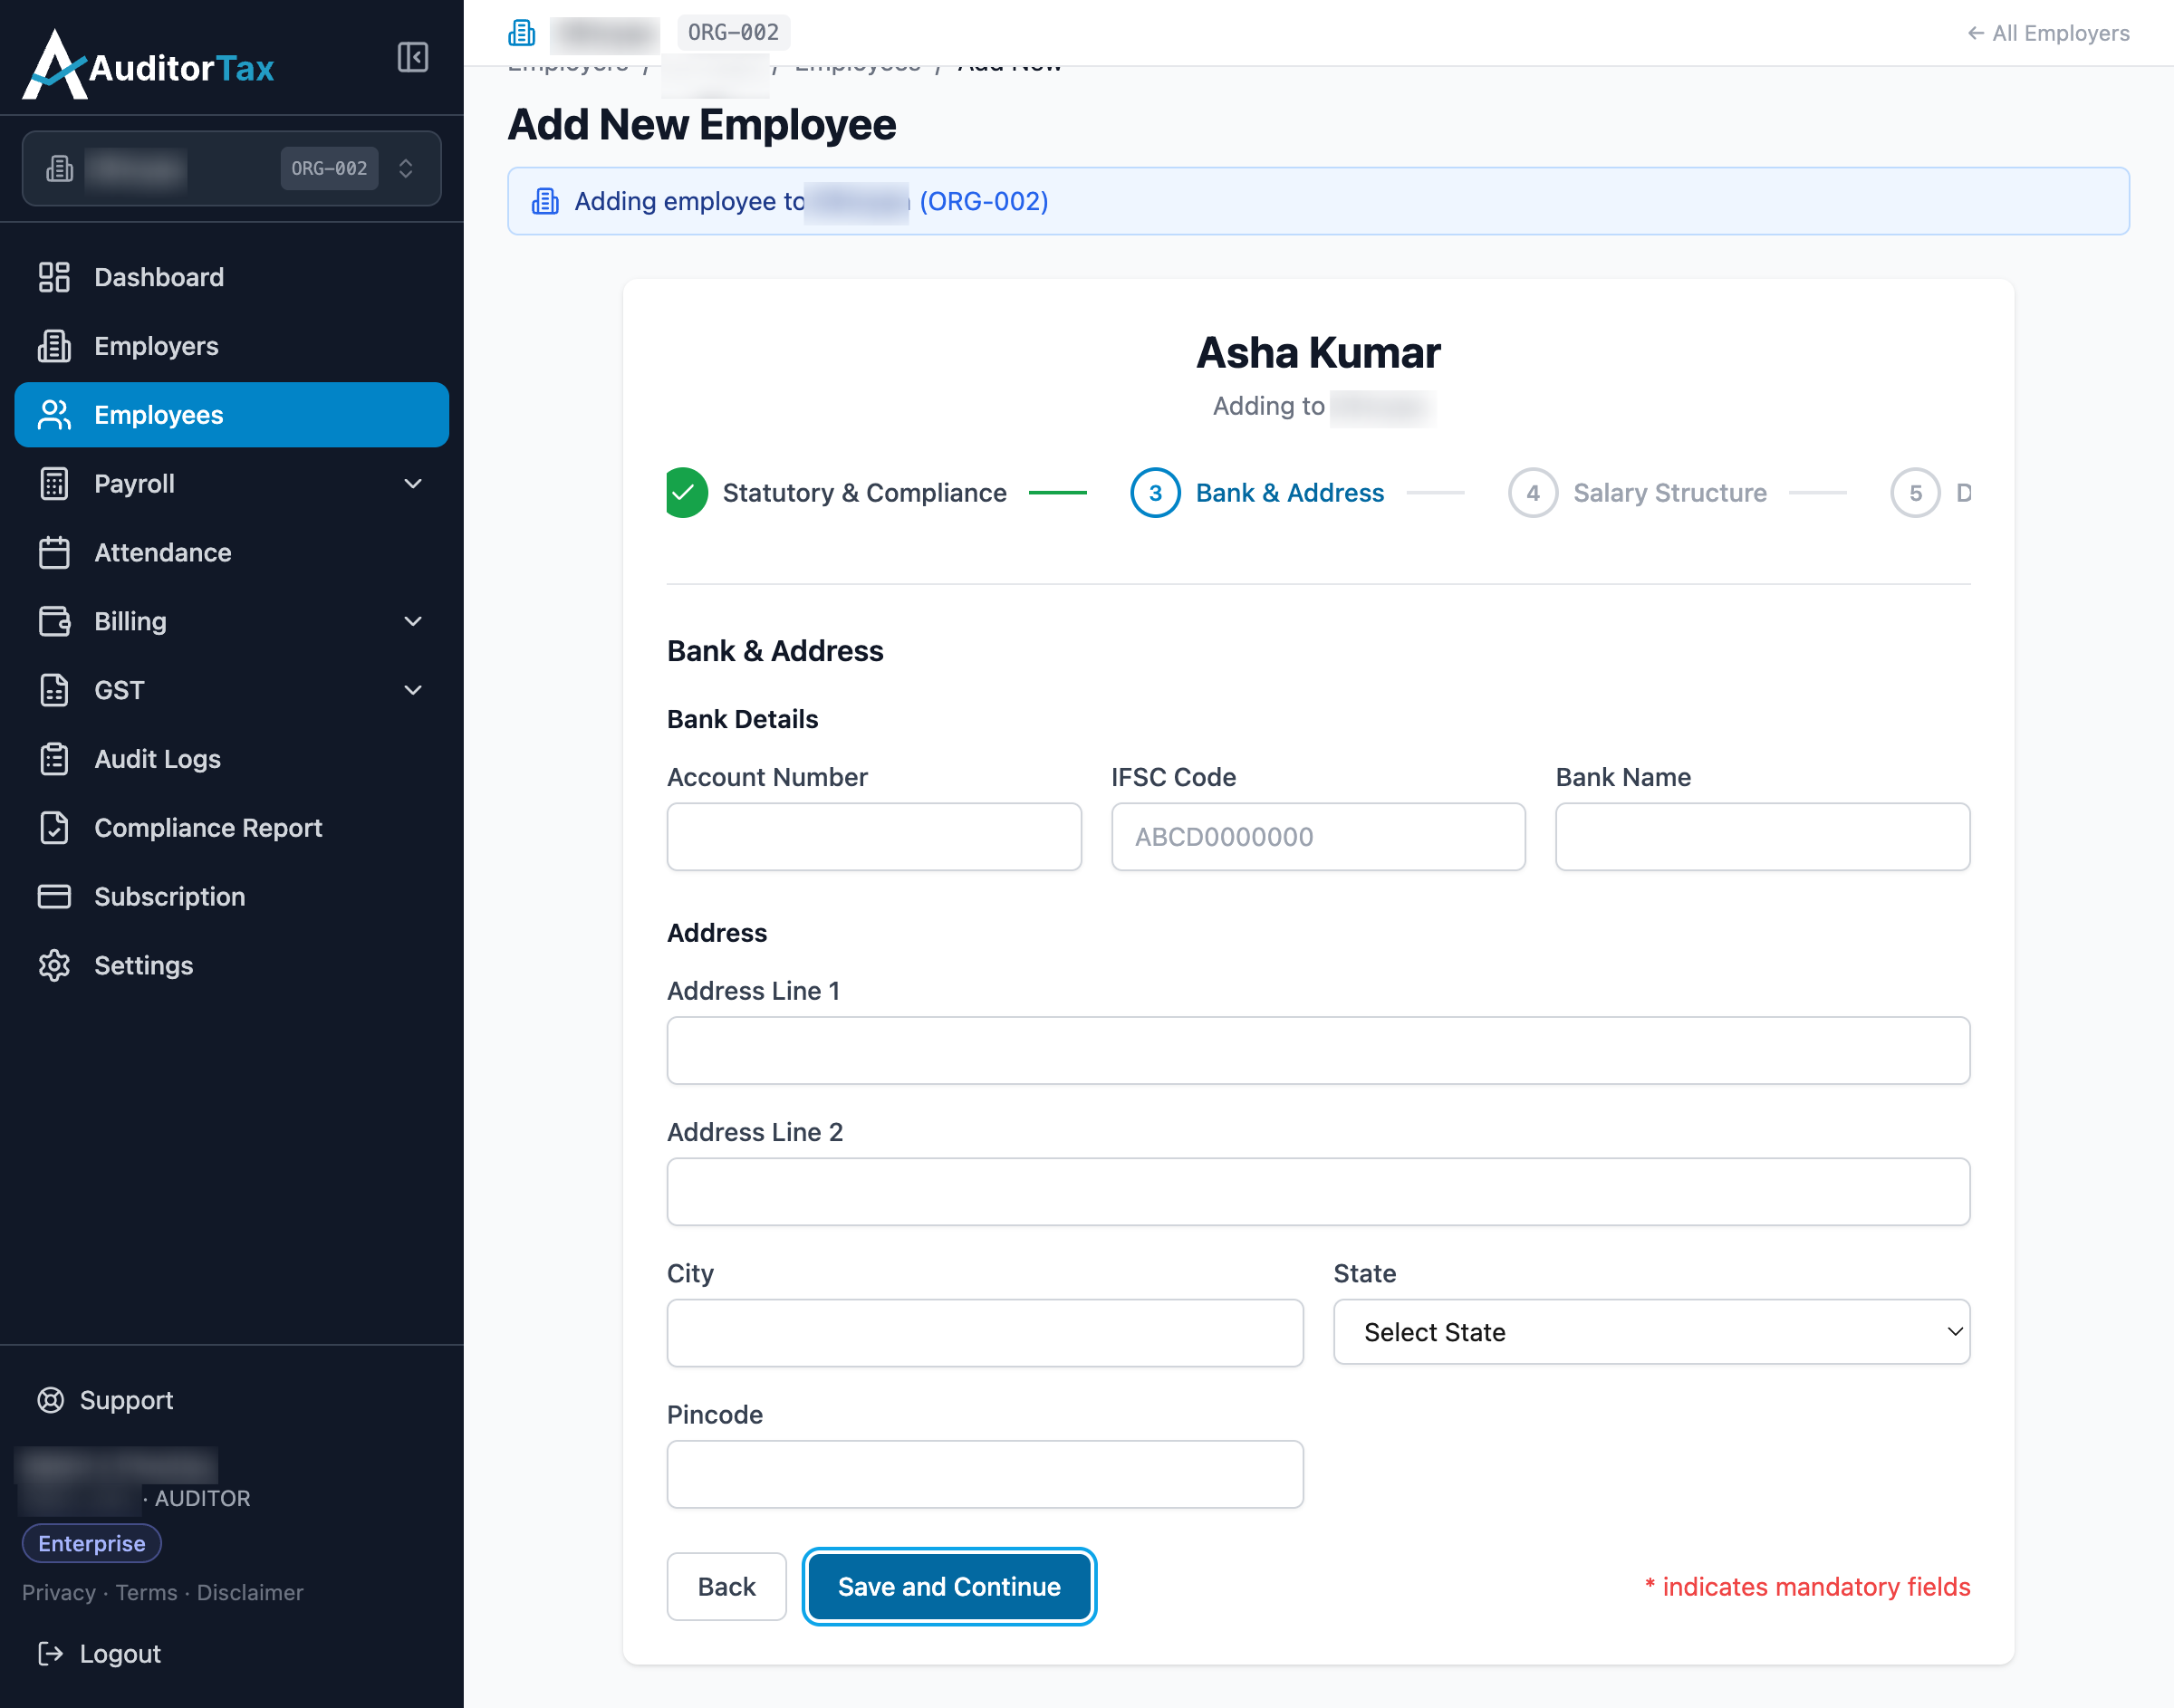
13. Bank and address details are optional here too
Section titled “13. Bank and address details are optional here too”Add them now if you have them to hand; otherwise it’s fine to come back to this later from the employee’s Edit page — a missing bank account does not stop payroll from running for this employee. Confirmed by continuing through this step with everything left blank: the wizard moved straight on to the next step without any warning.
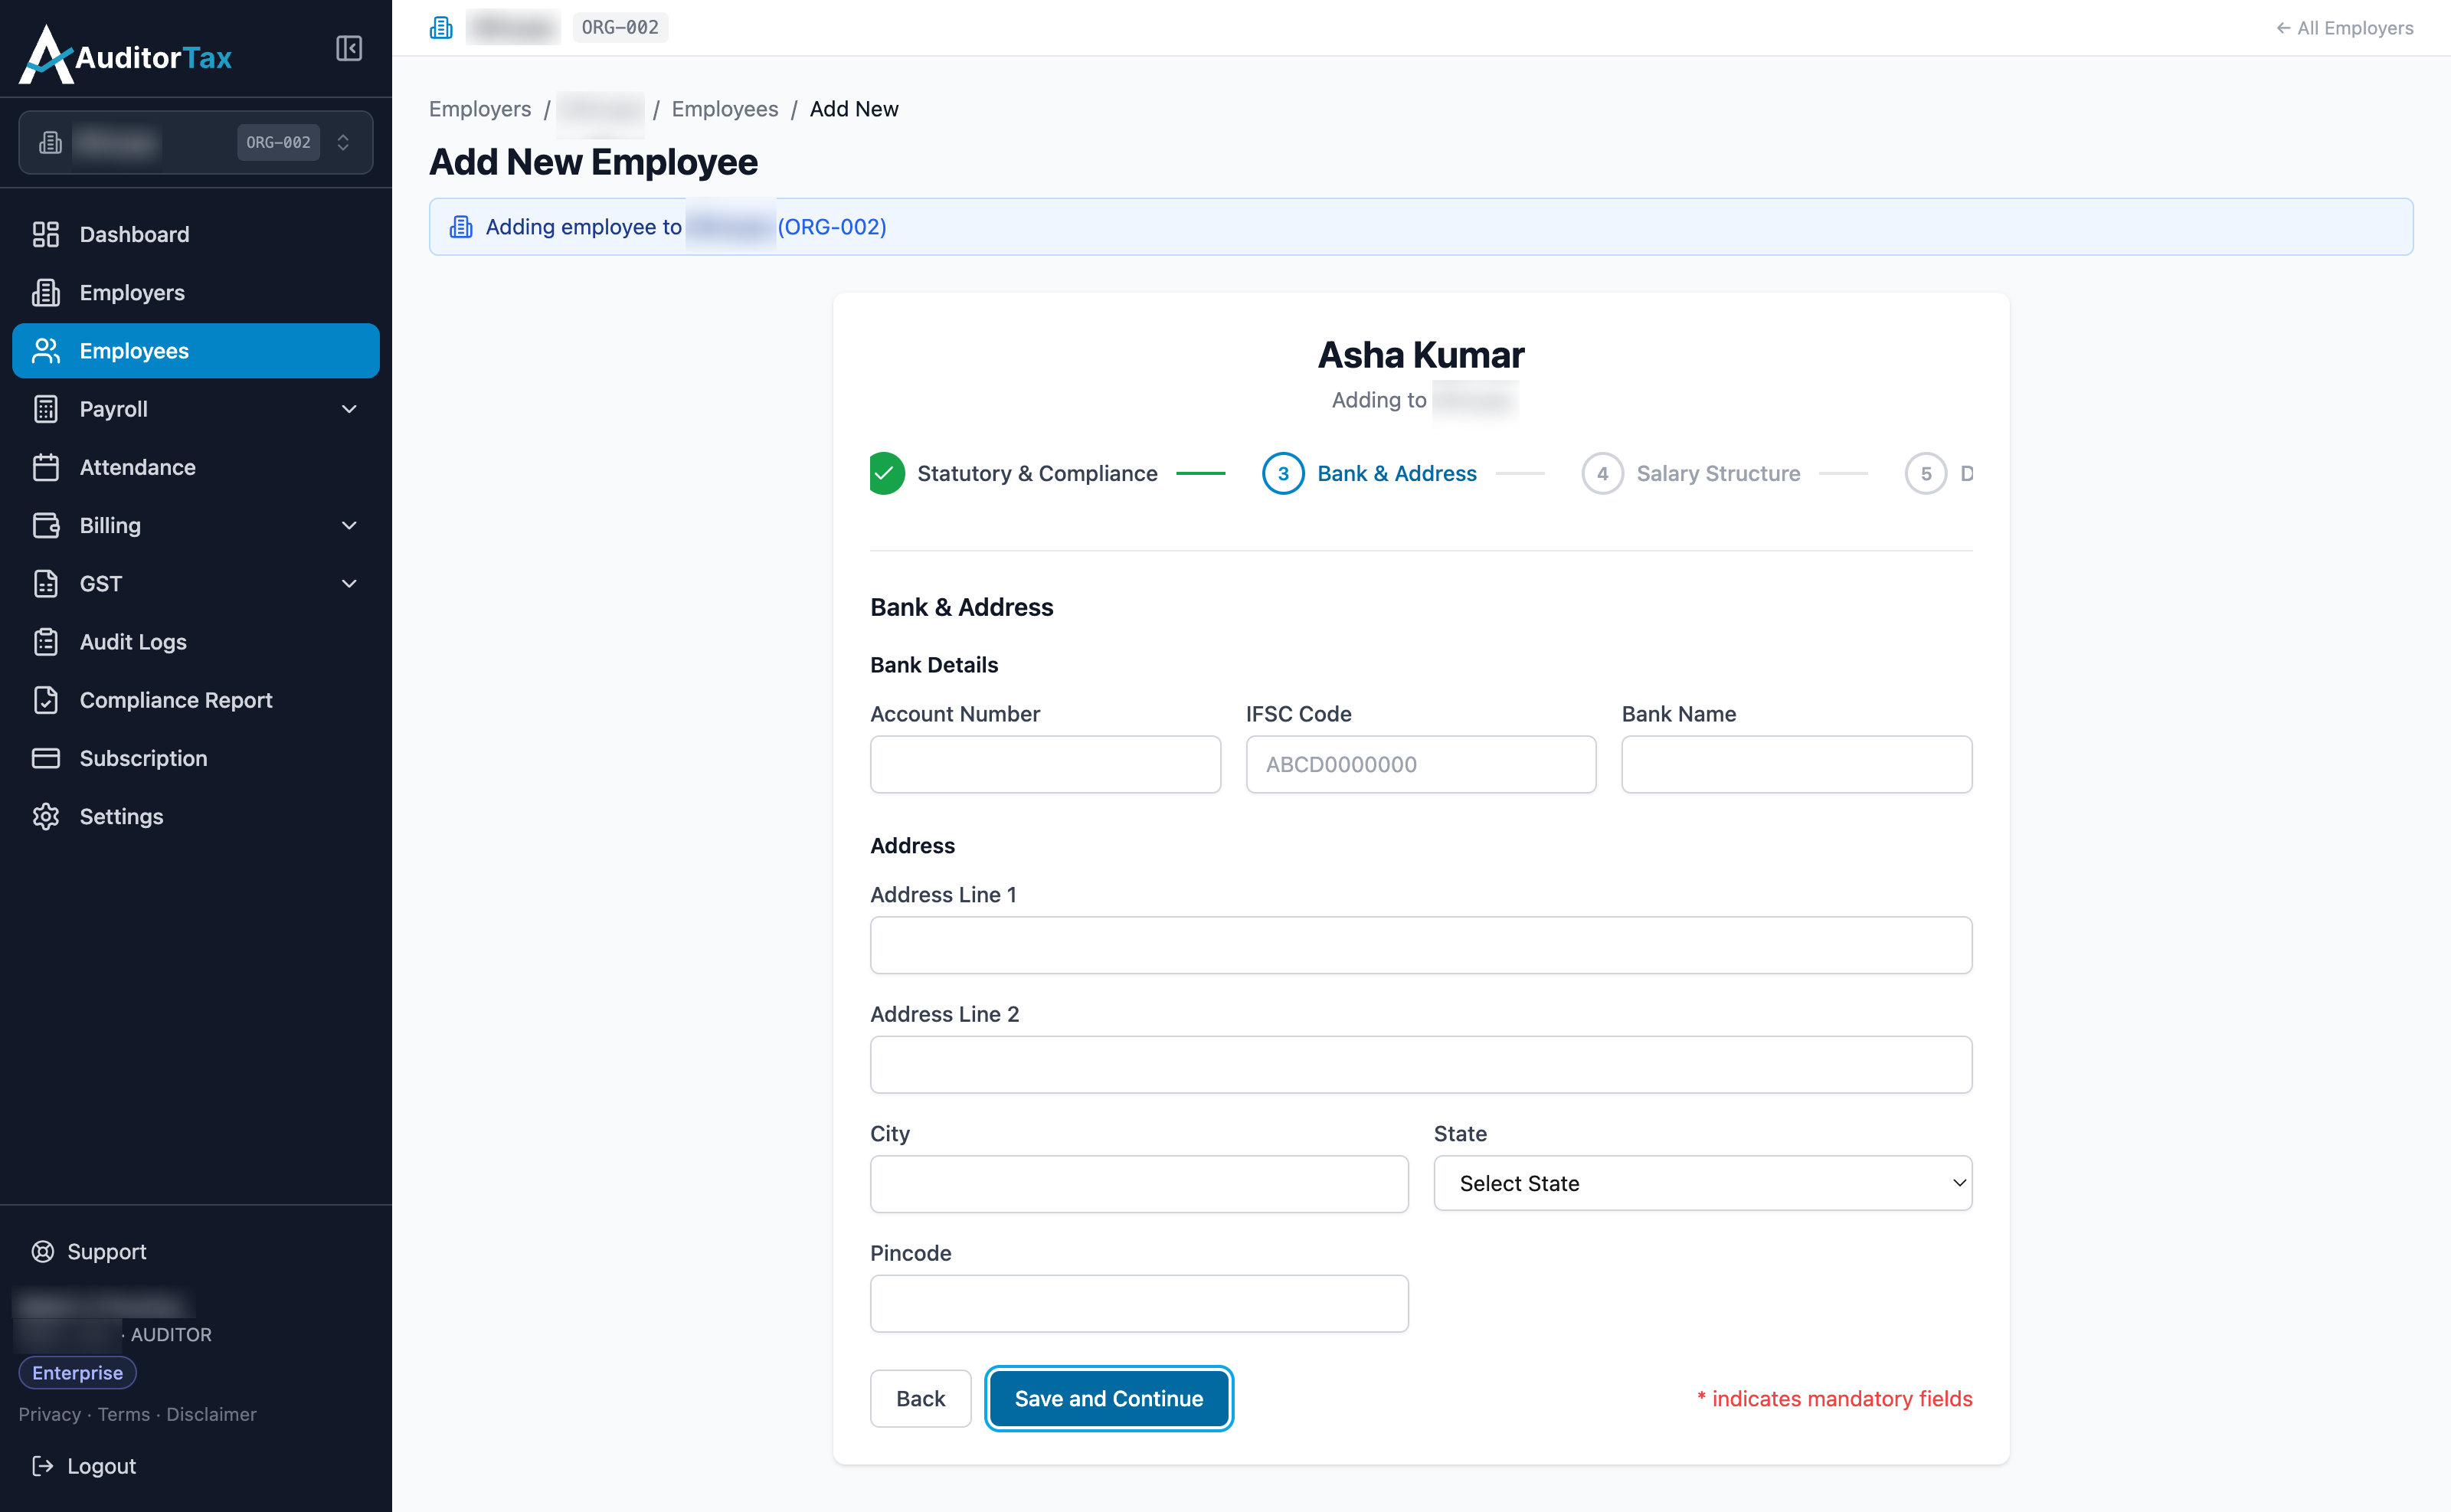
Address (Address Line 1/2, City, State, Pincode) has no similar effect on calculations — it’s the employee’s residential address for records and payslips, and it’s separate from the PT Work State and LWF Work State fields set on the previous step, which are what actually determine tax jurisdiction.
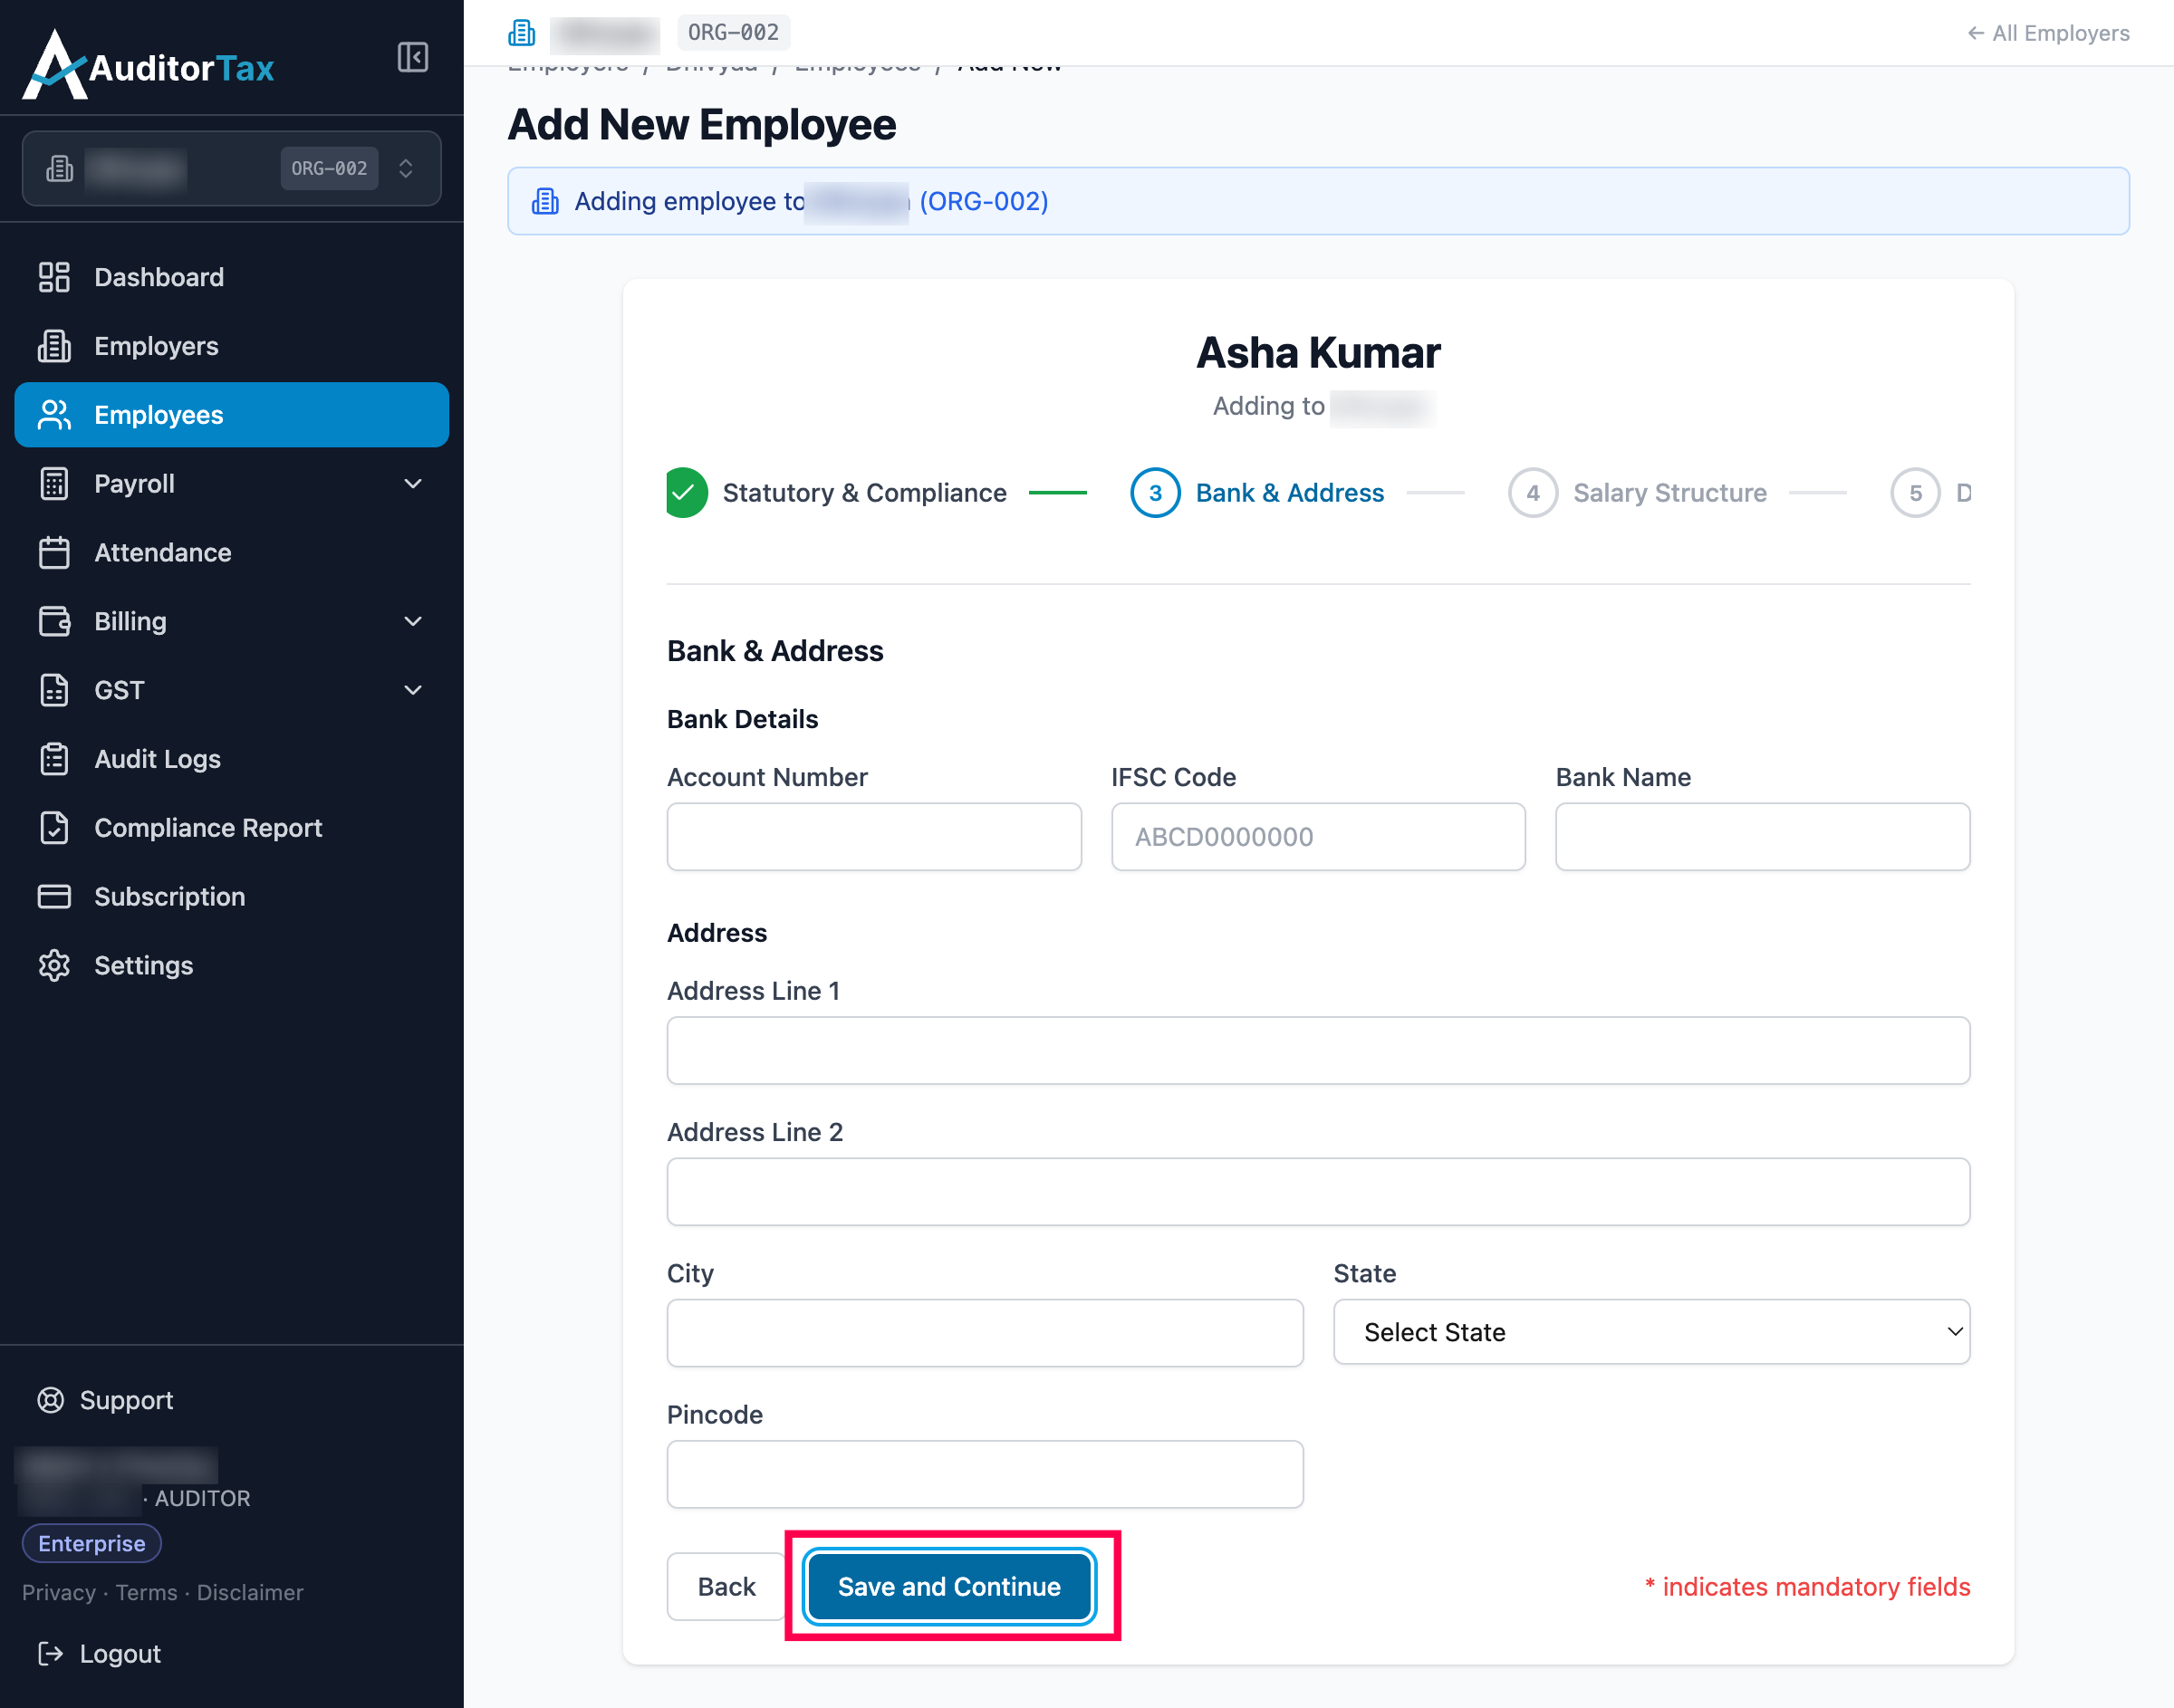
14. Click “Save and Continue”
Section titled “14. Click “Save and Continue””This moves you to the Salary Structure step.
15. Choose a Salary Structure, or add the employee to an Employee Group instead
Section titled “15. Choose a Salary Structure, or add the employee to an Employee Group instead”This step decides how the employee’s pay is actually put together, and it’s a choice between two different mechanisms. The on-screen note explains it directly: “Assign a salary structure directly, or add the employee to a group (group structure is inherited).” Only one applies at a time — as confirmed on the next step, picking an Employee Group clears the Salary Structure field back to ”— None —”, and vice versa.
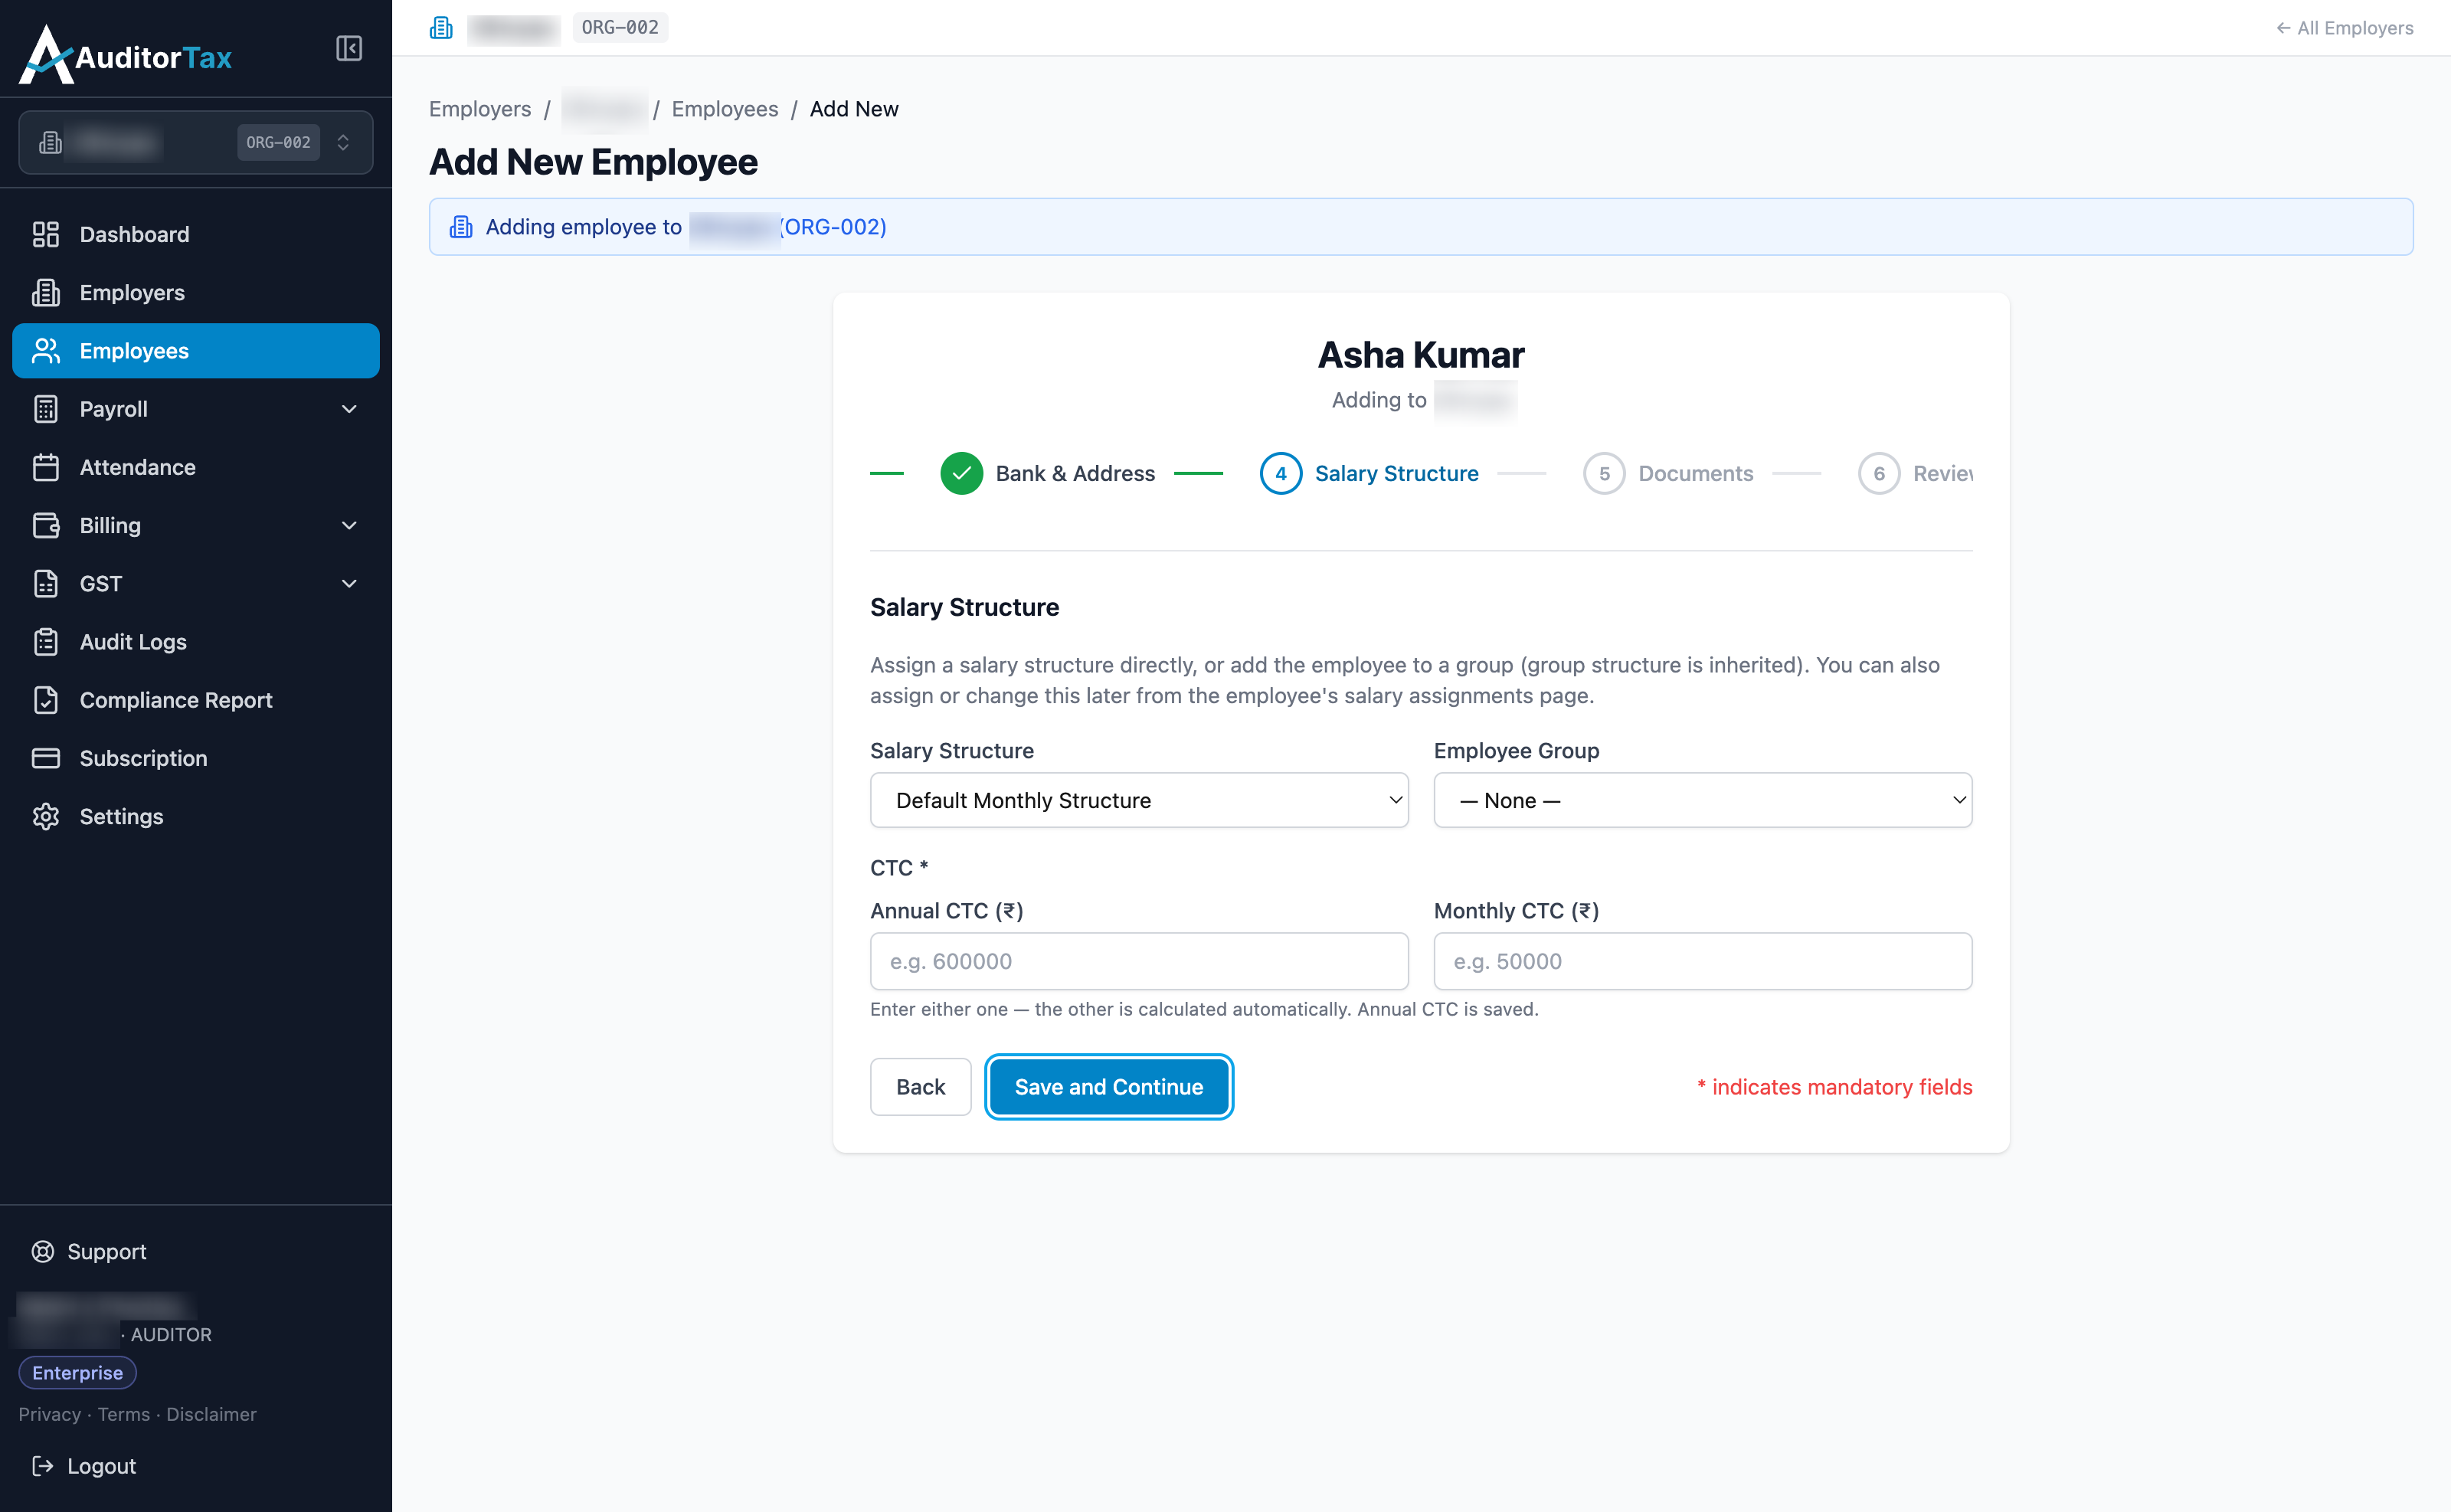
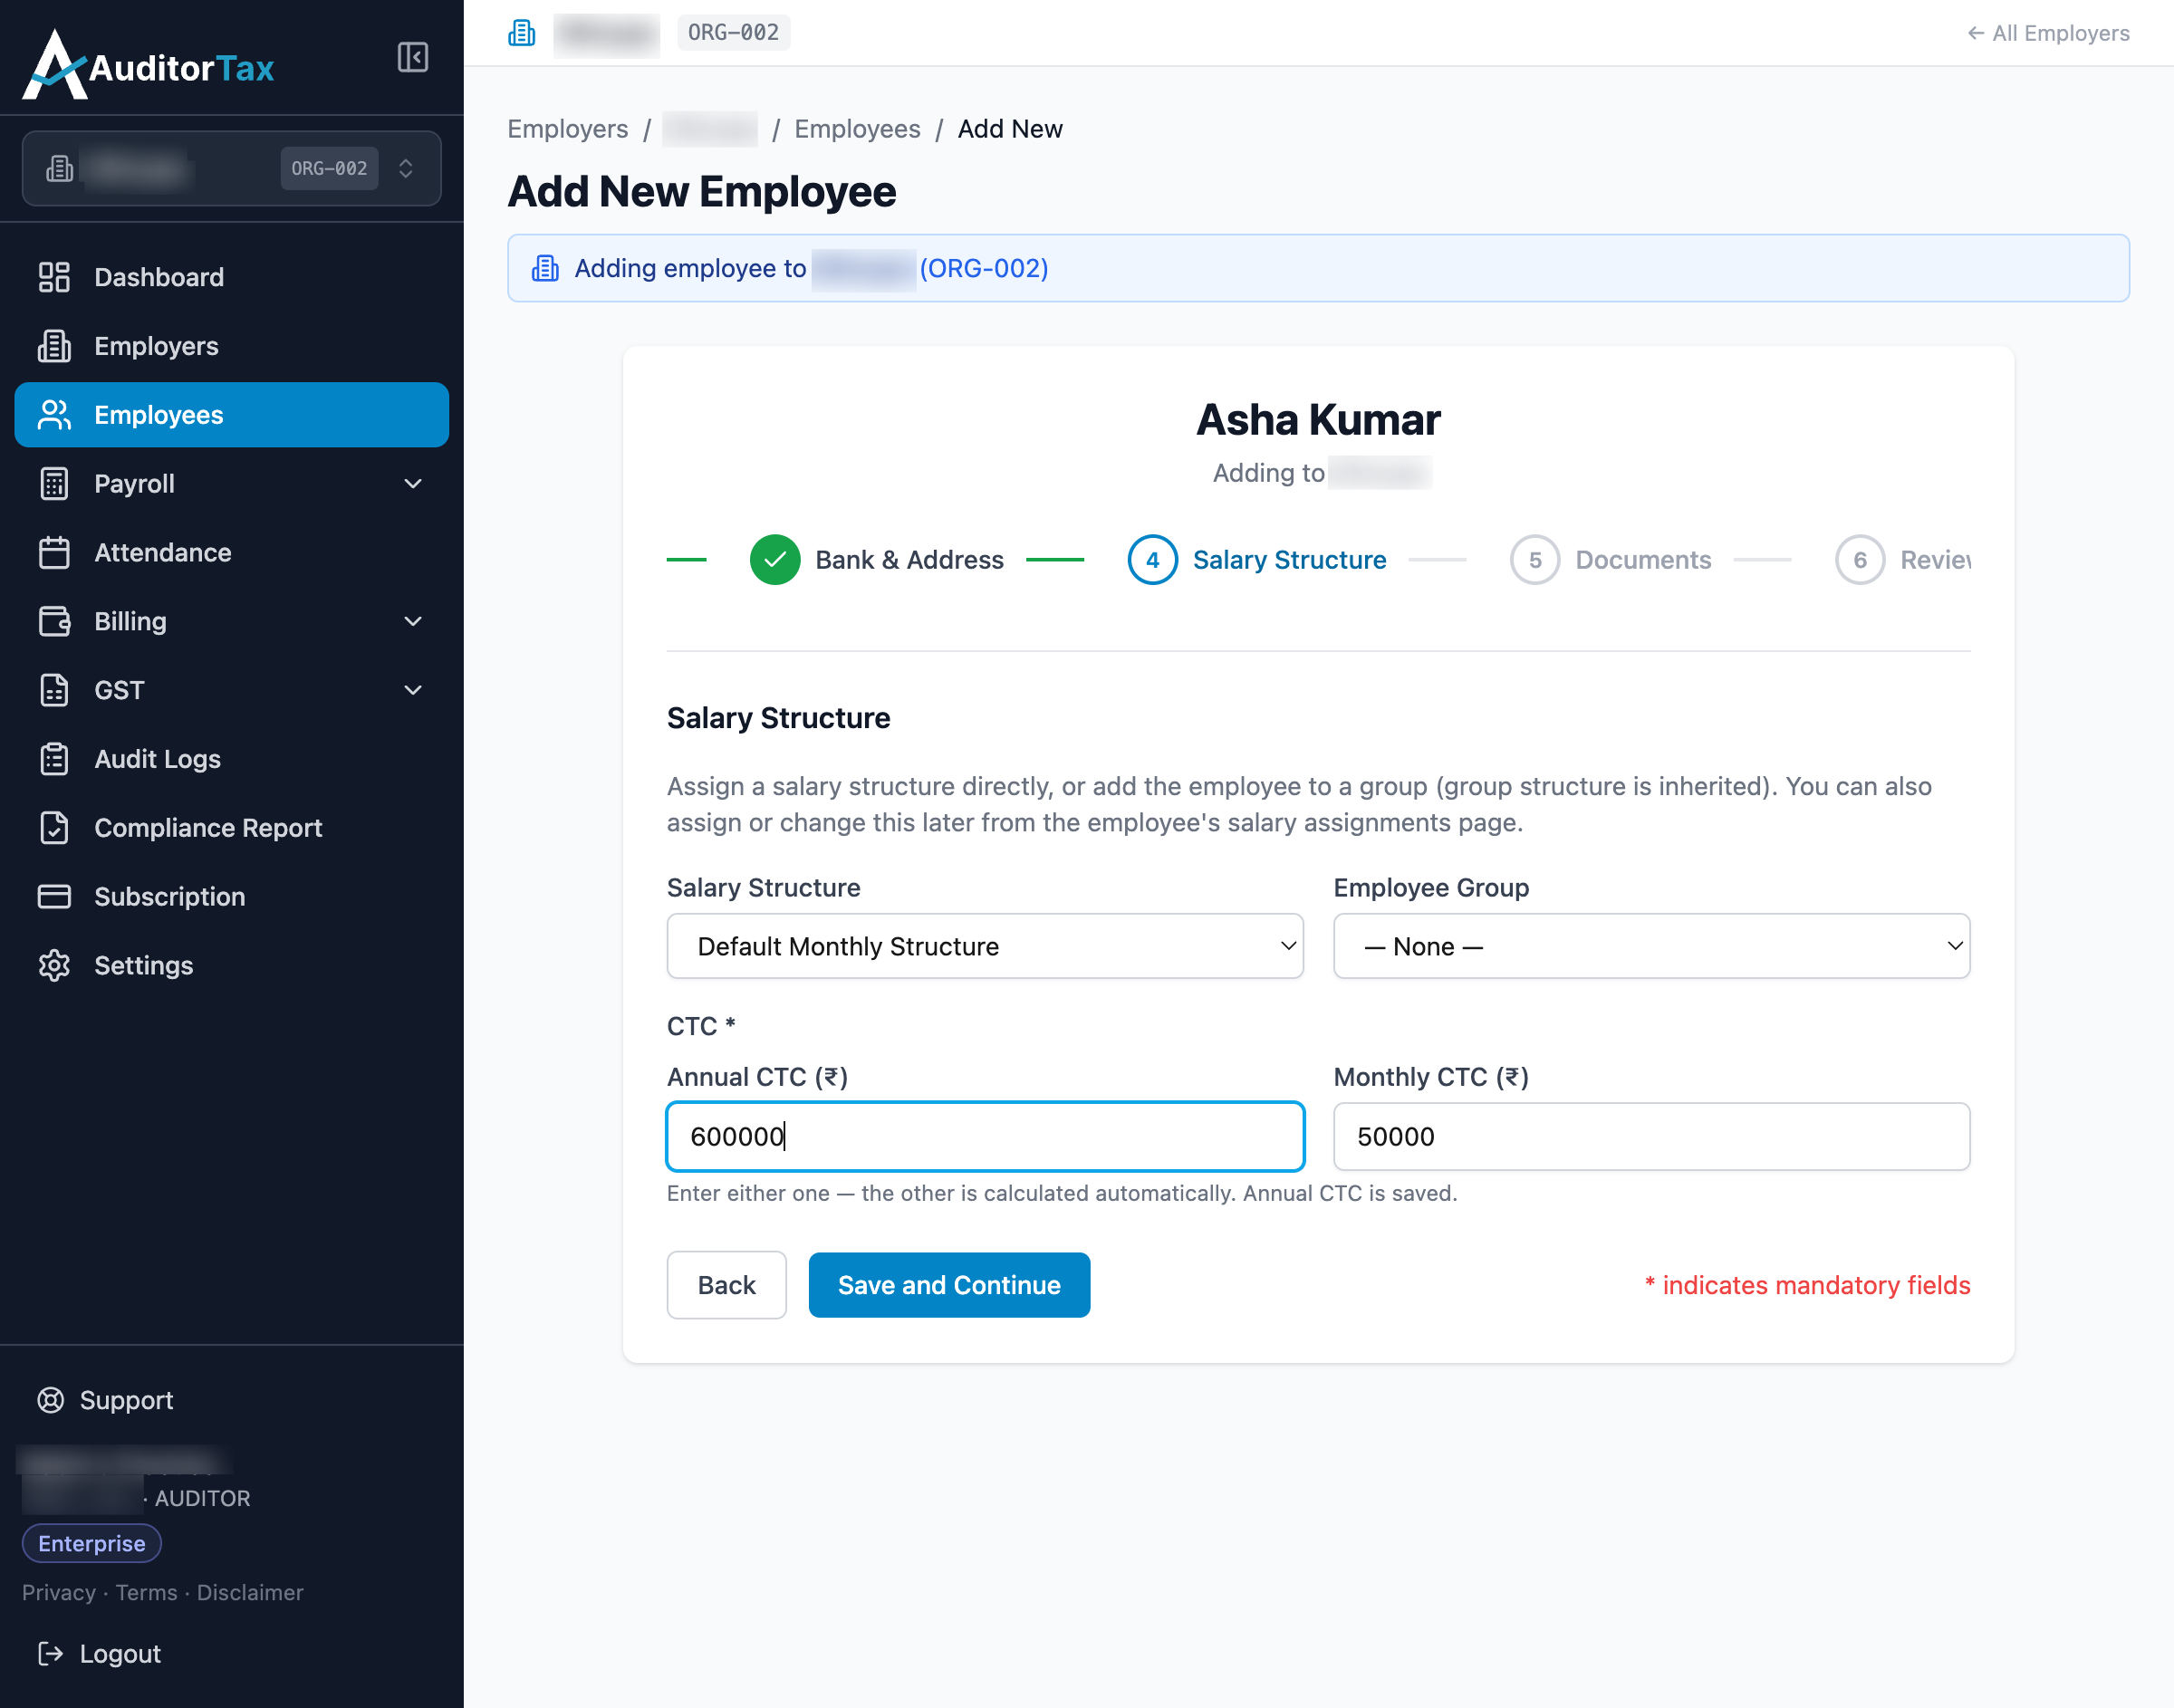
A Salary Structure is a reusable template AuditorTax uses to split a salary into components — Basic, HRA, DA, and whatever else the employer has configured — instead of every component being entered by hand for every employee. “Default Monthly Structure”, the one pre-selected here, works from a percentage of CTC (e.g. Basic set to a fixed share of CTC) and is why this screen asks for this employee’s CTC next. This employer also has a second structure, “Fixed Monthly Structure”, built the other way — flat rupee amounts per component instead of a CTC percentage — covered in step 18 below.
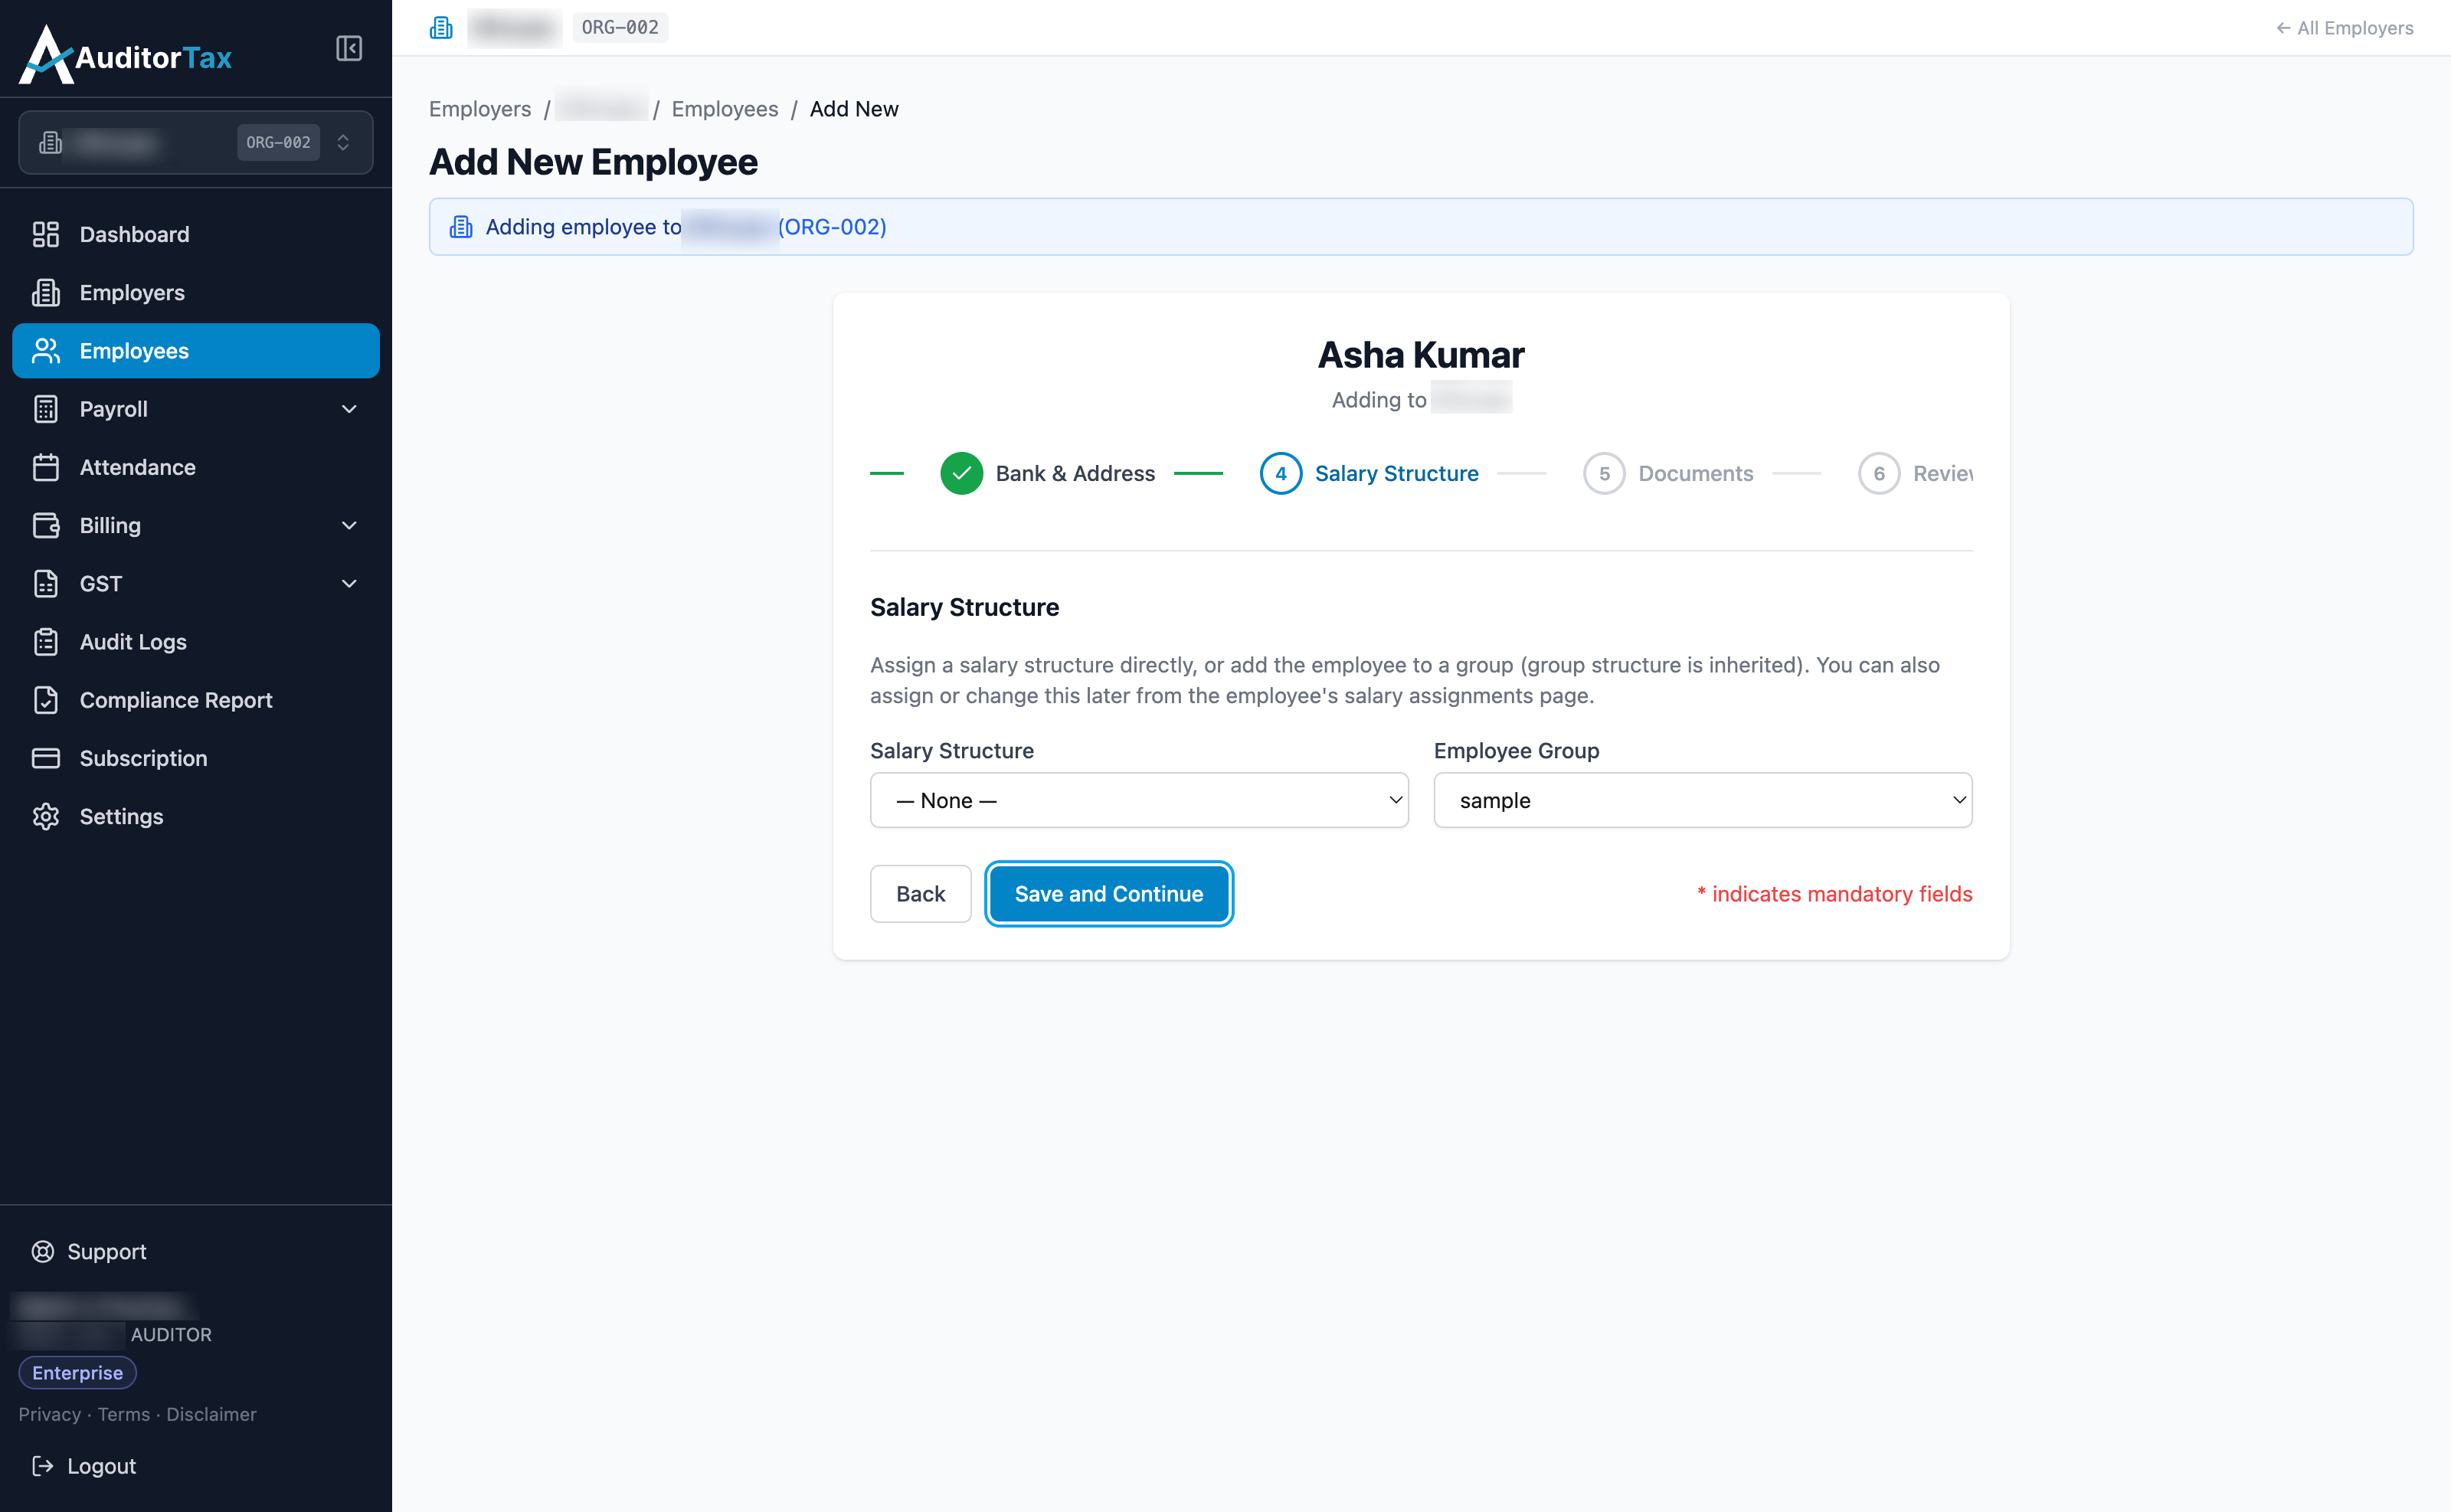
16. Picking an Employee Group instead skips CTC entry here
Section titled “16. Picking an Employee Group instead skips CTC entry here”An Employee Group is the alternative to a Salary Structure: a named group of employees who all share one salary structure automatically. Selecting a group — “sample”, in this employer’s case — immediately clears Salary Structure back to ”— None —” and removes the CTC fields from this screen entirely, since the group’s own structure supplies the pay amounts instead.
17. Enter the employee’s Annual CTC
Section titled “17. Enter the employee’s Annual CTC”This is the only required field on this step — and it only appears when a Salary Structure like “Default Monthly Structure” is selected, not when an Employee Group is. AuditorTax works out Basic/HRA/DA from the CTC you enter, using that structure’s percentages; you can enter either the annual or monthly figure, and the other is calculated automatically.
If you’d rather not decide on a Salary Structure or Employee Group just yet, that’s fine — leaving both as ”— None —” on the previous step still lets you create the employee, just without a salary assigned. It can be added whenever it’s ready, from the employee’s salary assignments page, and doesn’t need to hold up creating the record now. One thing worth knowing in the meantime: until a salary is assigned, AuditorTax includes the employee in payroll runs with earnings set to zero, rather than leaving them out or raising an error. It’s a quiet zero rather than a blocking one, so it’s worth double-checking before assuming a structure was assigned.
18. Picking a Fixed-type structure replaces CTC with per-component amount fields
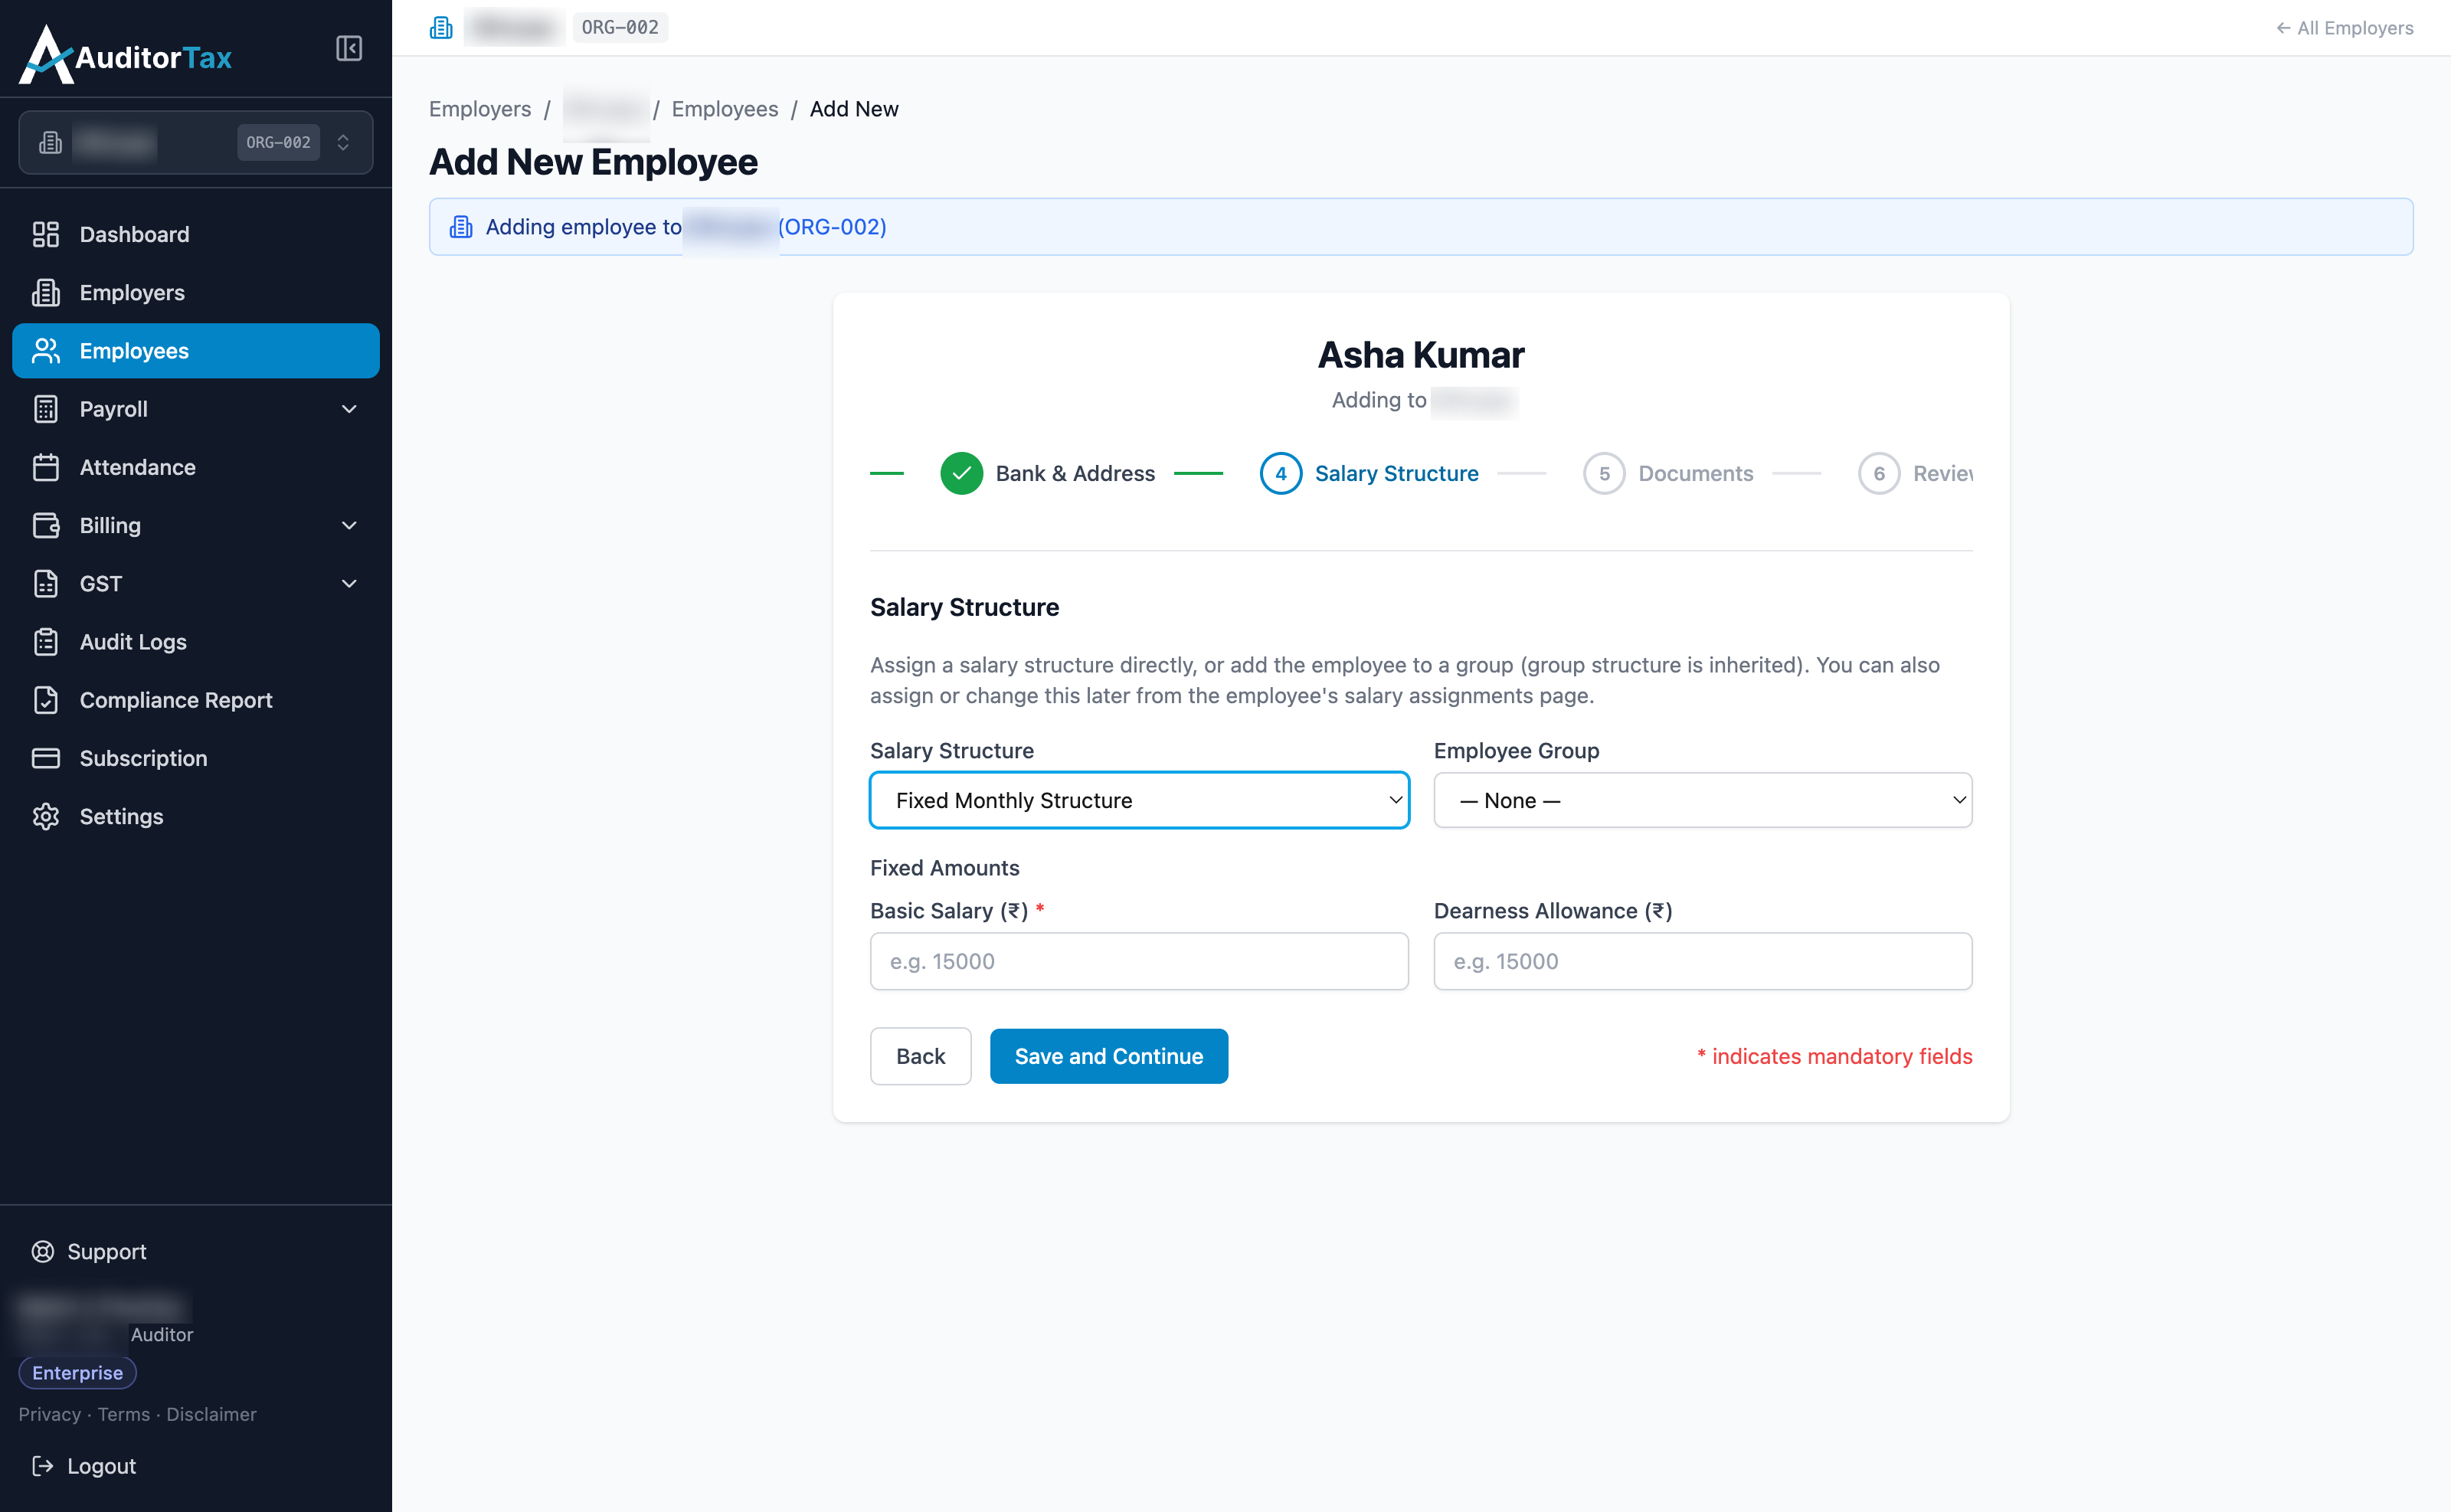
Section titled “18. Picking a Fixed-type structure replaces CTC with per-component amount fields”Selecting “Fixed Monthly Structure” instead of “Default Monthly Structure” swaps the Annual CTC field for a “Fixed Amounts” section, with one rupee-amount input per component the structure carries — in this employer’s case, “Basic Salary (₹)” (required) and “Dearness Allowance (₹)” (optional). There’s no CTC entry at all: whatever you type into these boxes is this employee’s actual monthly amount for that component, not a share of a total that AuditorTax works out for you.
Where “Fixed Monthly Structure” itself comes from: Go to Payroll → Salary Structures → Edit Structure (or “New Structure”). Two settings there are what make it behave this way instead of like “Default Monthly Structure”:
- The “Basic % of CTC” field is left blank (“leave blank for grade-based” is the field’s own hint), instead of being set to a percentage like Default Monthly Structure’s 40%.
- Each component added under “Selected Components” (BASIC, DA) is toggled to “Fixed” rather than “Formula” — a per-component switch right next to it — instead of carrying a CTC-based expression like Default Monthly Structure’s components do.
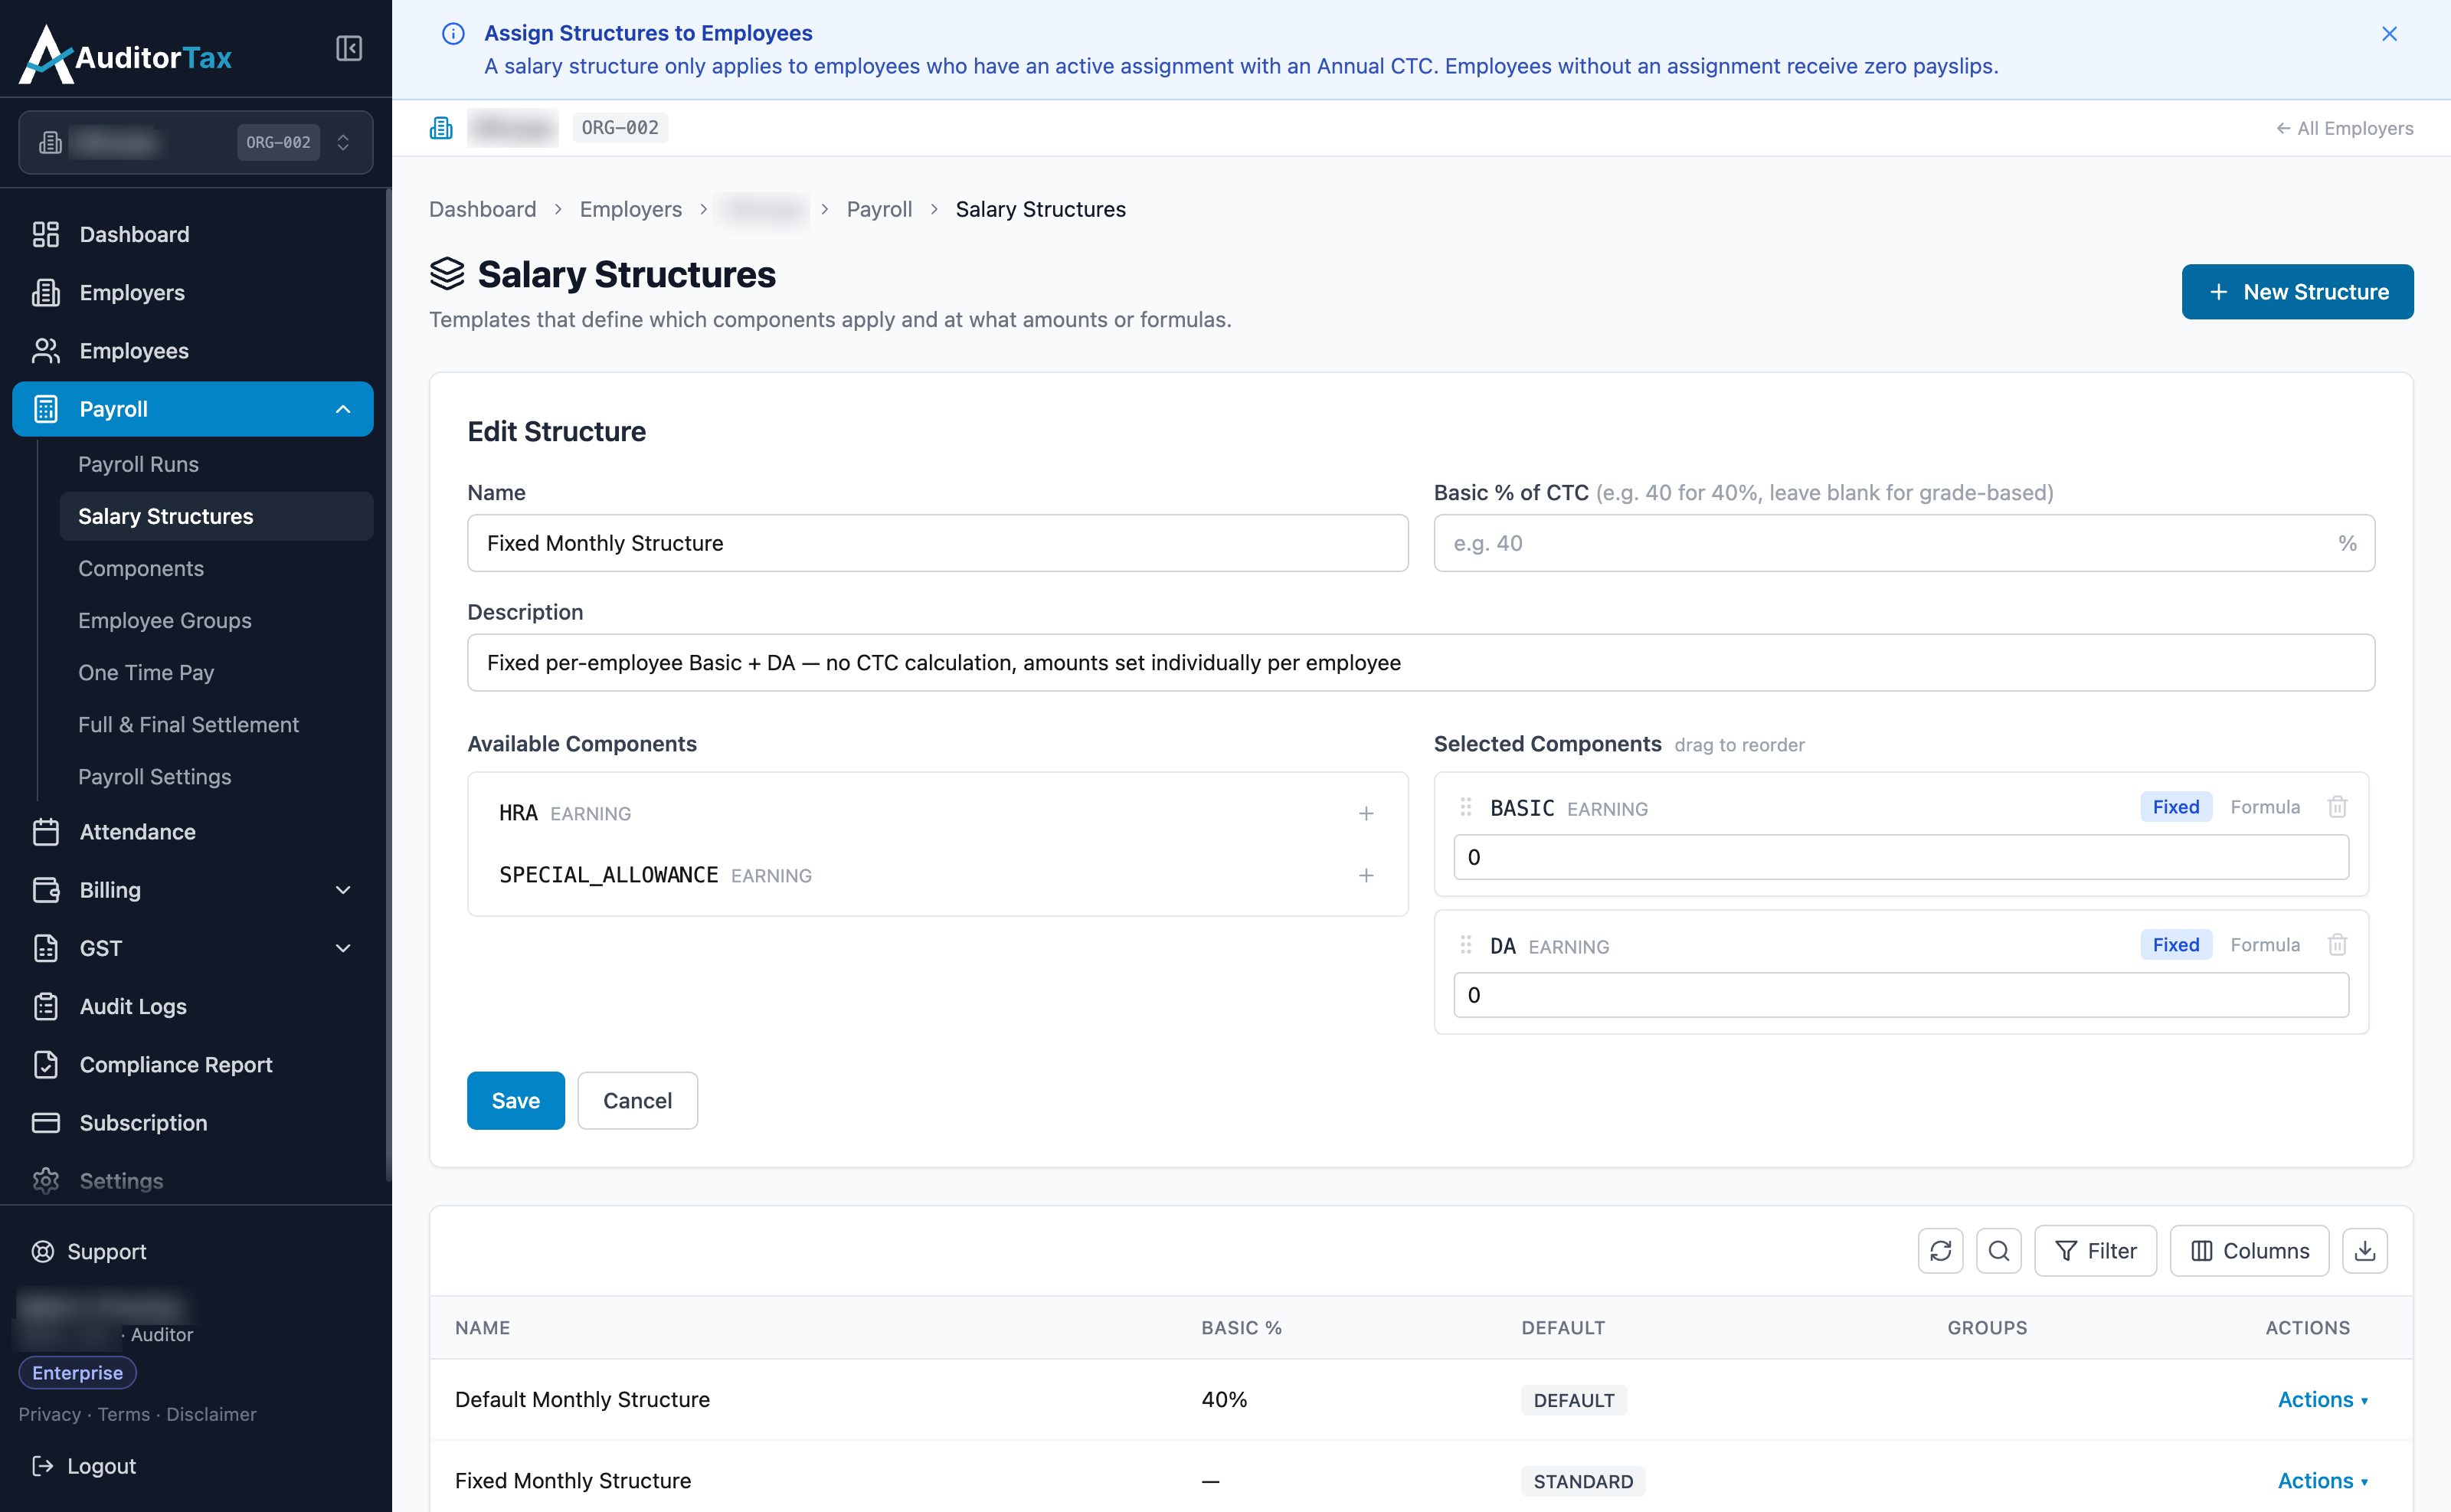
Once a component is toggled to Fixed here, every employee later assigned this structure gets that component’s “Fixed Amounts” input in their own Salary Structure step — same mechanism as step 18 above, just per employee instead of per structure.
19. Click “Save and Continue”
Section titled “19. Click “Save and Continue””This moves you to the Documents step.
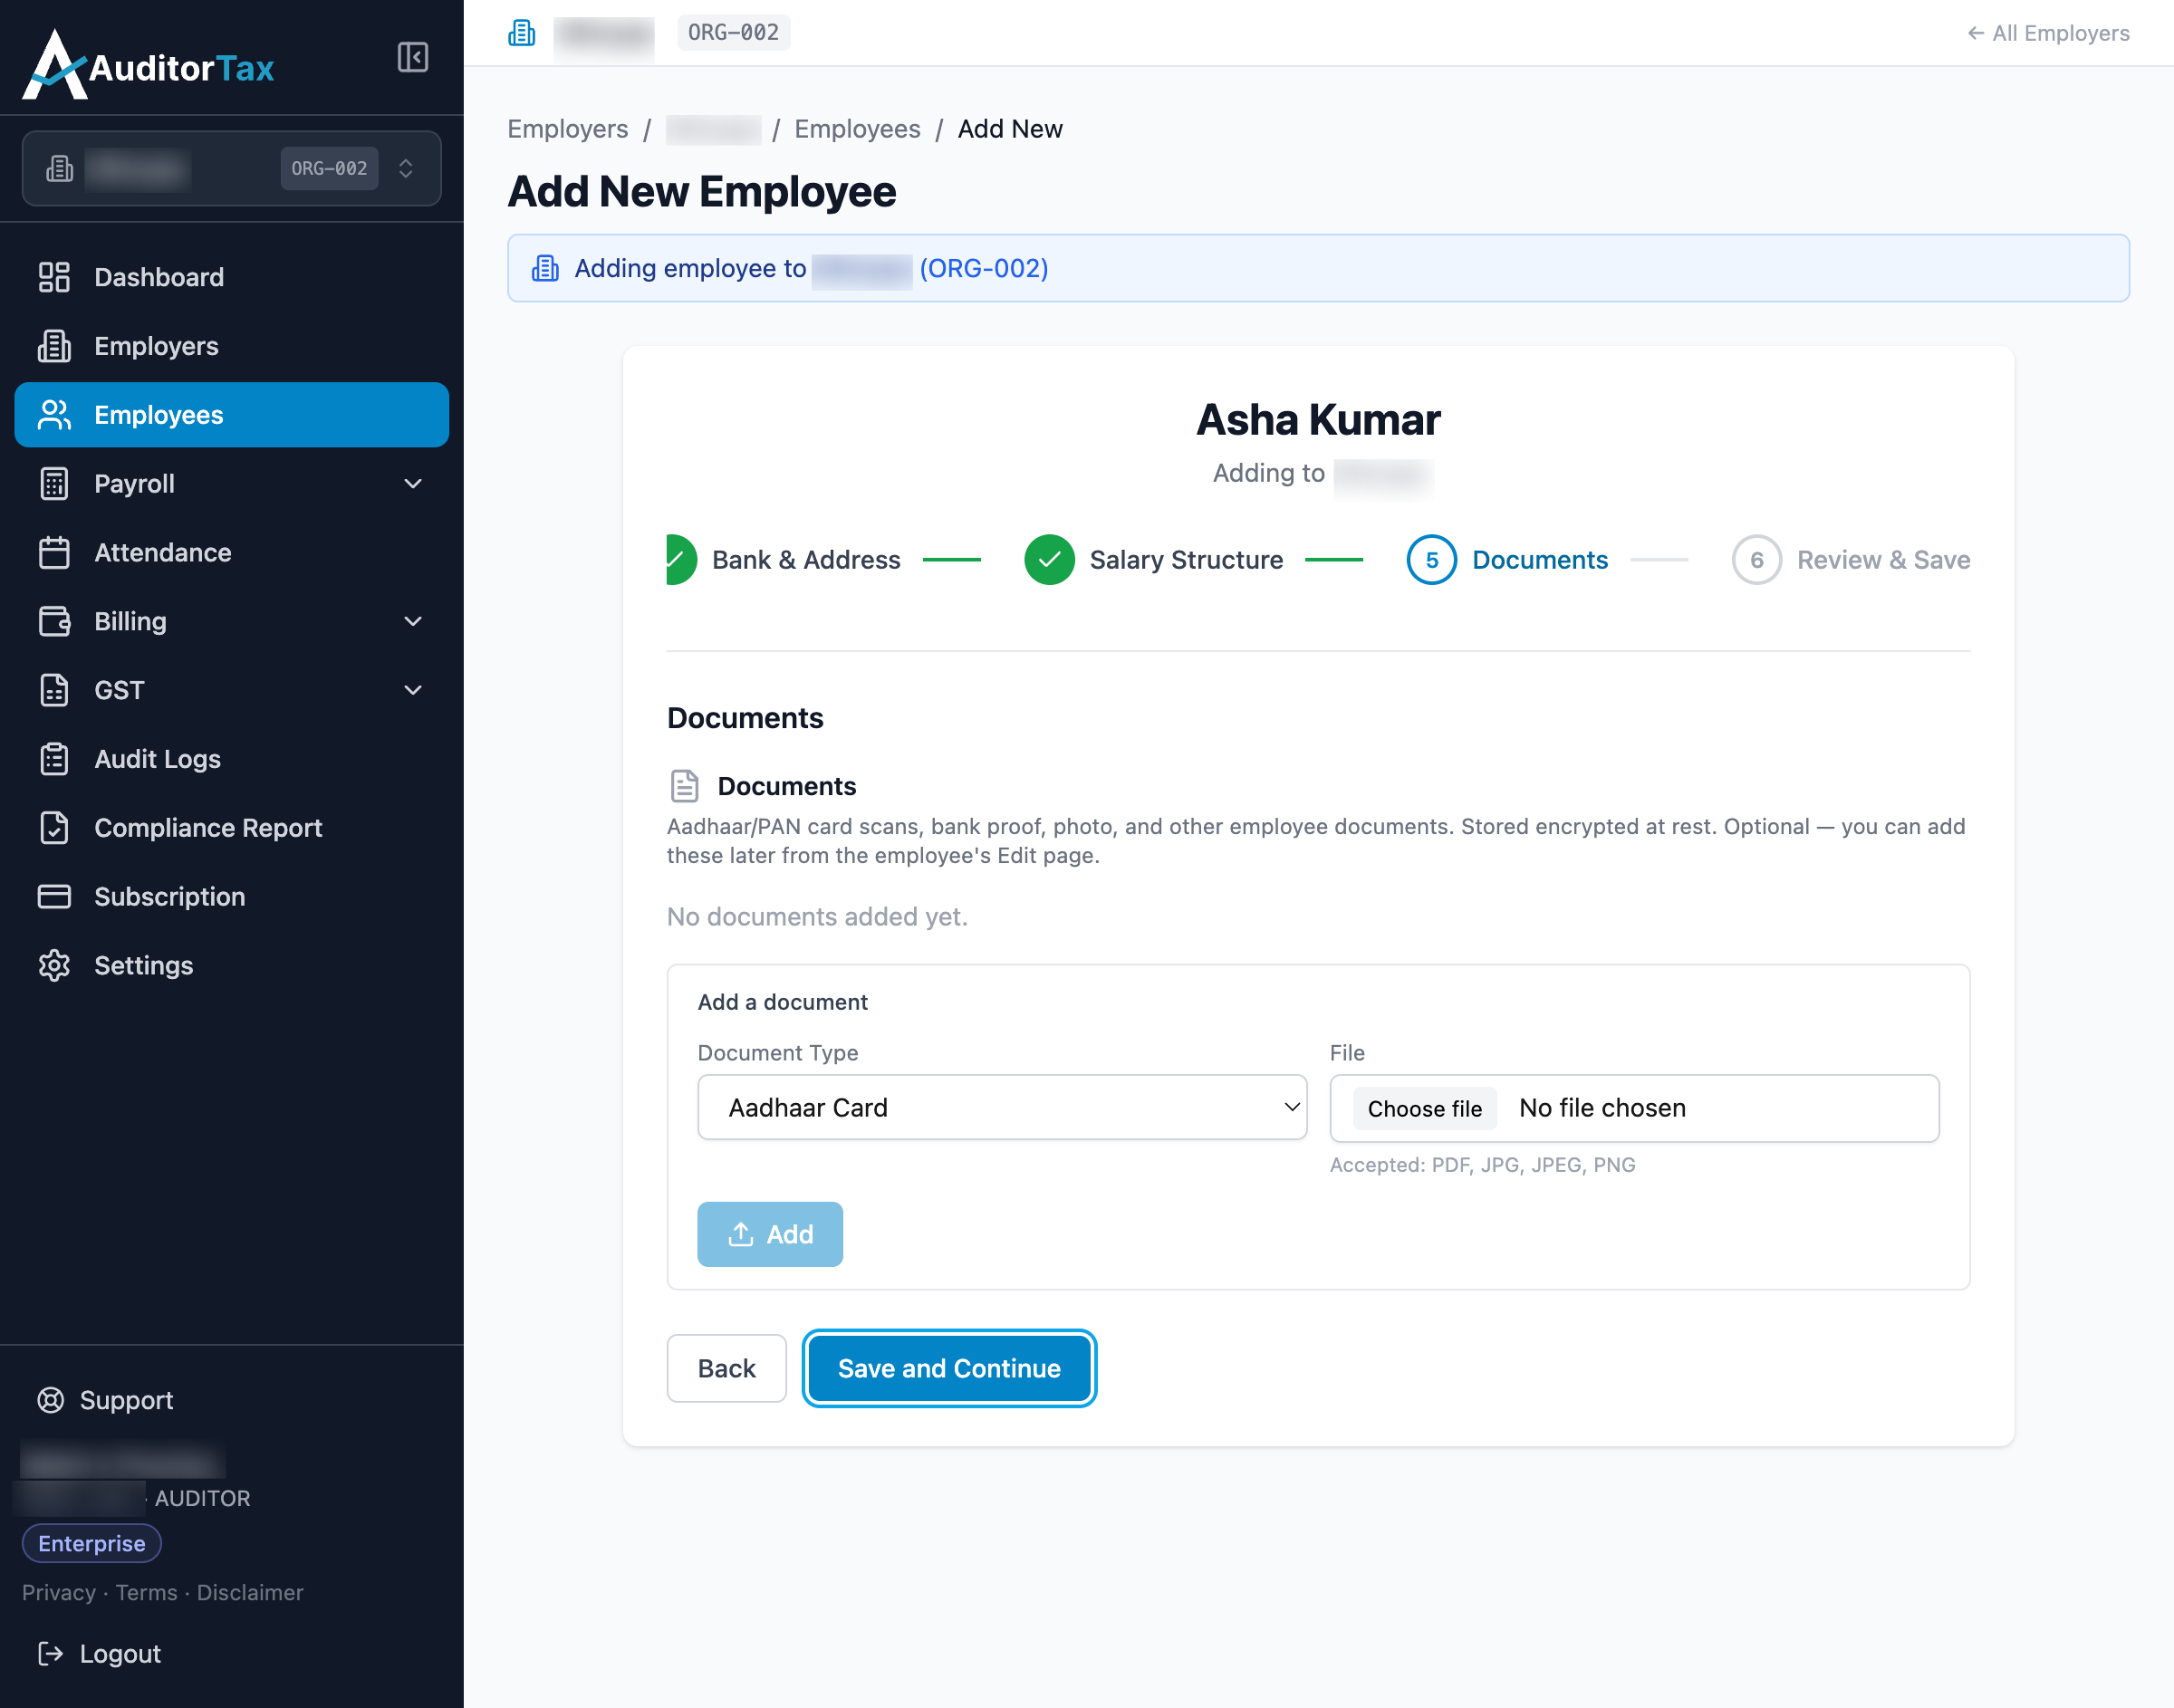
20. Documents are optional at this point
Section titled “20. Documents are optional at this point”Uploading Aadhaar/PAN scans, bank proof, or a photo isn’t required here — if they’re not ready yet, that’s fine, they can be added whenever it’s convenient from the employee’s Edit page.
21. Click “Save and Continue”
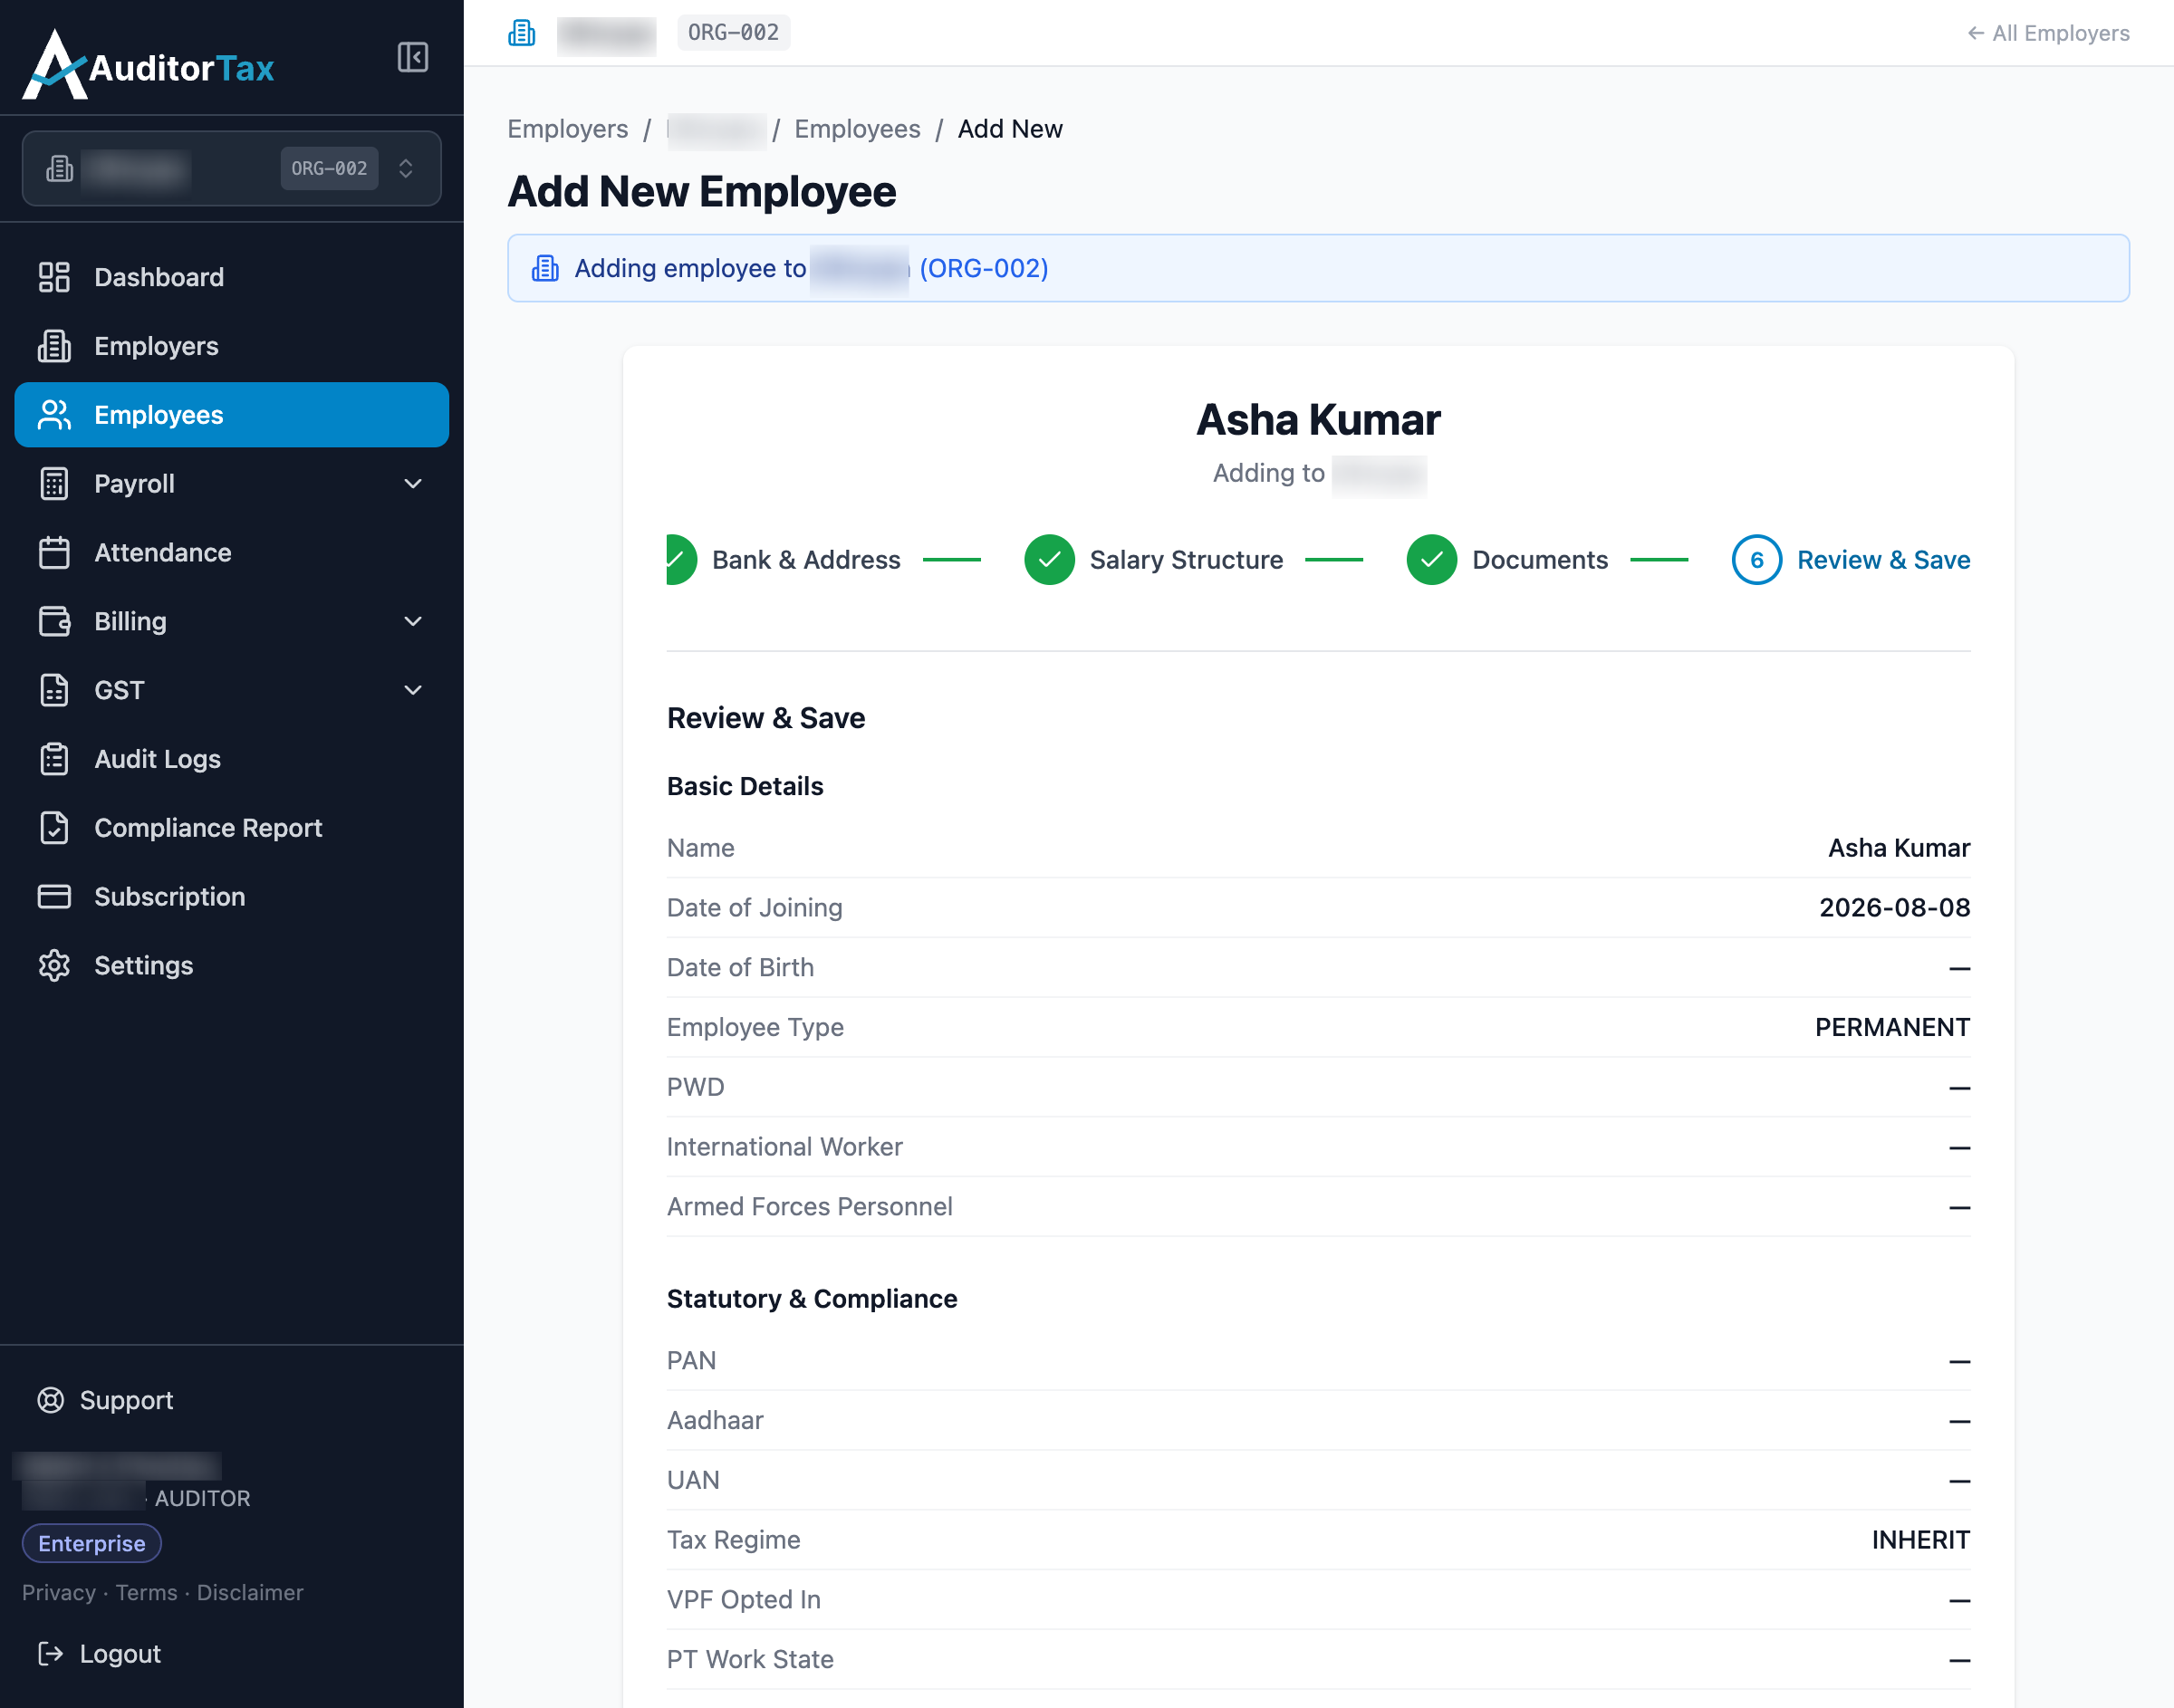
Section titled “21. Click “Save and Continue””This moves you to the Review & Save step, which summarizes everything entered across the previous steps.
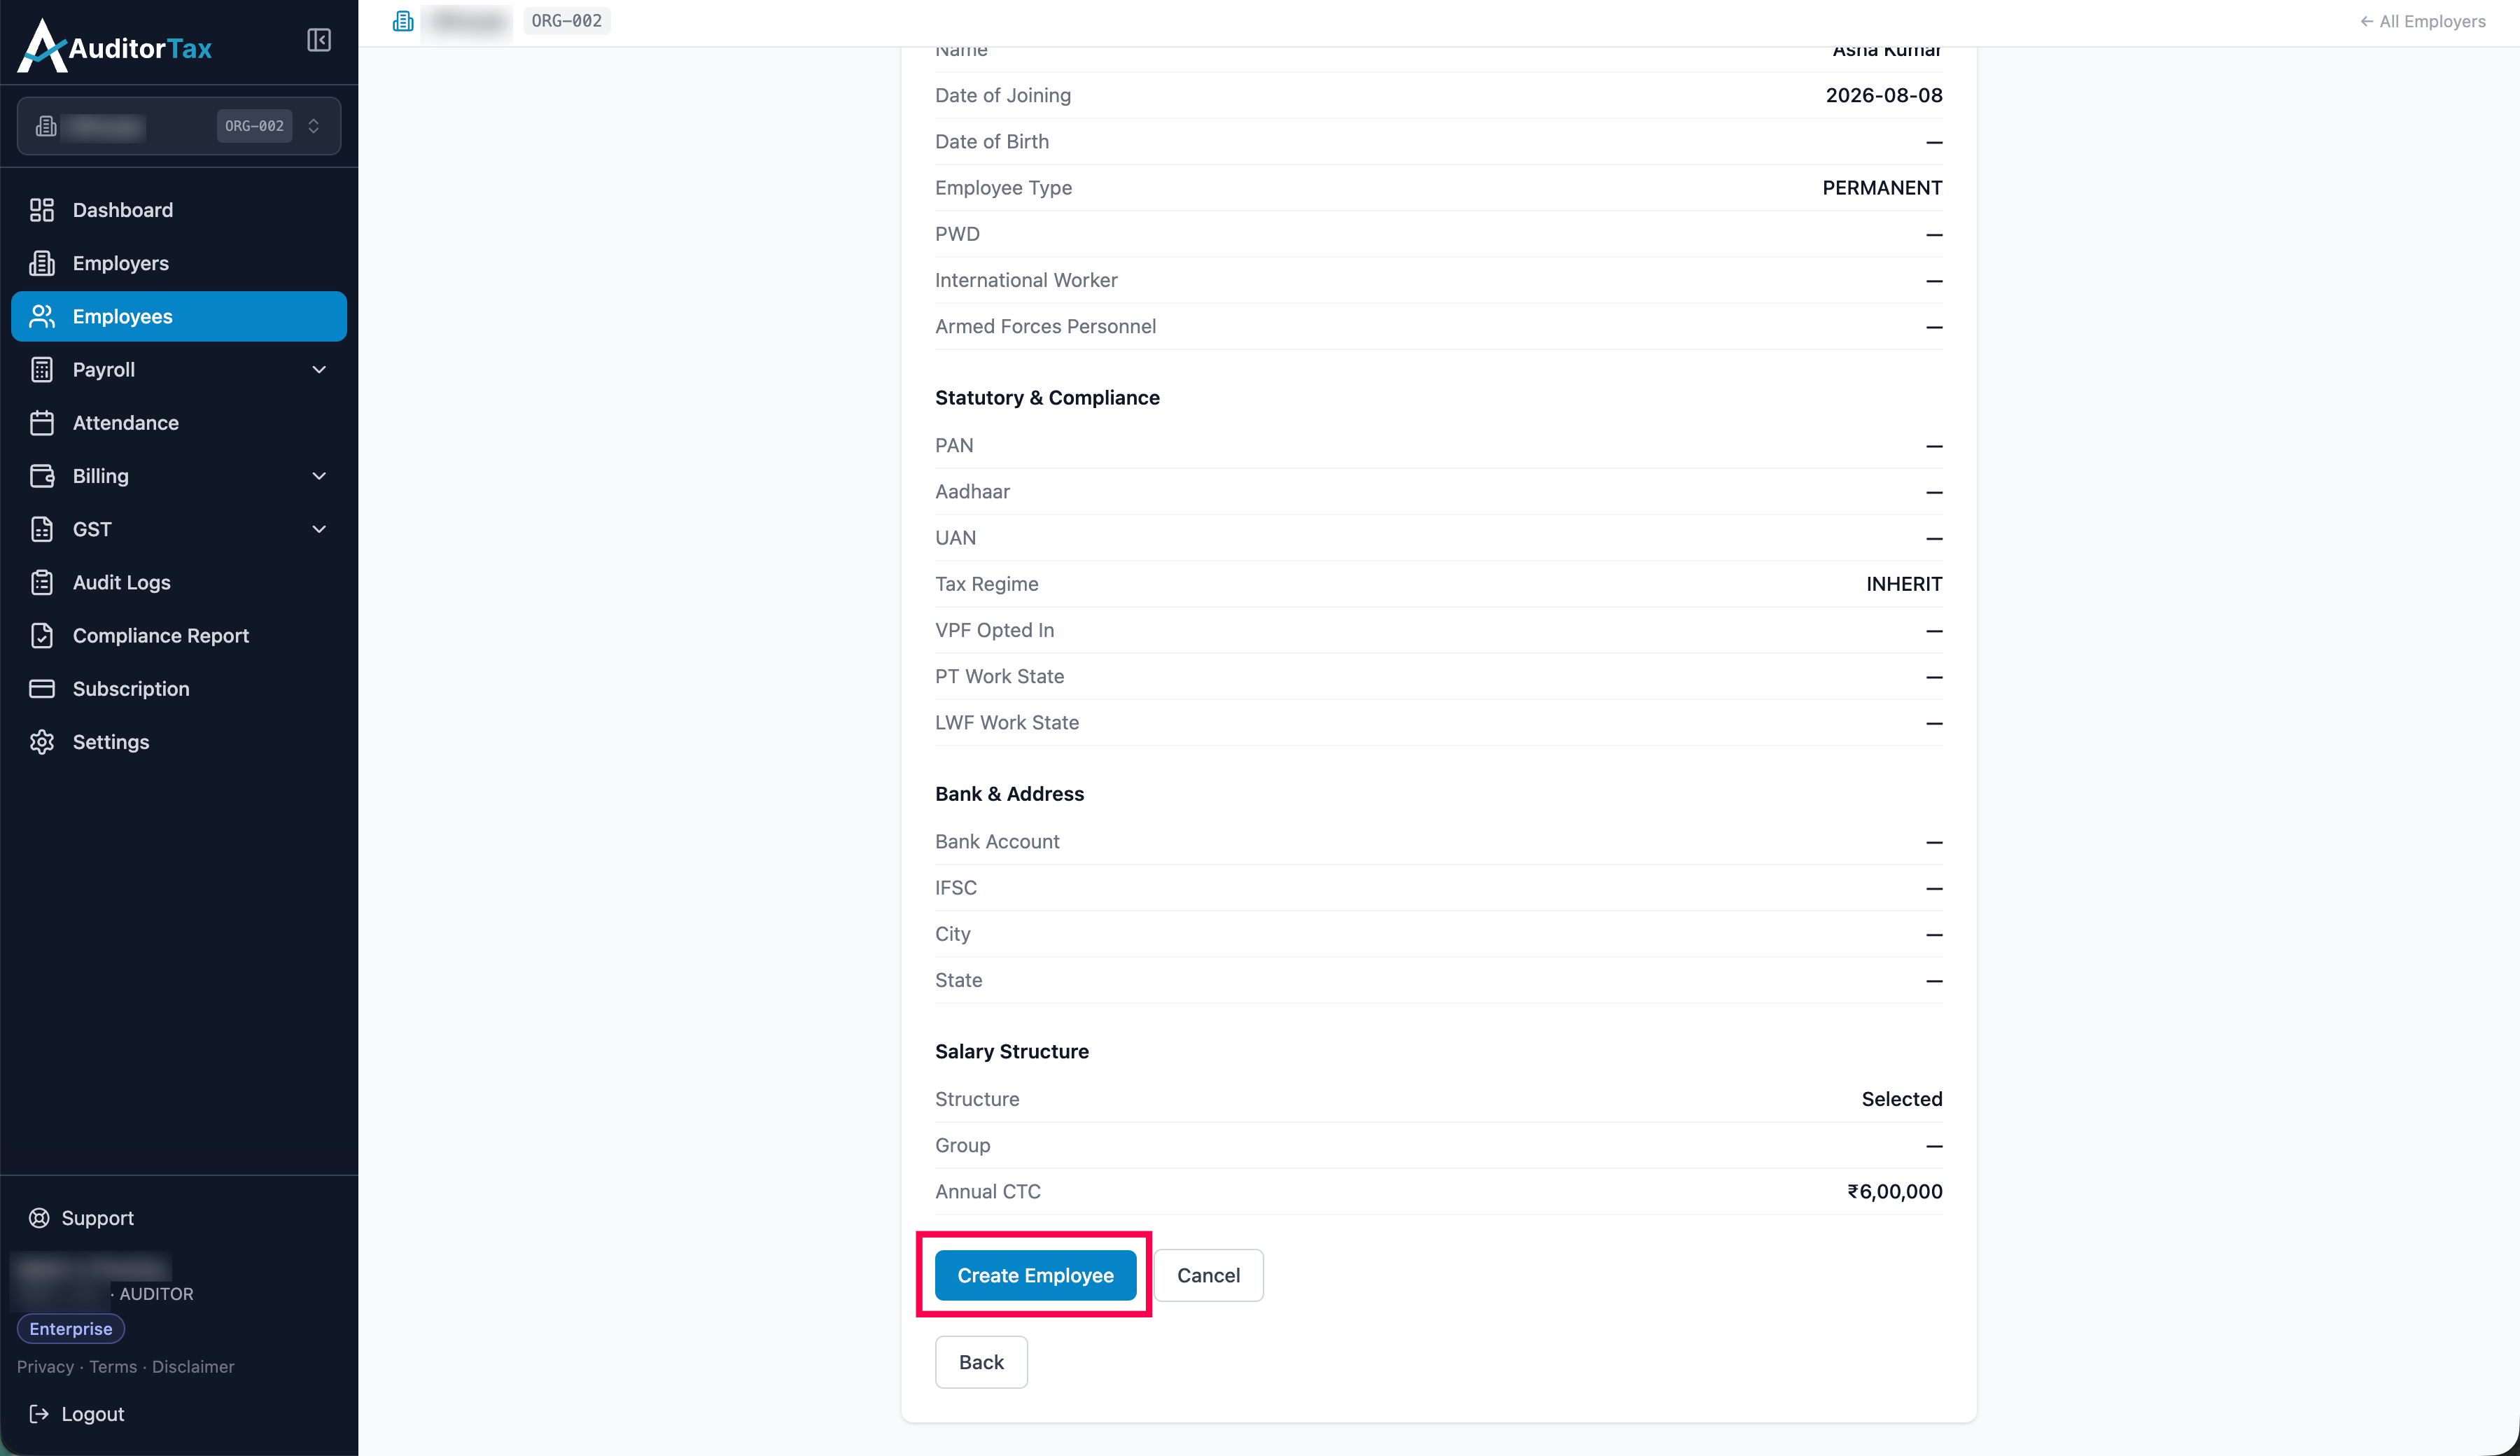
22. Click “Create Employee”
Section titled “22. Click “Create Employee””This saves the new employee.
Outcome: you land directly on the new employee’s detail page, with
an auto-generated code (e.g. EMP-002) and status ACTIVE.
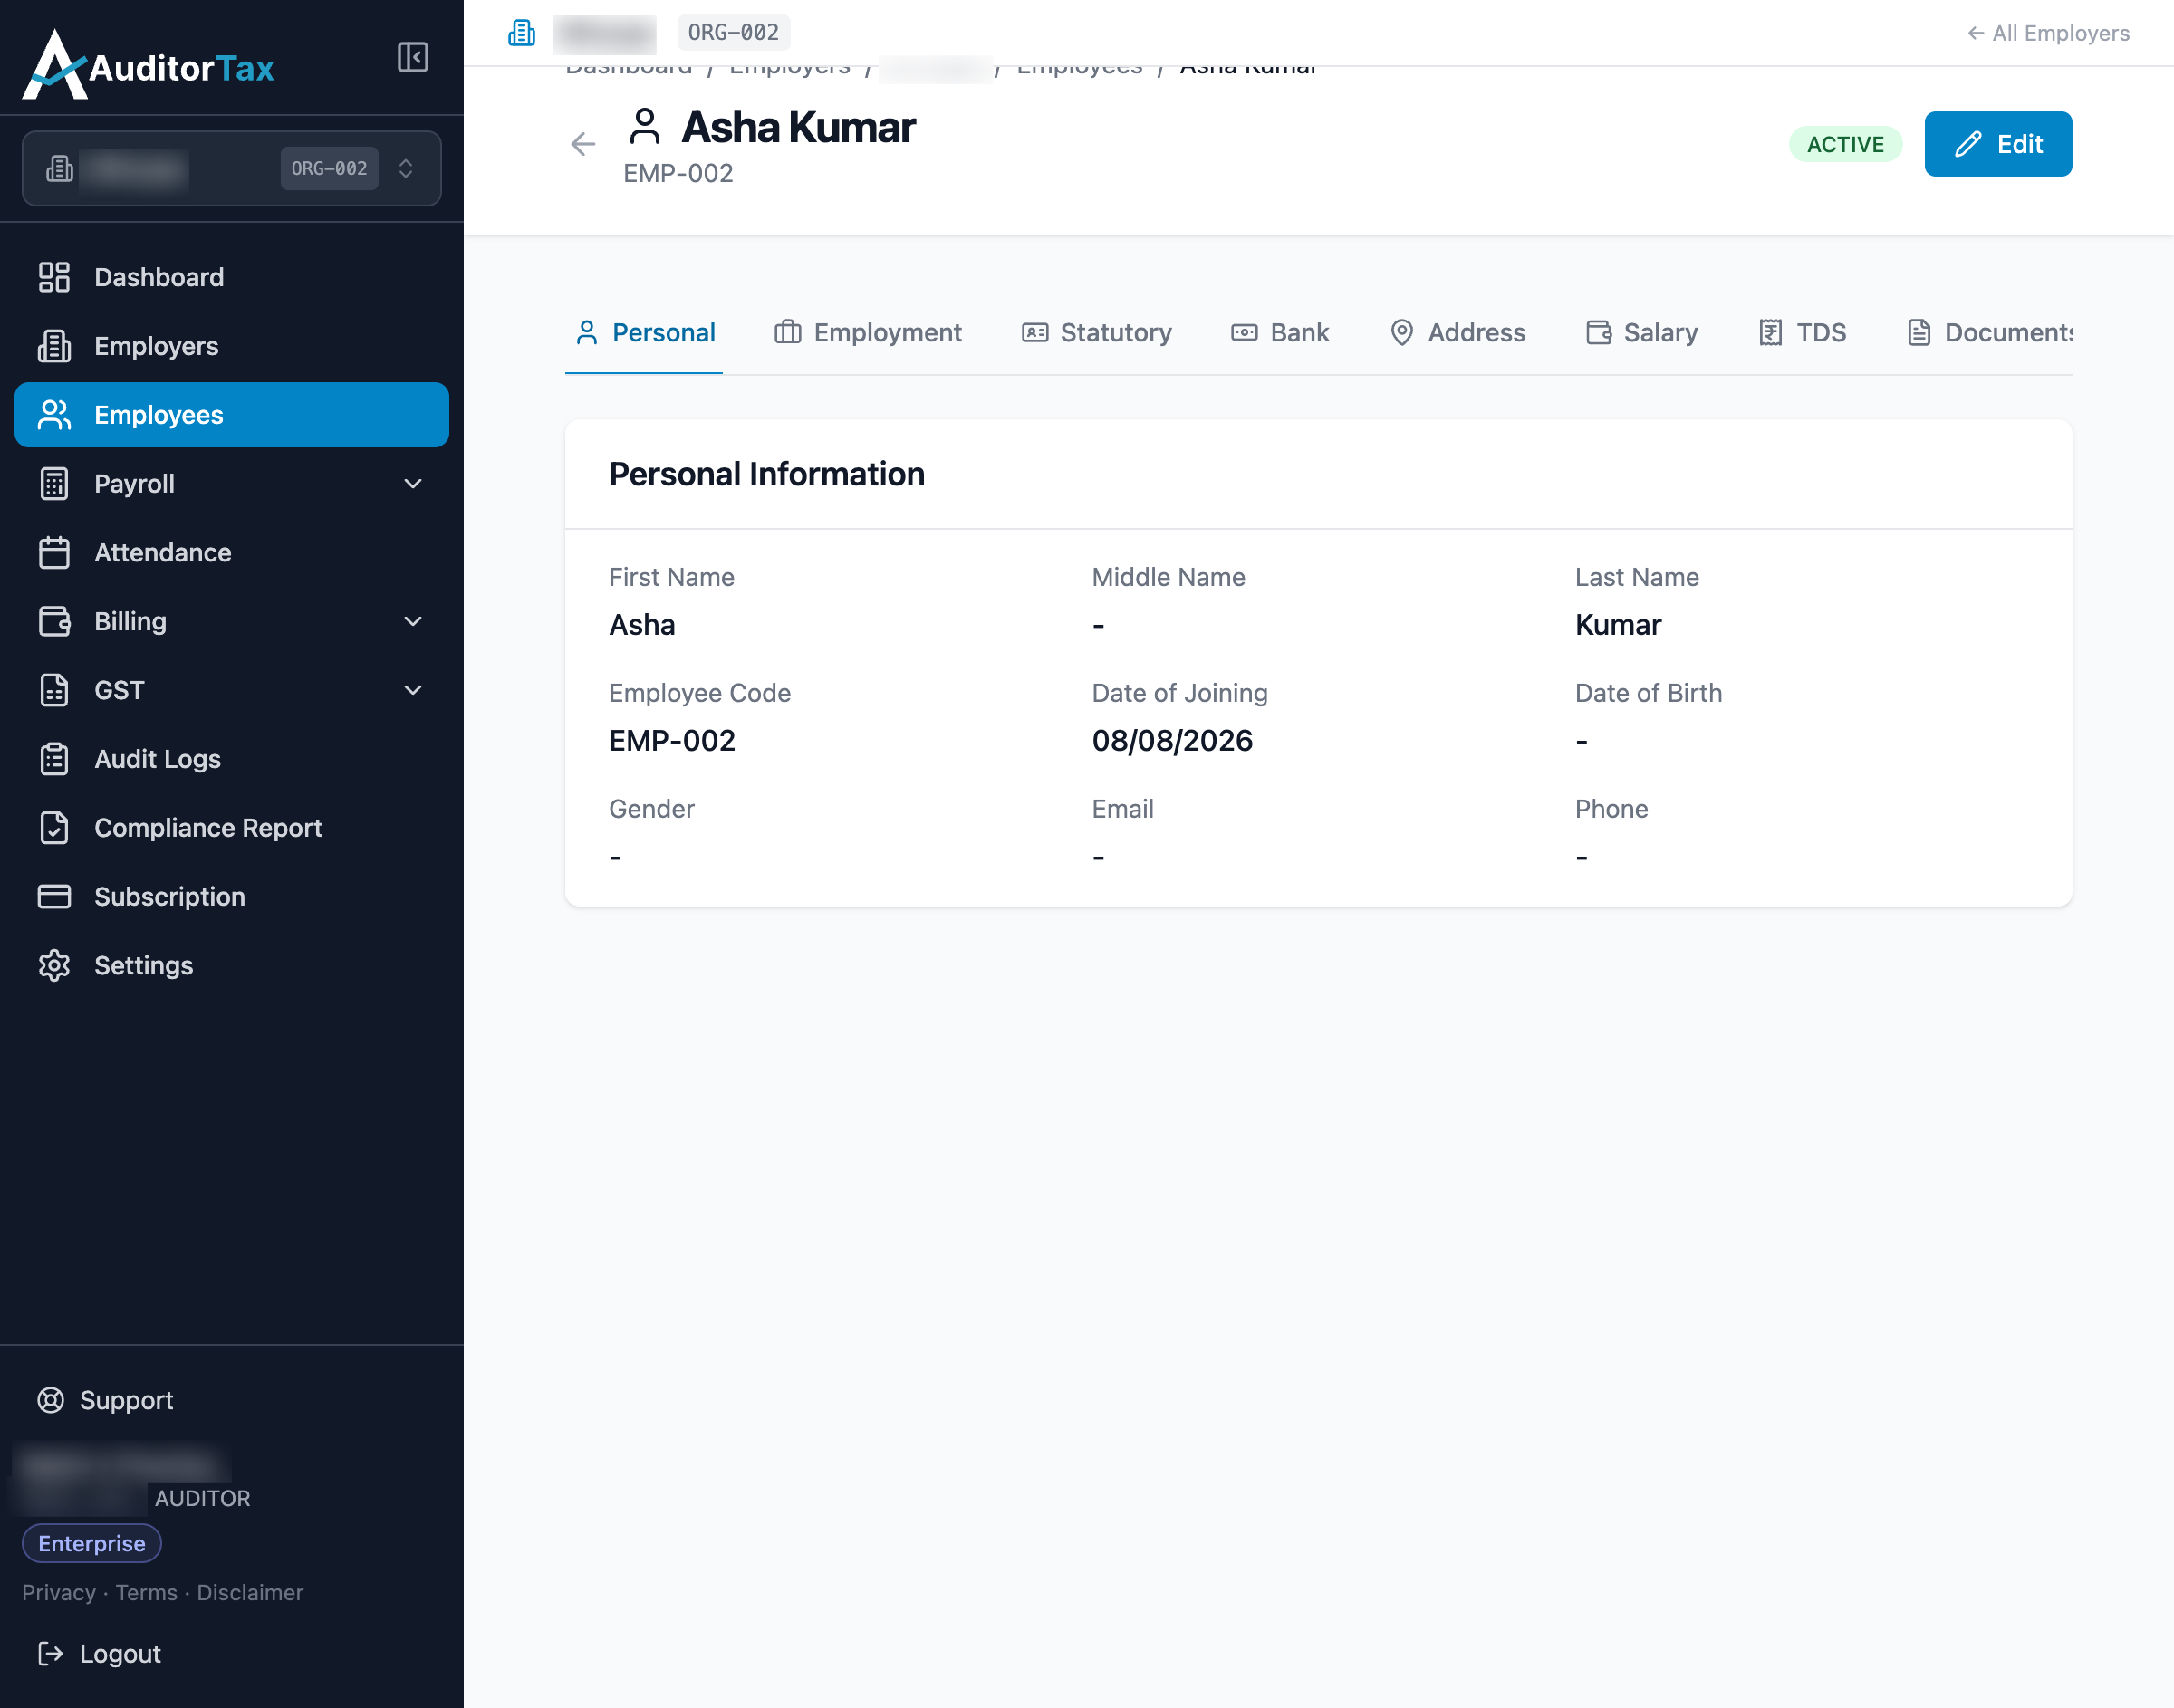
They also now appear in the Employees list: